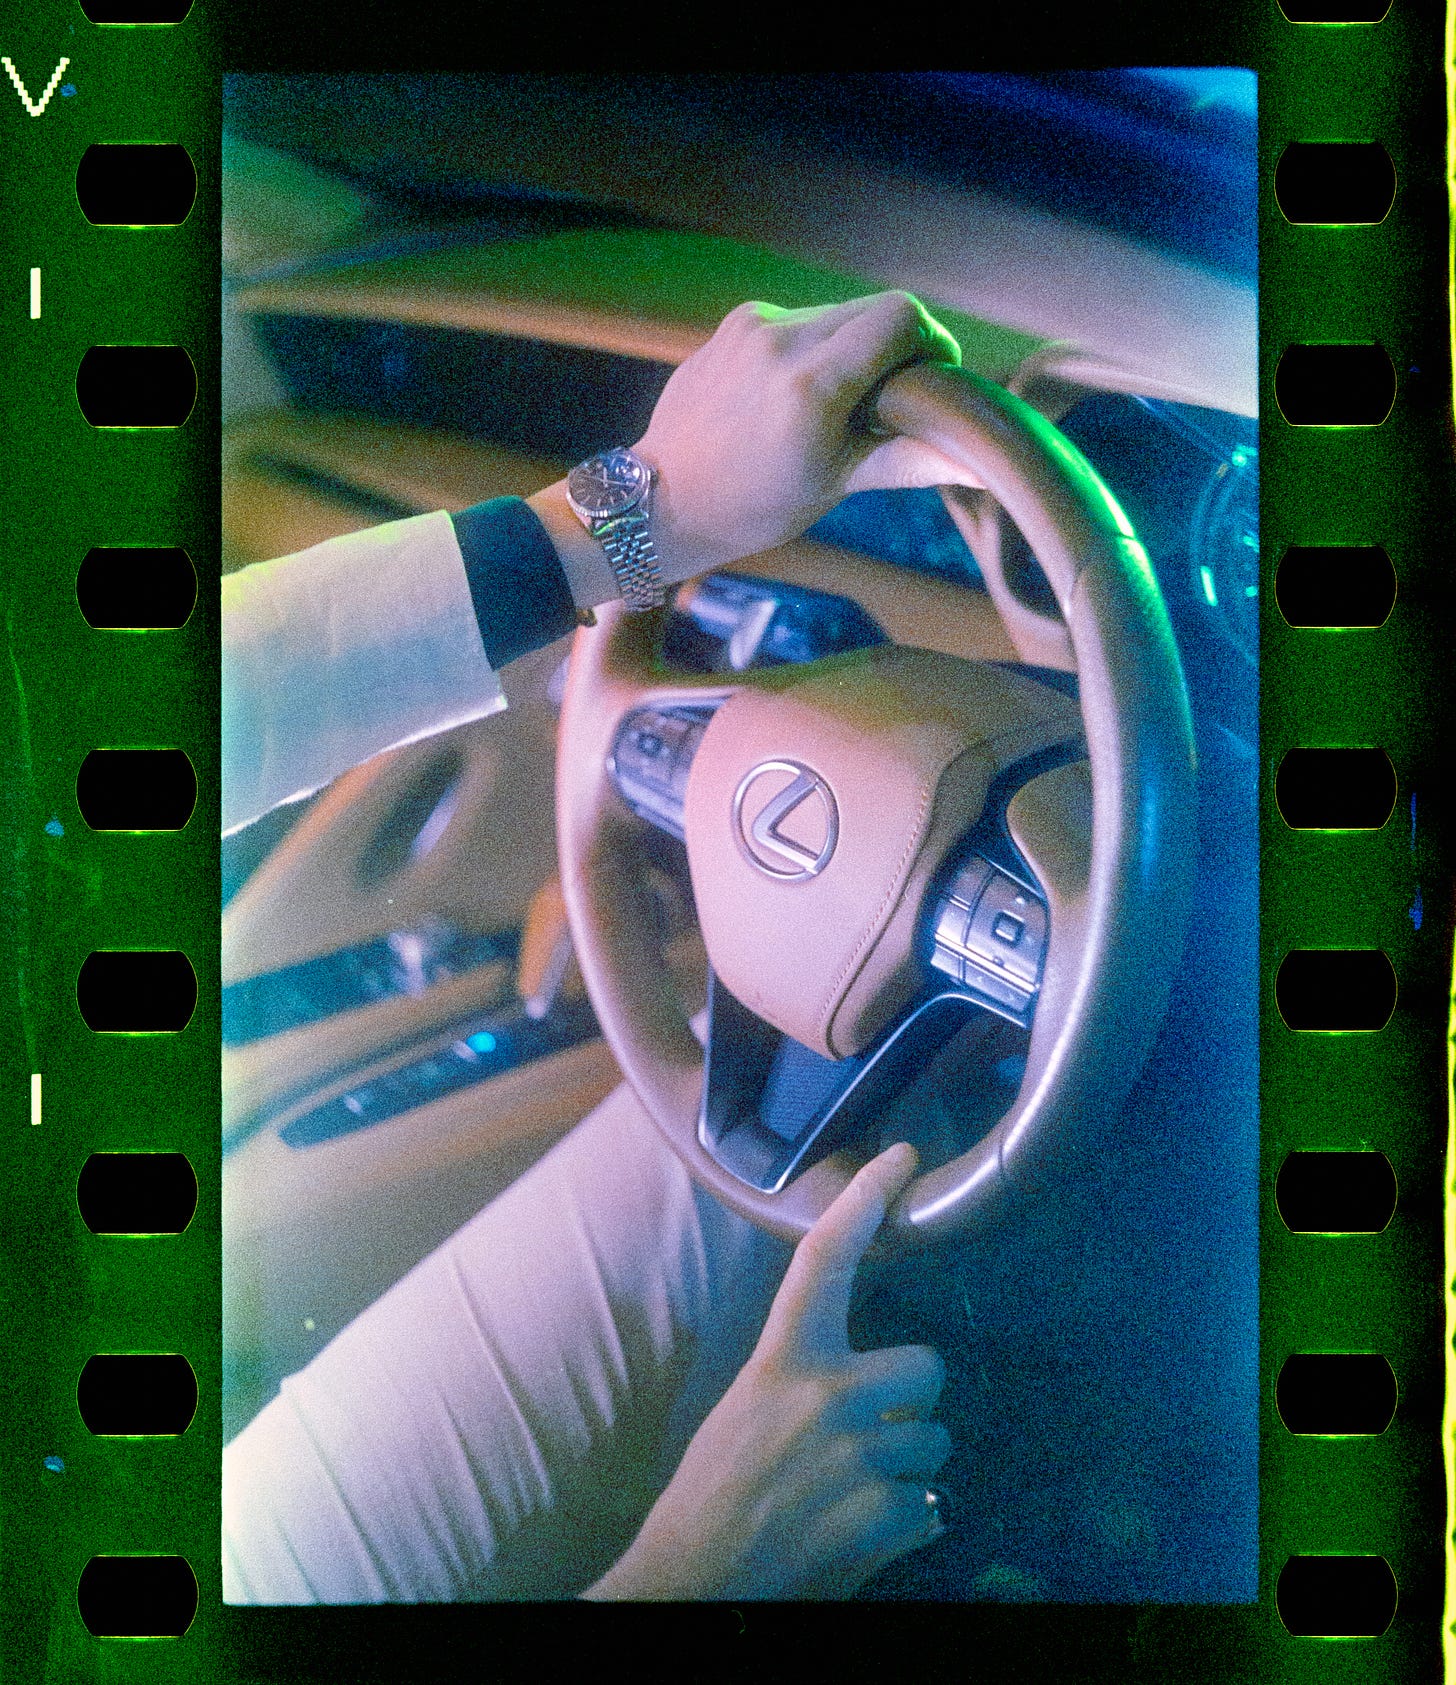
‘Miami Vice’ + Zhiyun’s NEW ‘X60’ RGB Light - C.R Kennedy Imaging x Zhiyun x Josie On Film.
A first look at the X60 in action, as Clem Kennedy stepped into the role of a ‘Narcotics Cop’ on a night out in Sydney.
Welcome to this special Newsletter!
Before I get into the swing of things - a huge thank you to C.R Kennedy Imaging for working alongside me to bring this incredible photoshoot to light, and to Zhiyun for inviting me along to be the first 35mm Film Photographer to play around with their latest lighting equipment to hit the market - the MOLUS X60 RGB Light.
This newsletter will be a recap of how it all happened, some of the behind the scenes process, a little look into the technical side of shooting film, and of course - plenty of ‘First Looks’ at the final 35mm film images I produced - I guarantee this Newsletter will be worth the read!
As always these newsletters will still have the vibe of catching up with that one friend you haven’t seen in a while who’s just very passionate about all things film. So if that’s your kind of jam, you’re in the right place!
Grab a coffee, settle in, and let’s get right into it.
The 80’s Influence Strikes Again
I don’t mean to toot my own horn (okay, maybe just a little) but I’m becoming more and more known as “that Ricoh girl” in the film community thanks to the vibrant retro inspired photoshoots I create within the Sydney Car Scene with my old metal bricks. I create images that are full of 80’s and 90’s nostalgia with vibrant pops of colour, unique special effects thanks to the use of vintage filters, and of course the one thing everyone wants to learn from me - making magic happen with artificial lighting, specifically Gels and RGBs.
Time and time again I have been complimented on my work with the repeat comment being ‘I don’t know anyone who does what you can do.’ - because I don’t just shoot film and produce kickass images, but I hand develop it all myself. Now I’m clocking in at around 300 rolls developed since October ‘21 - wow!
For a while I had been in my own lane, doing my own thing, being the usual Ricoh obsessed nut that I am - when last September I got invited to a Ricoh event, and it all kind of evolved from there. I truly didn’t think anything else of it after I met some of the CRK Team for the first time and had a lovely little chat with Clem about all things Ricoh. I was like, oh sweet this dude thinks it’s cool that I shoot Ricoh - how awesome! And then went back to what I was doing without a care in the world.
But as it turns out dear reader - I’ve been over here in my own little world being an absolute film gremlin while a whole ass team of people were unknowingly keeping a keen eye on me… Lucky for me they liked what they were seeing, heh.
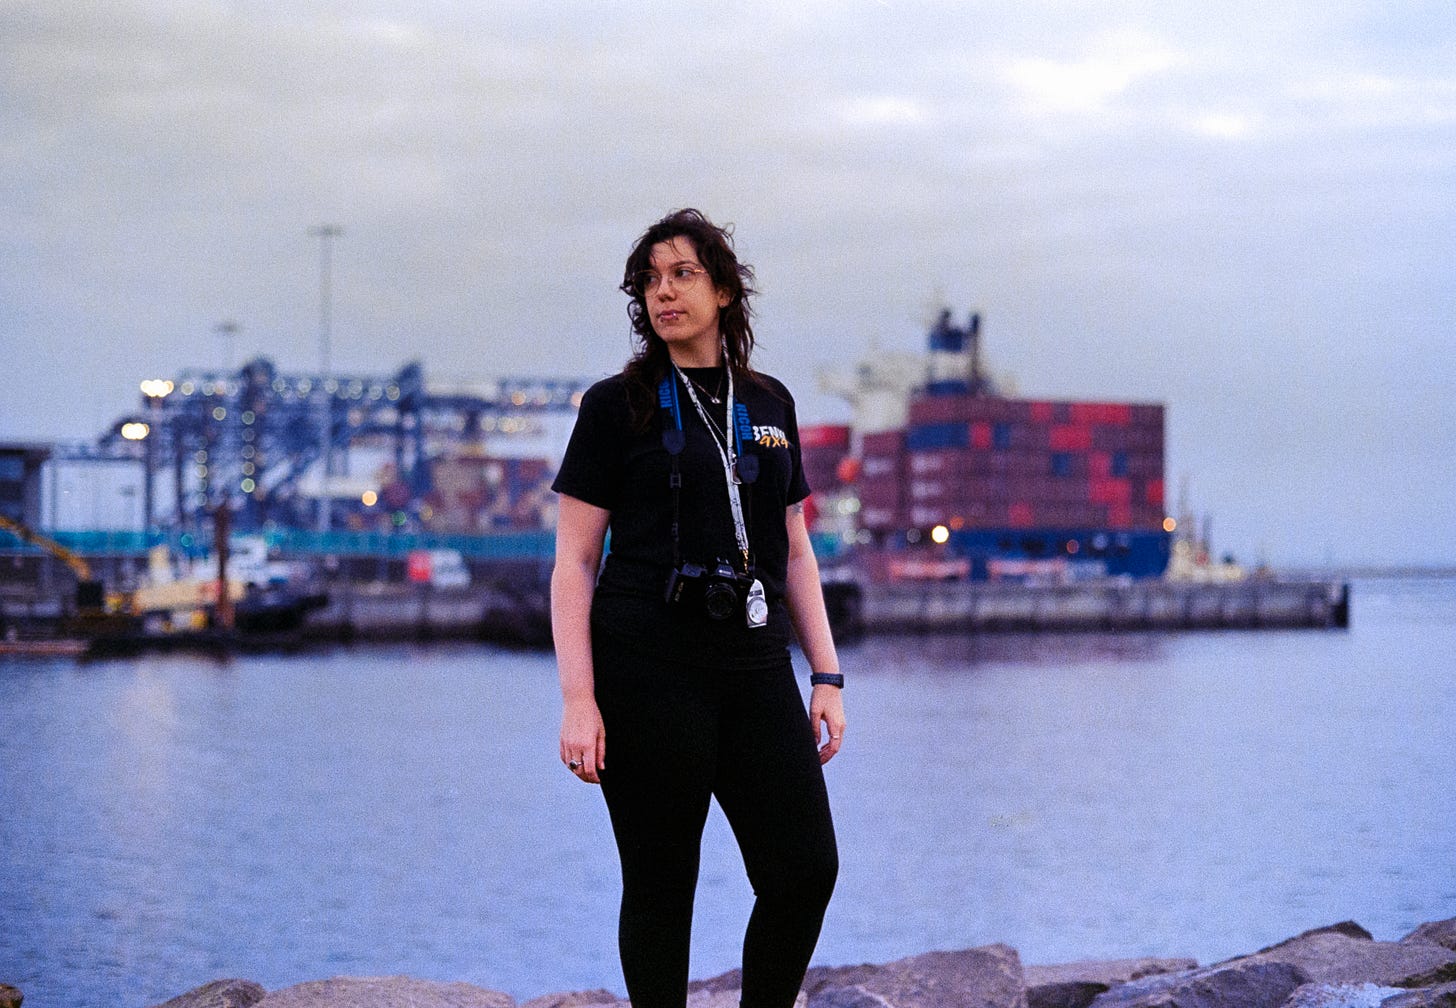
In December I was commissioned for a Car + Owner style photoshoot with Clem Kennedy. At first I thought it was just going to be a super chill personal shoot - and very quickly I stepped into a whole new world of working with some influential brands within the photography scene. To say I was anxious would be an understatement - but I knew my work was good (I mean, if Clem Kennedy himself wants you for a shoot… need I say more?) and I knew I could rely on my trusty Ricoh’s to pull the job off.
Before anything was even confirmed and locked in - I did what I do best, threw caution to the wind and went all in on the planning, getting the film and chemicals ready, and started test shooting at potential locations.
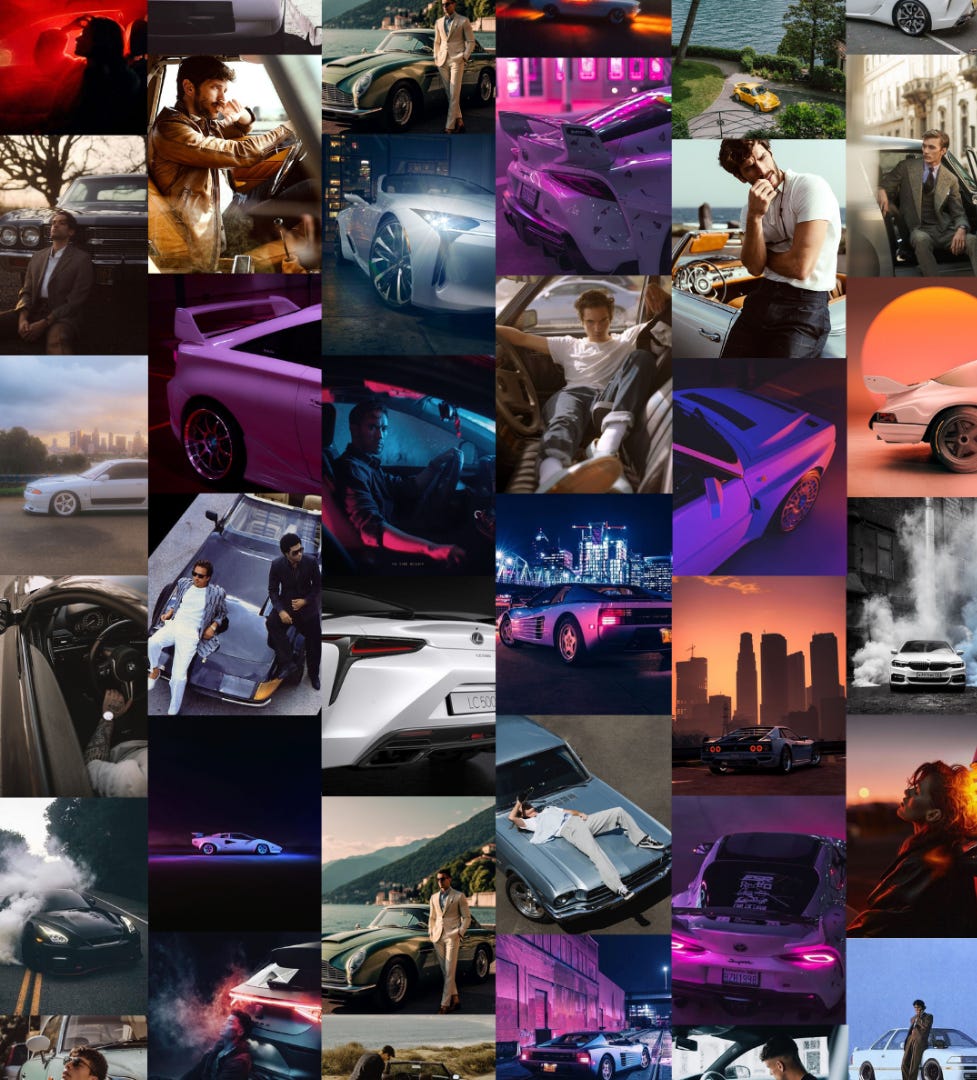
And thus almost overnight the idea of Clem becoming an ‘undercover Narcotic Cop on a bust’ with a classic ‘Miami Vice’ inspired aesthetic was born. I spent way too long listening to 80’s music, eventually making a synthwave playlist that was just on a loop while I came up with the mood board, shot list, and prepared myself to pitch my vision to Clem - hoping that he’d fall in love with the idea and be willing to go all in on the Editorial vibe.
Here’s a little look at the mood board I created as well to give you an idea of the vibe I was going for - now I can’t share the entire PDF I sent because there’s sensitive details in there, but I can share the photos I gathered and used as inspiration from good old Pinterest.
I combined this with examples of previous photoshoots I’ve done as proof of concept, although I didn’t really need to do this as they were already determined to work with me - still, I like to go above and beyond to reassure anyone I’m working with that I’ll put the time and effort in to ensure I’m bringing their ideas to life on 35mm Film.
Location Scouting - Sydney and Port Botany
Something you may find hard to believe is that I had never actually been into the City of Sydney - at least alone. You see I live rurally about an hour and a half from it and frankly I’ve always preferred the Mountains. I’ve never been a fan of the hustle and bustle of city life.
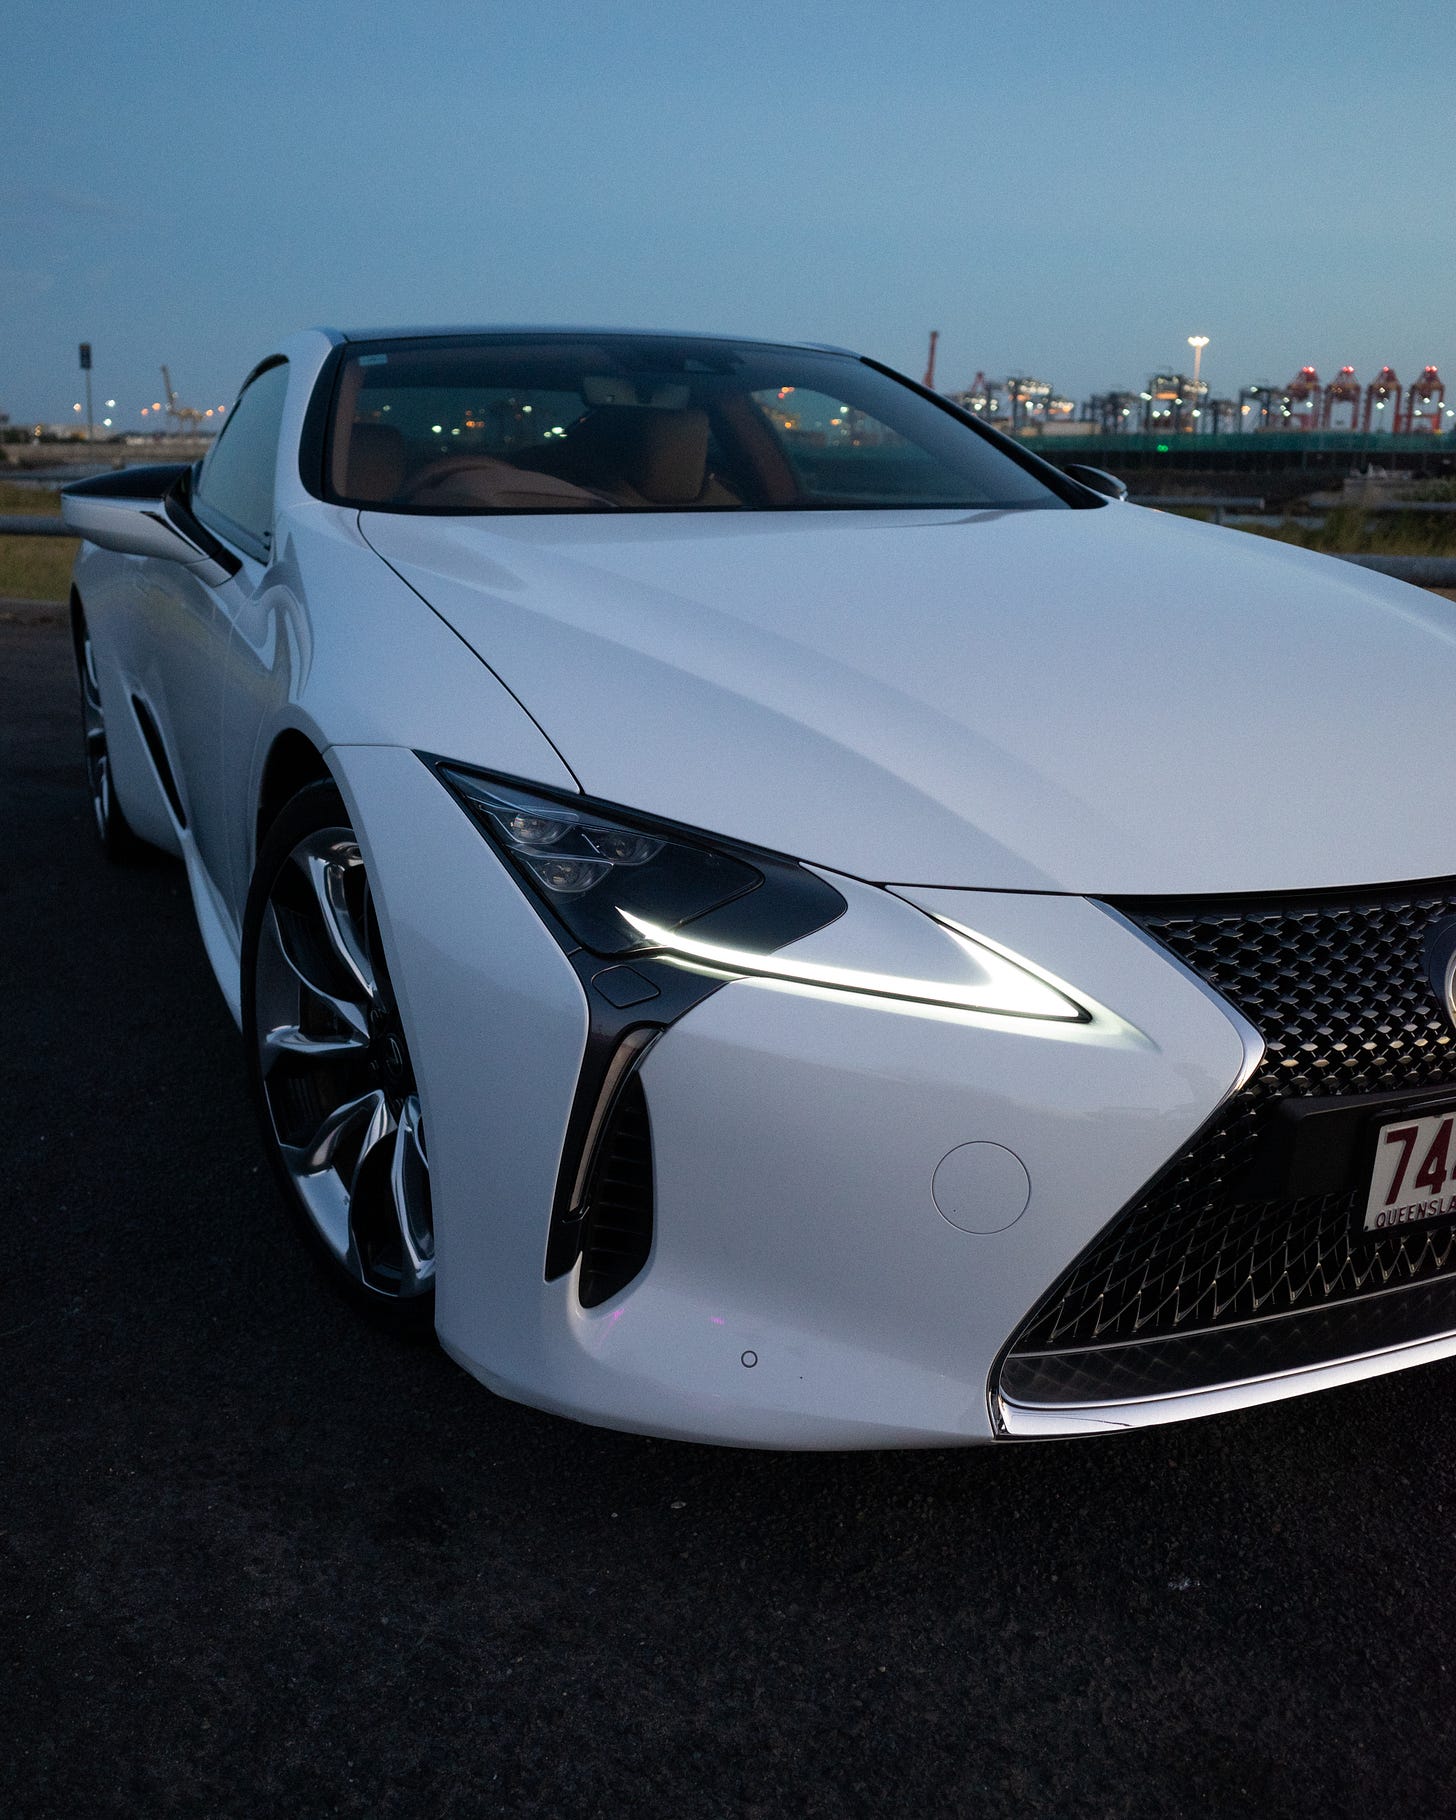
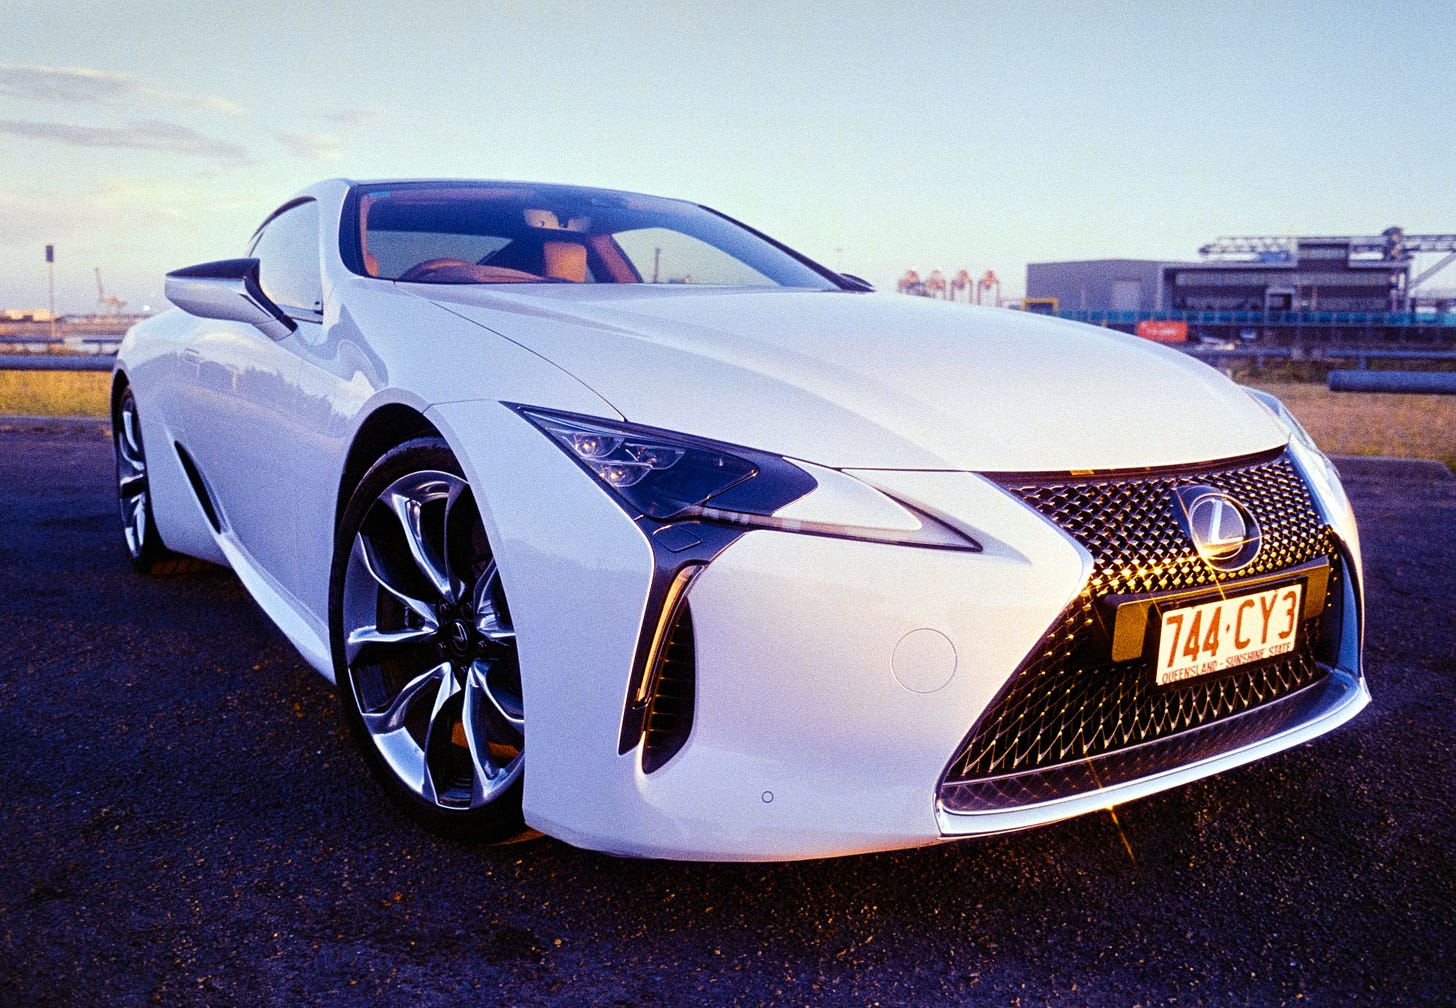
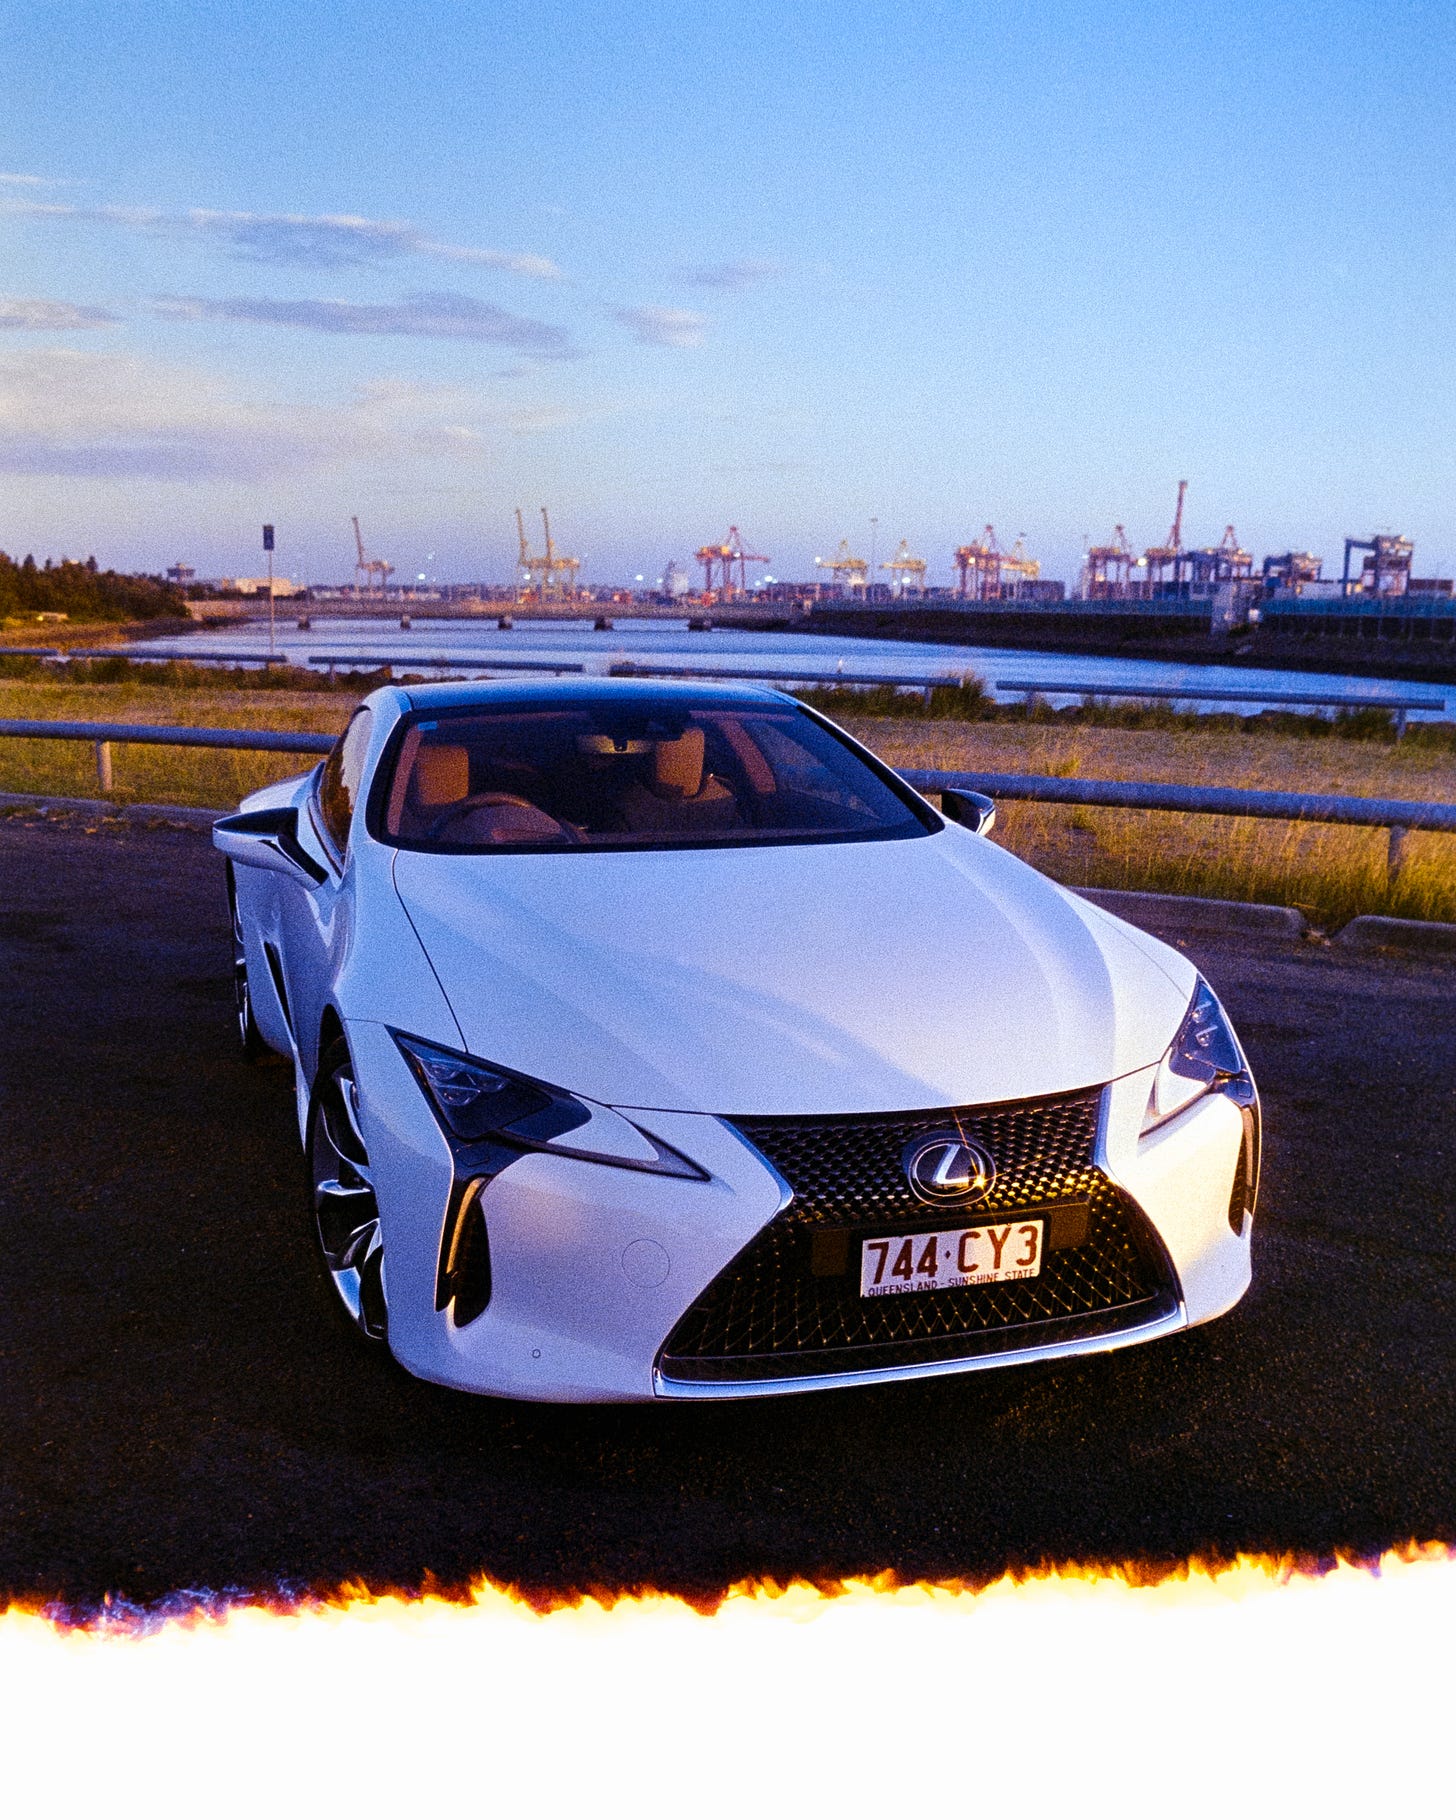
And yet there I was at the beginning of 2024, driving around the area pretty frequently as I tried my best to find a suitable location for a small team (which would turn into a much bigger production than expected!) in hopes that I could find somewhere we could have Clem’s gorgeous Lexus LC500 parked for a photoshoot without restrictions.
It was bold of me to assume that my giant 1991 GQ Patrol would fit down the streets of North Sydney - and at one point it was an absolute nightmare with an awkward 3 point turn to try to get her around a tight corner - but I managed to make it to a location I had in mind. McMahons Point right by the harbour (Not to be confused with the Blue Mountains location from the last newsletter!) was claimed to be one of the best photography spots to be able to park a car and take some shots with Sydney Harbour Bridge in the background.
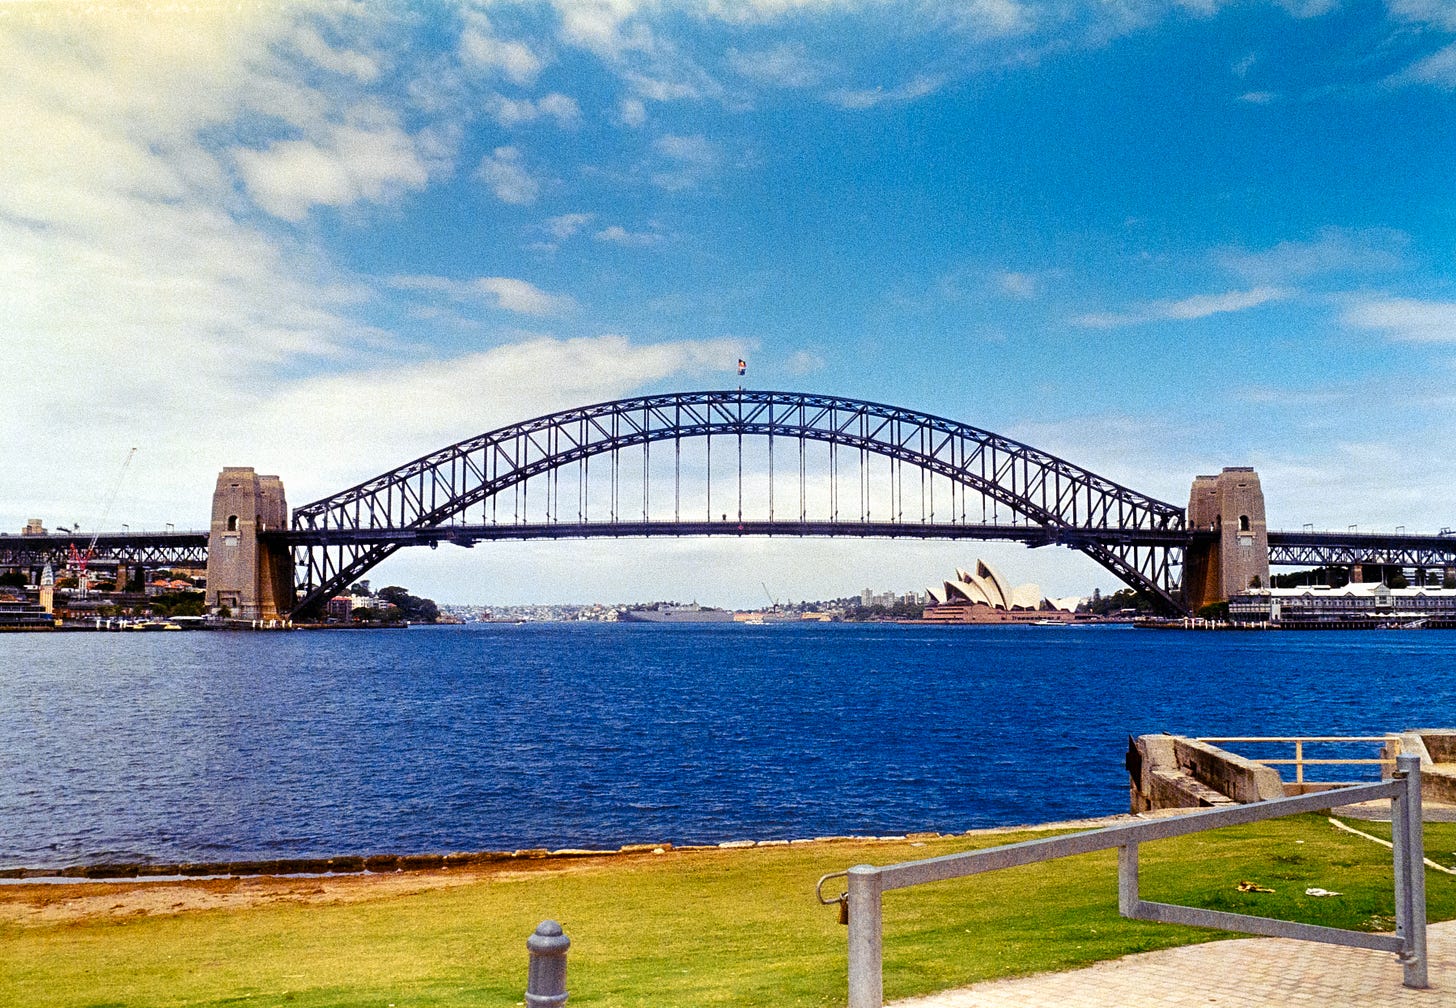
Turns out it wasn’t as great as I had hoped, plus there’s the issue with dealing with potentially having the cops called on you for blocking a no parking zone. At that point I started to worry that I wasn’t going to find a location in Sydney to host the shoot. After a failed day of trying a few more areas I had just one lucky last location in mind and went to check it - I immediately fell in love with it!
Port Botany is right near the airport so it can be a little noisy, but there’s a gorgeous spot where local car meets happen - and if you’re in the scene you’ll immediately recognize it from the photos. I took a chance and pitched it during my meeting with Clem and the CRK Team, and after getting the go ahead I made the choice to lock it in and go for it.
I went back a week before the photoshoot and did a test shoot with my own car just to get an idea of what to expect from the backdrop, along with when the sun would set, how it would all look, and whether or not 400 ISO film would work in that scenario. I’m really glad that I did this because it boosted my confidence when it came to the real deal.
I had my usual lighting setup - a pair of old unknown branded LEDs with some gel sheets pegged to the barn doors for colour. They aren’t particularly bright so I took my tripod with me and found I had to shoot with quite a slow shutter speed for it to work the way I needed. I am super confident with my film photography skills and knew I’d be able to pull it off somehow even if I had to compromise a little - but the part that was concerning me the most was once the sun was completely set there just wasn’t enough light output from the setup I have for it to really pop the way I’d like. And while there were large street lamps that came on which helped illuminate the area - they cast a green tone and aren’t bright enough for additional ambient lighting.
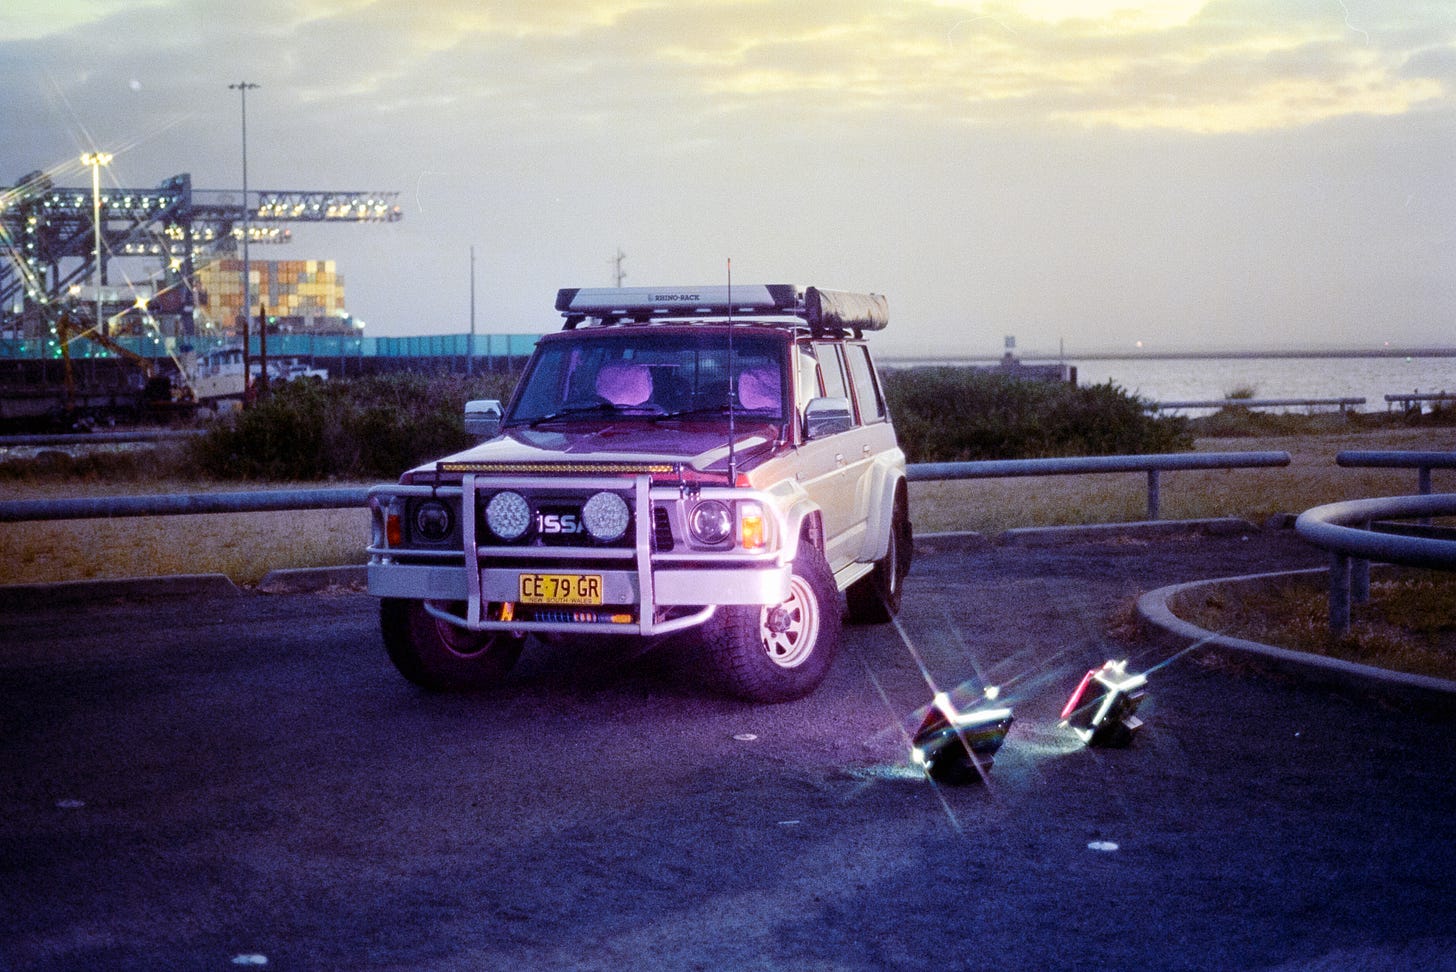
I knew I’d need a stronger coloured light setup, and a white key light as well for what I had in mind so I chatted with the CRK Photo Division about my concerns… and thus entered Zhiyun with a solution - their new X60 with RGB capabilities.
They were looking for someone to give their new light a whirl, and I had previously used the M40 on 35mm Film with success - plus as CRK are one of the main distributors of the product it all just kind of made sense that we worked together to create some marketing magic. So as you can imagine I was keen and excited to use their products for this photoshoot as well.
And yes - this means that I’m now ‘that film photographer/influencer’ and can say I got to work with a really cool brand - something I had never expected to happen, but I’m extremely grateful for.
Let’s turn Port Botany into a scene inspired from ‘Miami Vice’
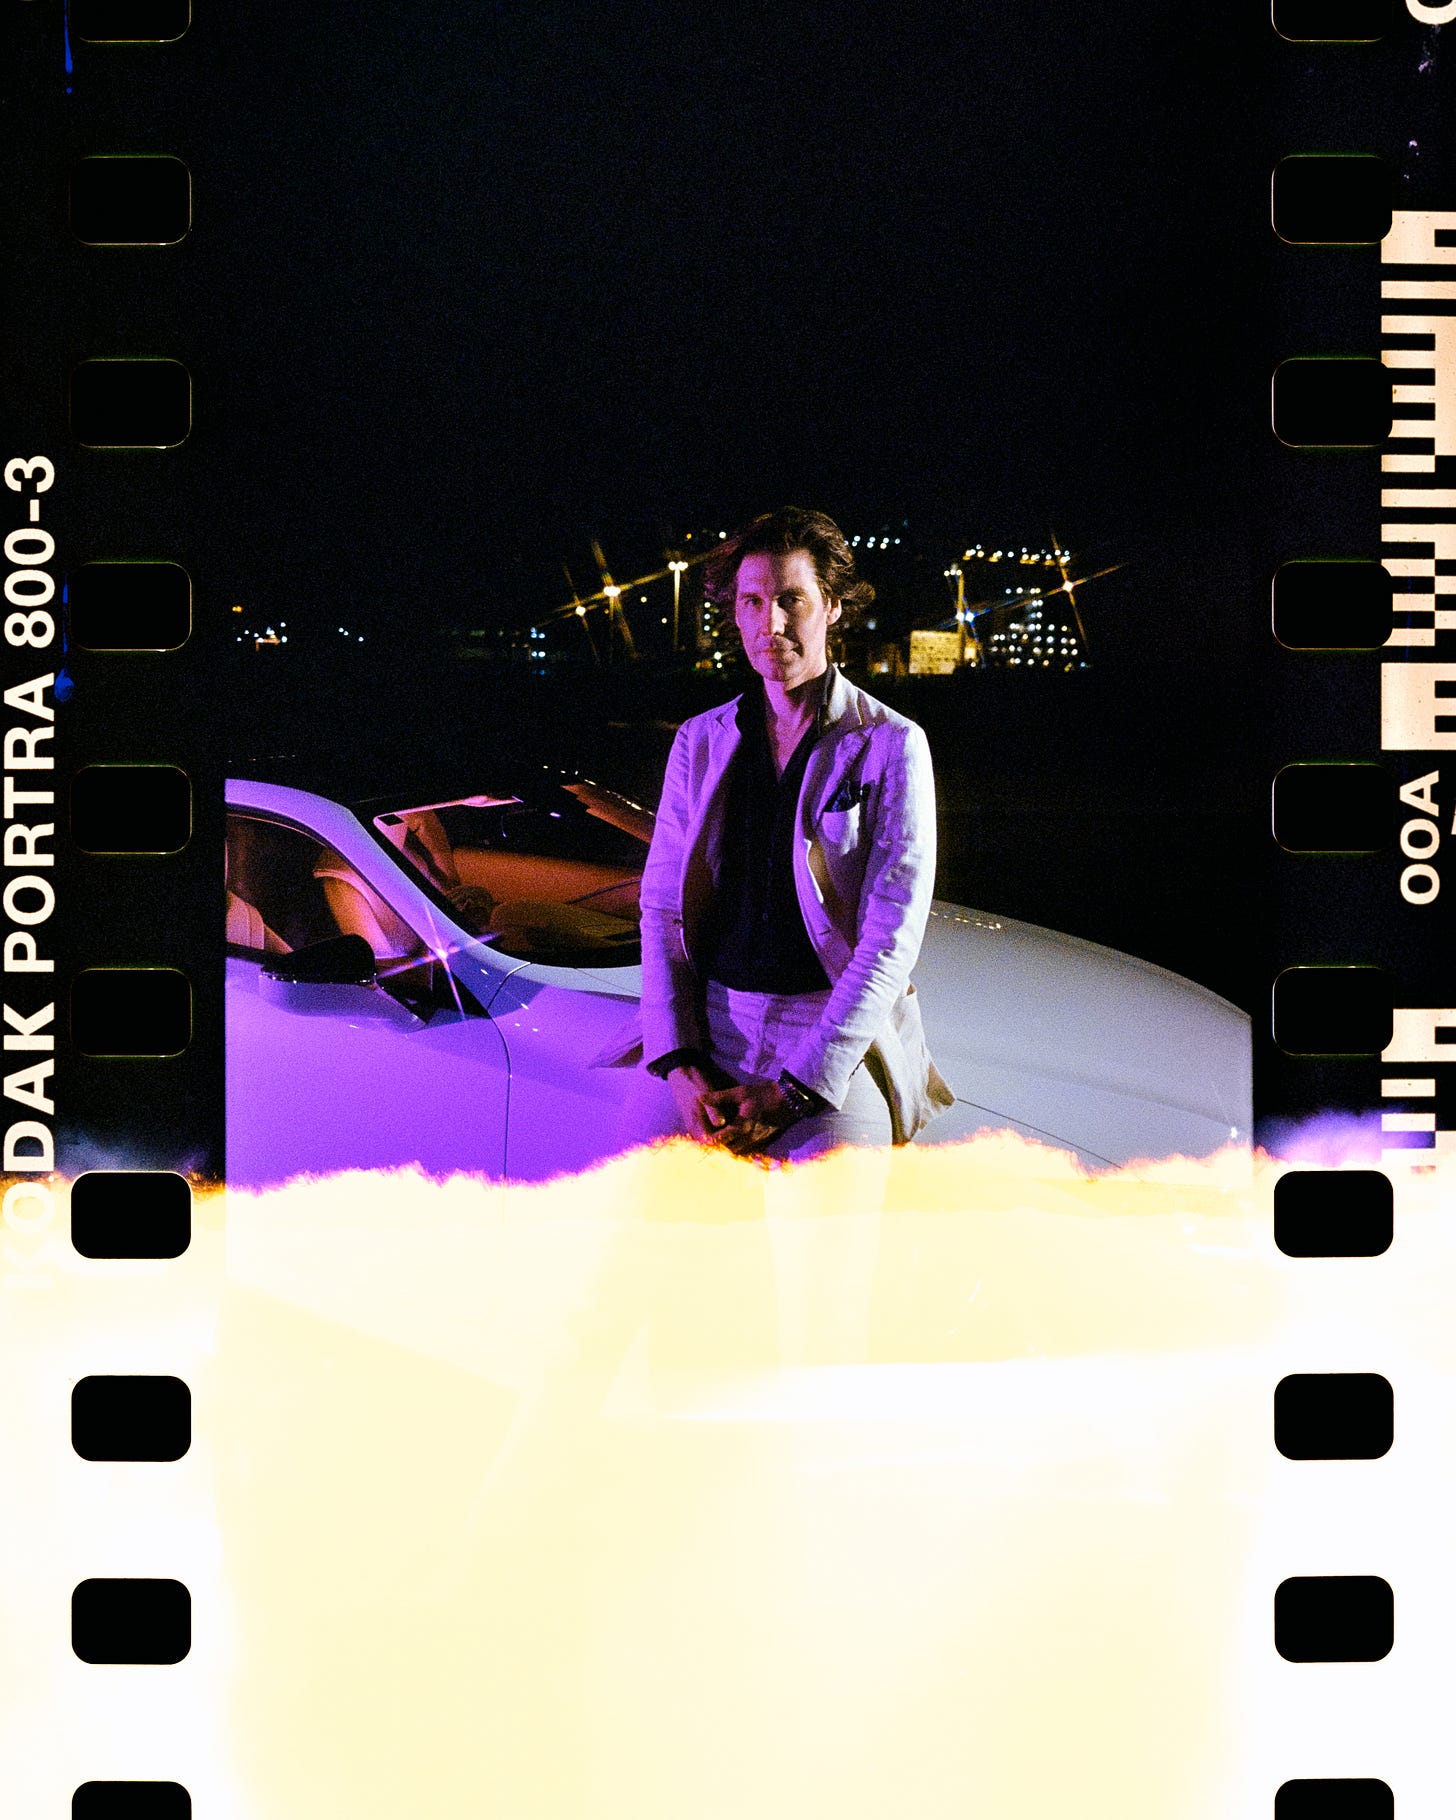
I prepared all my gear in advance and selected - you guessed it - Cinefilm along with some Kodak Ultramax and Kodak Portra 800. Now I know what you’re thinking ‘but Josie, you hate Portra!’ - and you’d be right, but I wanted to take an 800 ISO roll as a backup as it got darker, especially with my concerns about Ultramax not working with my own lighting setup. Little did I know that the Zhiyun lights would be almost too damn bright and 400 ISO film worked rather well!
I settled on using my Ricoh KR-10 Super with a Rikenon 28mm f/2.8 lens, teamed with a vintage cross-screen filter, and my Ricoh Singlex TLS + Auto Rikenon 50mm f/2 with the K&F Concept ½ strength Black Diffusion filter. Arguably I could have swapped the filters around to give the 28mm lens a little extra light thanks to the bloom from the diffusion filter - but it all worked out rather well as you’ll see in a sec.
I packed waaaaay too much film for the night, plus my GQ ‘Scorpion’ was jam packed with lighting gear goodies as I had been handed the lights ahead of time to get a feel for them before the shoot.
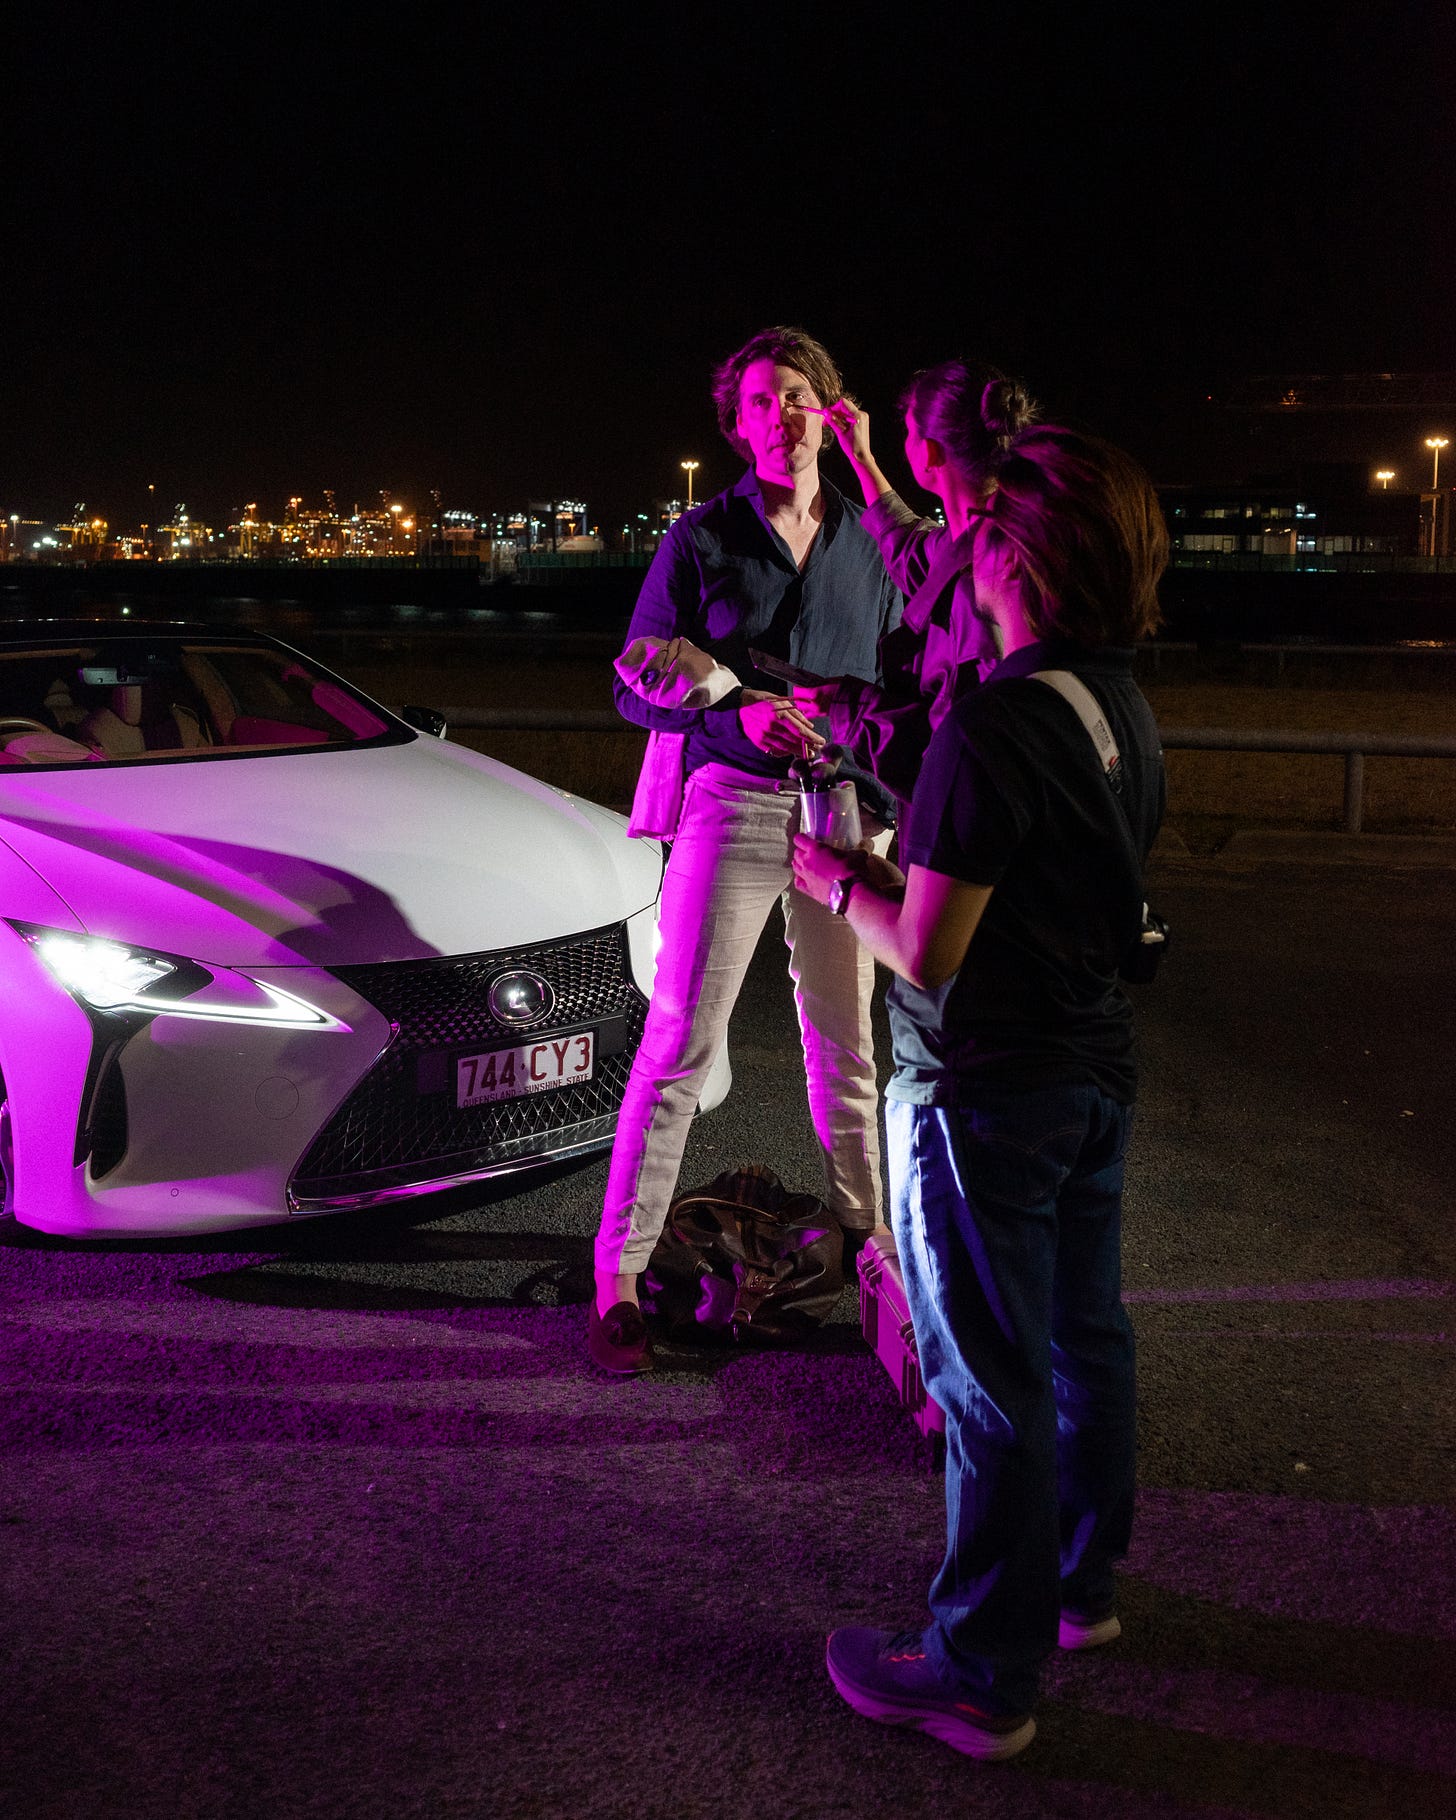
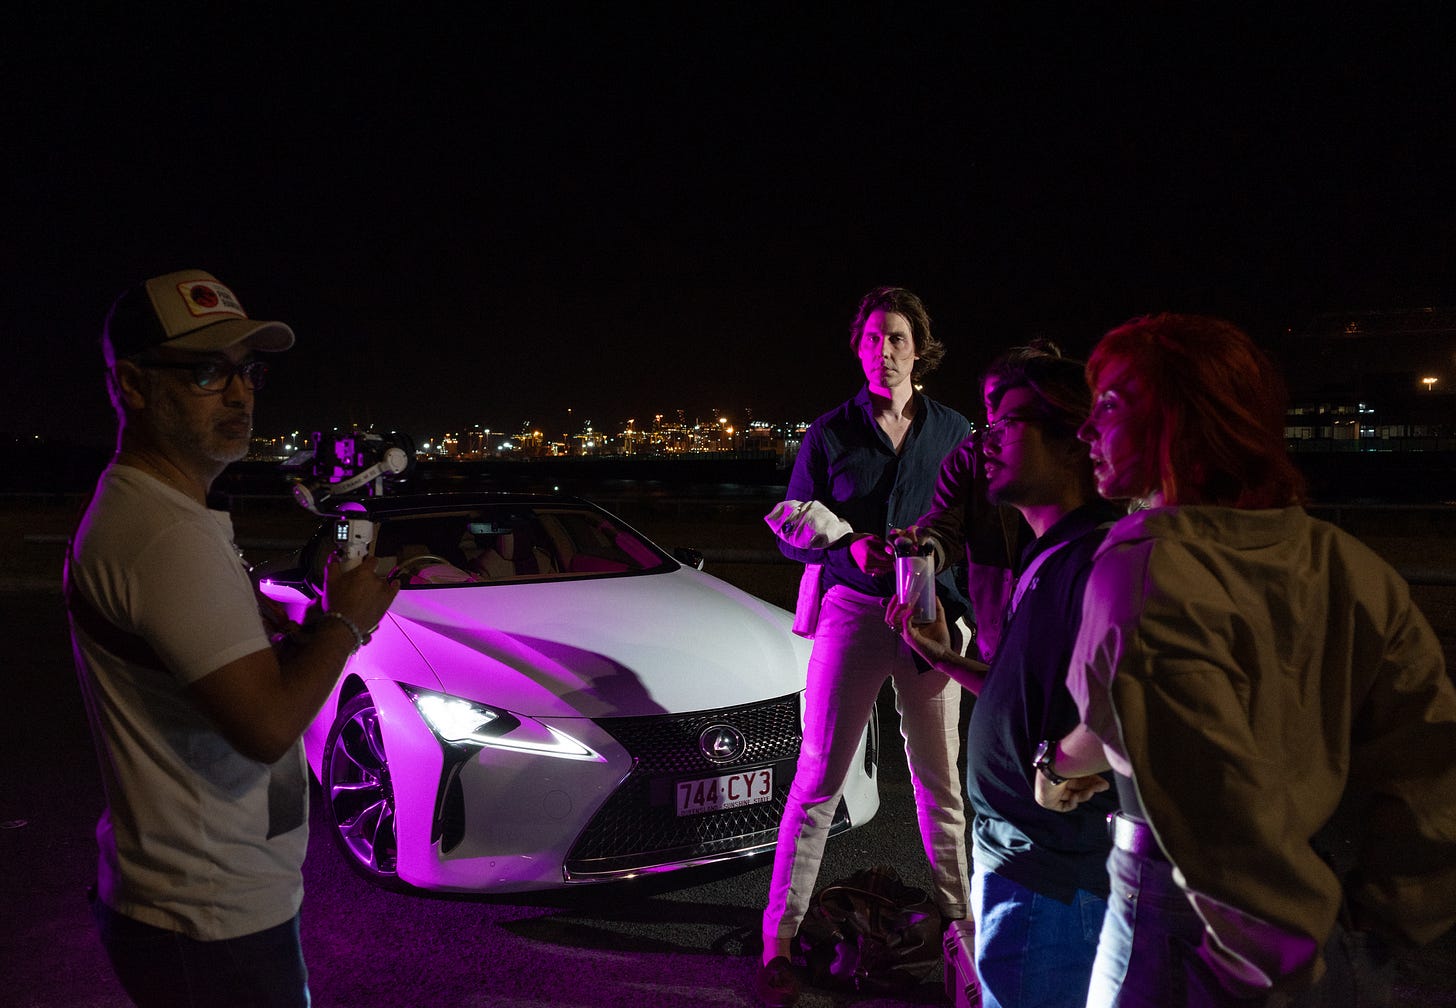
Once I arrived I was soon greeted by Clinton and Wozzy from the CRK Marketing Team and found out that I’d be hooked up to a mic all night (sorry not sorry for the random shit I probably said to myself while working lol) and the CRK Team was going to grab some cool shots of the process as well as the Zhiyun products of course. They worked flawlessly and I was truly amazed to see a professional videography team moving so perfectly in sync.
As the rest of the CRK Team along with Anika the HMUA, and eventually Clem himself showed up - it suddenly hit me that it was a full production - like this was a reeaaaally big fucking deal! It was like nothing I had ever experienced before and I was feeling a little overwhelmed.
But as always, my creative partner in crime Jordan assisted me throughout the night and reminded me to take a breath and again ‘do what you do best, just load the film and get in there.’ - and that’s all it took for me to get ‘in the zone’ to begin working away.
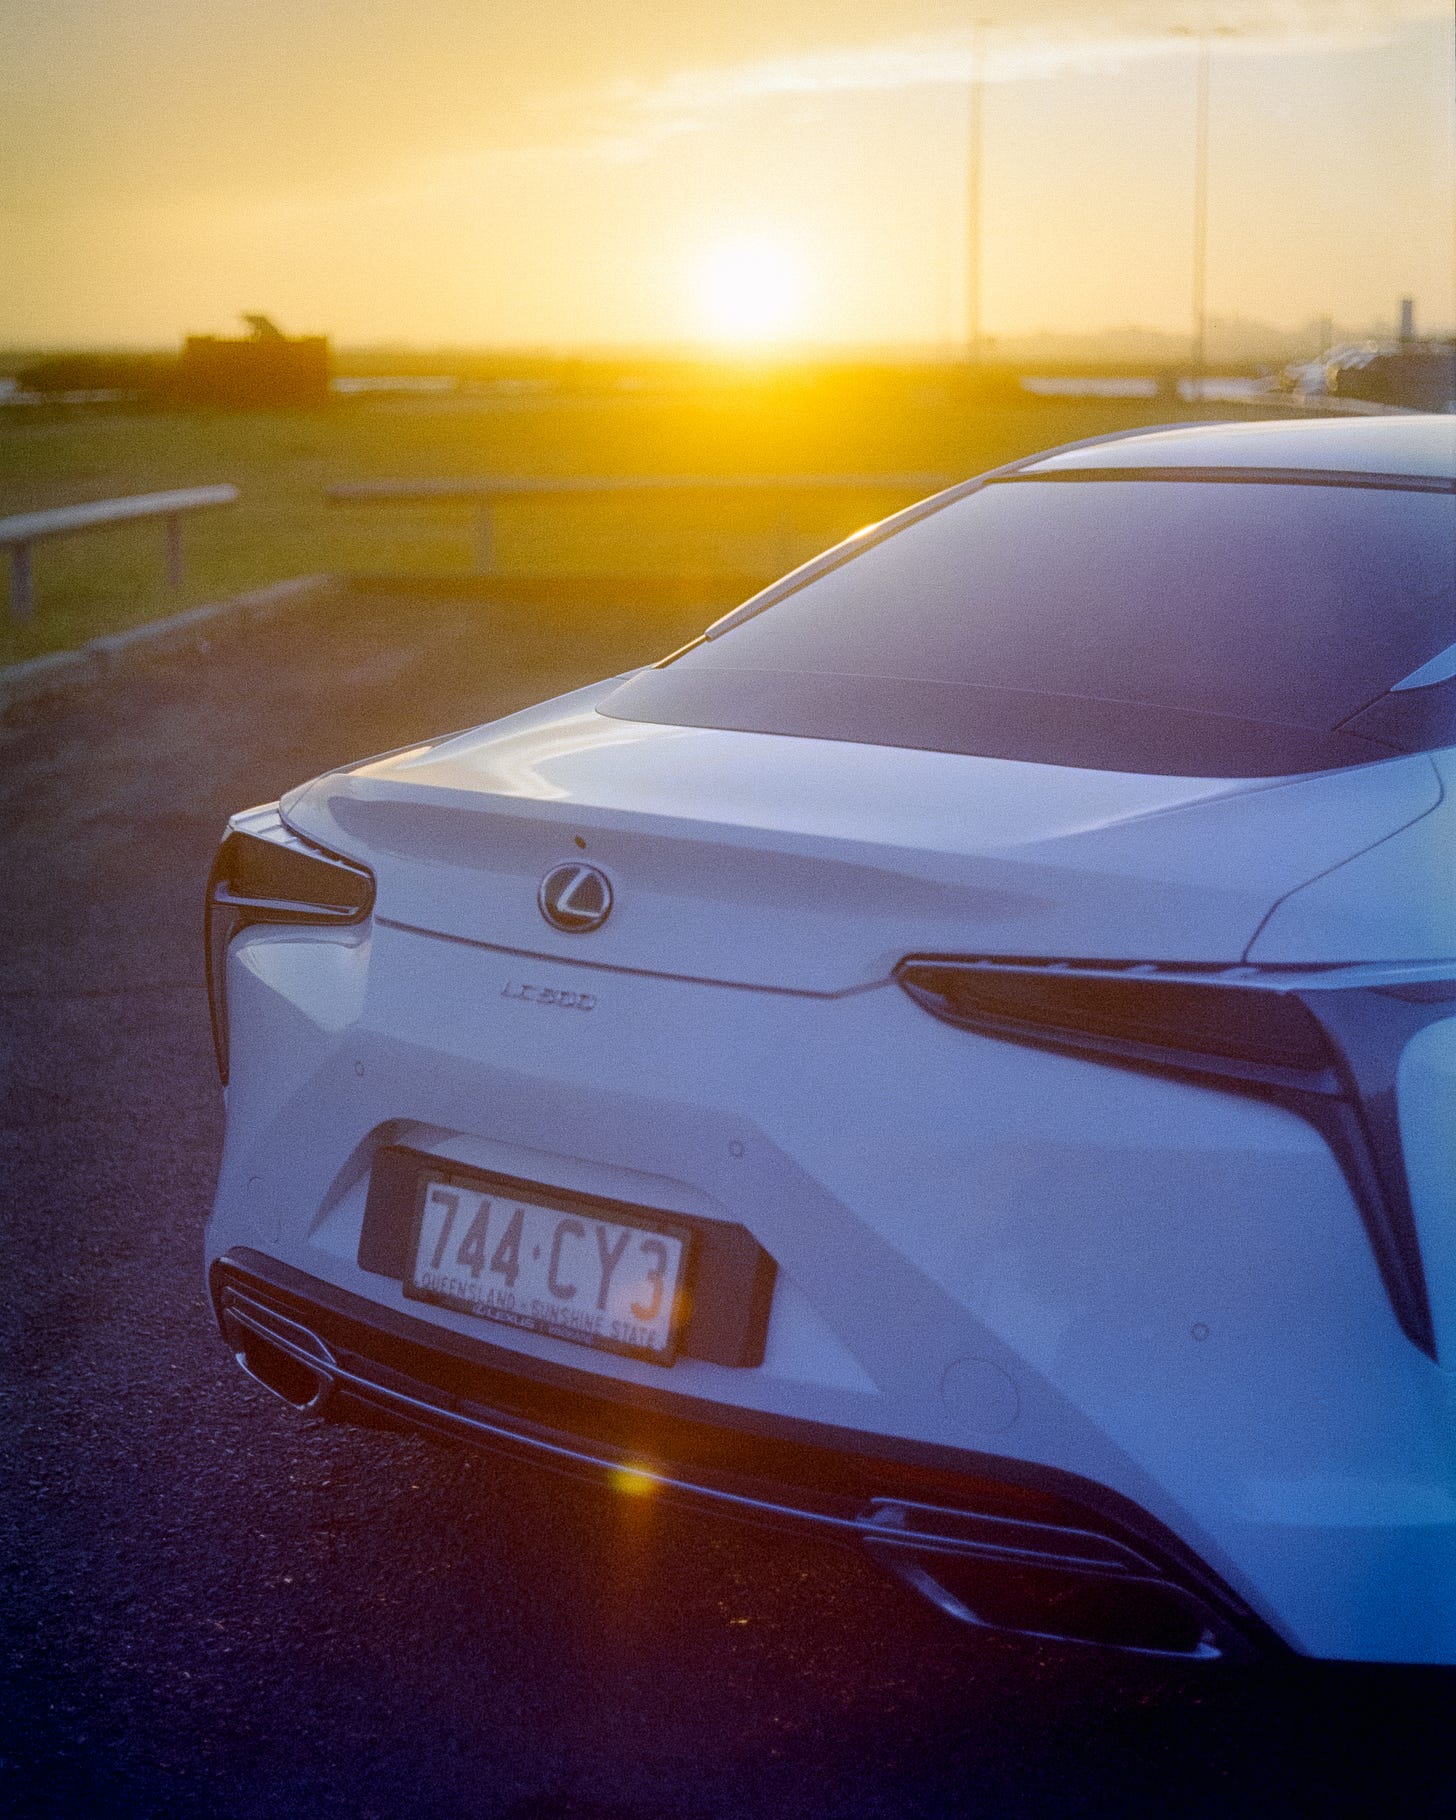
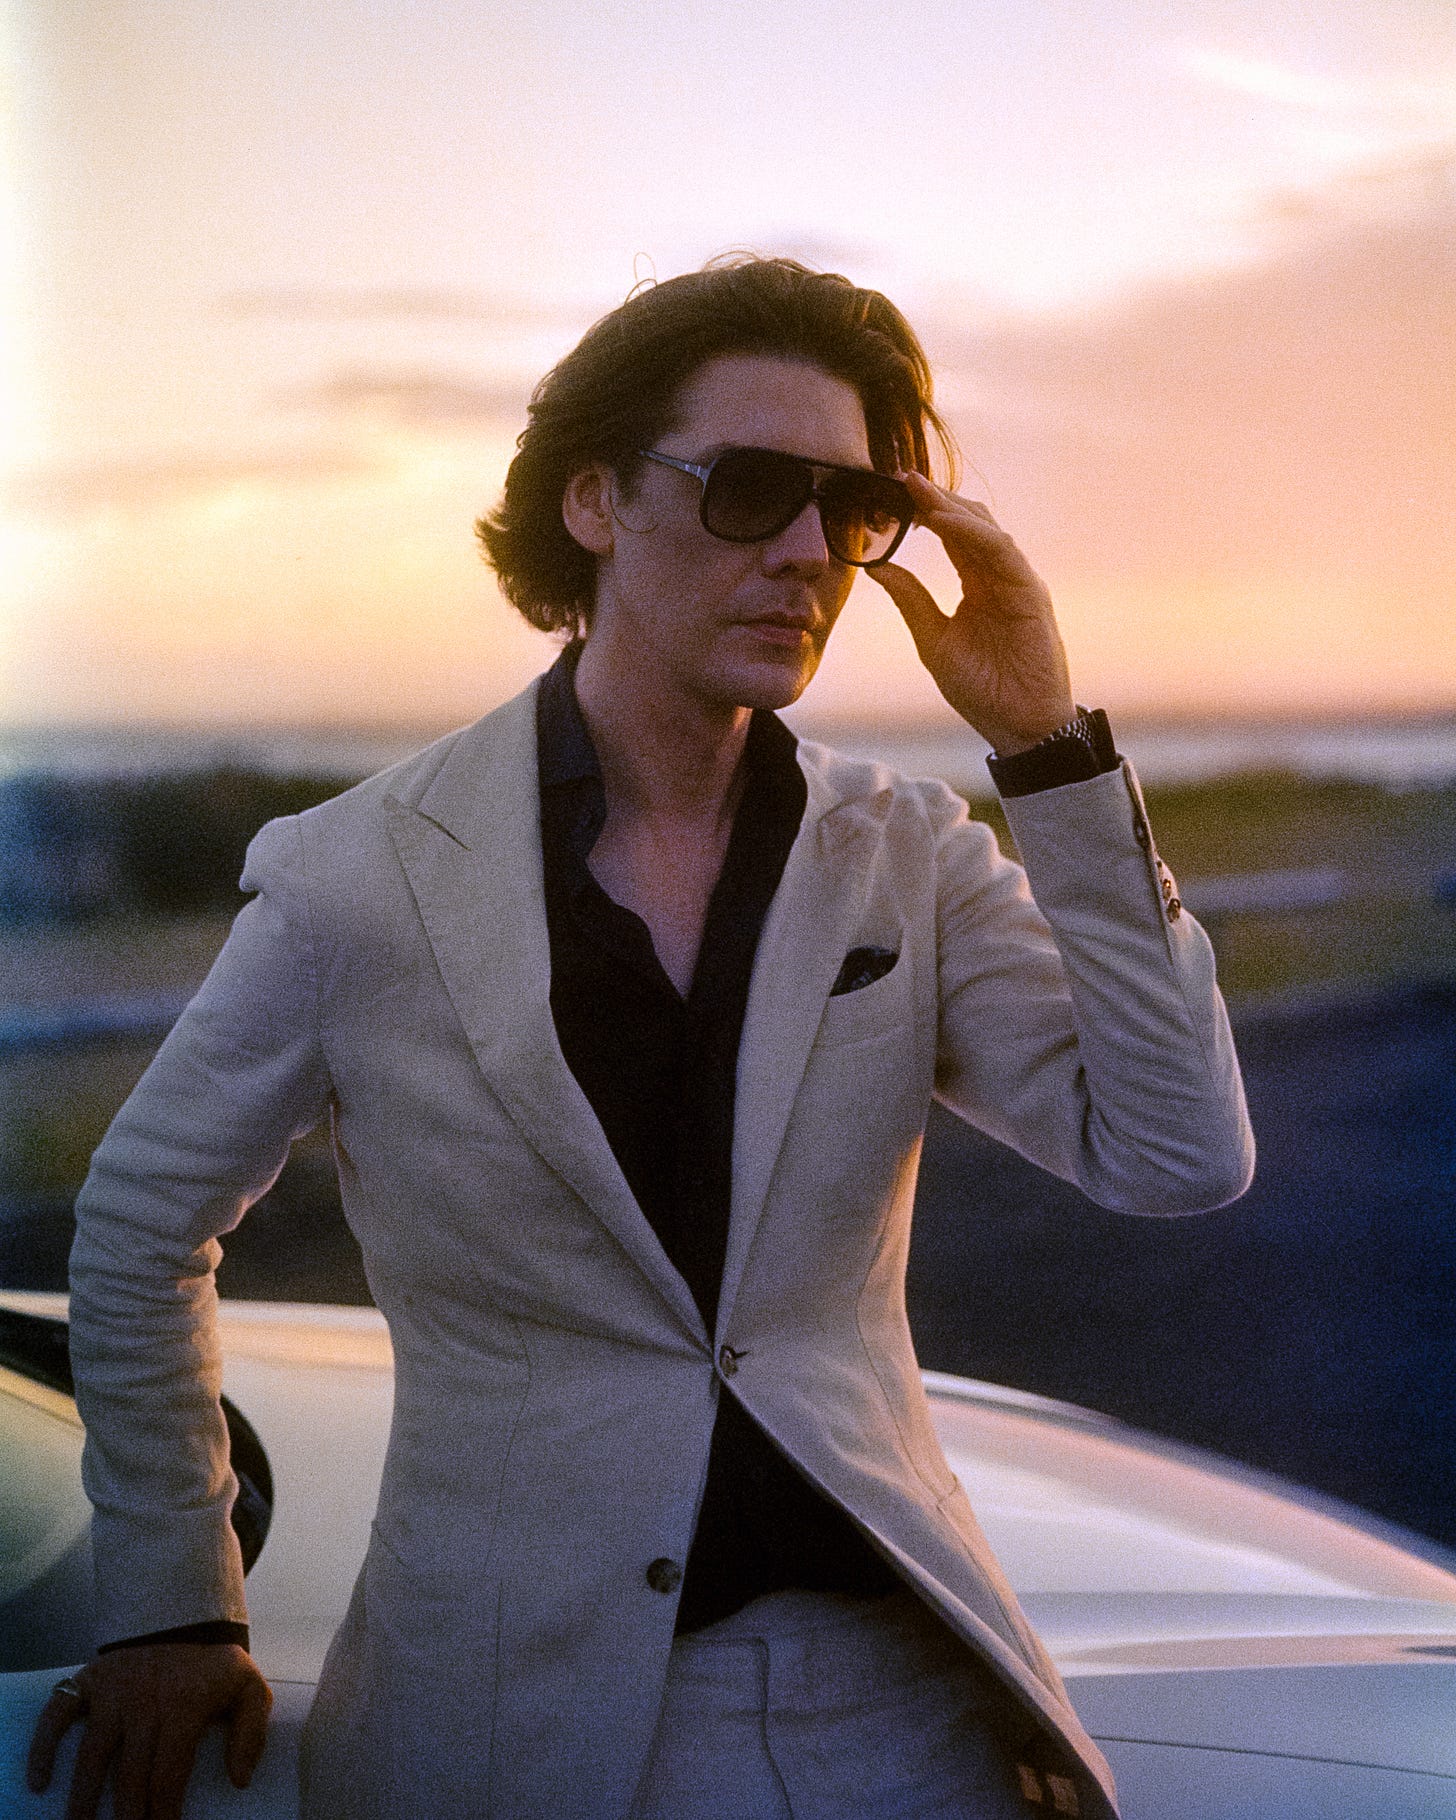
I used my Ricoh KR-10 Super’s light meter which is center weighted for the Sunset and Blue Hour portion which worked great, and I always adjust my settings manually from there for each frame anyway. I wanted the photos to be quite moody despite the glow of the sunset and I think they turned out beautifully. Backlit photos are always a fun challenge and the filters I used created golden halos and starbursts in some of them.
I also got the chance to use a Ricoh GR III which was genuinely a little confusing for me - as I’m not a digital girlie at all. Give me a film camera and I’ll master it in two seconds, but hand me a digital camera and I’m lost!
It worked beautifully with a 28mm lens as a ‘live preview’ and I managed to capture some great candid moments with the camera throughout the evening, all the while essentially using it as an additional light meter once the sun set as the in built light meter of my film SLR was doing some wild shit thanks to the RGB lights, but luckily my handheld selenium meter - an old Sekonic L-38 - was bang on and matching perfectly with the GR’s digital metering.
That little pocket rocket was super fun to play with and I wish I snapped some more photos with it to be completely honest but I was so fixated on getting the film shots I kind of forgot about it, oops!
Blindingly Bright - Zhiyun’s X60 gets put to the test!
The MOLUS X60 RGB is - you guessed it - a 60W LED light with some really cool capabilities. It can output a full 60W in dual colour temperatures with zero flickering, and is jam packed into a compact little body with a detachable battery pack. It’s only 100mm long and weighs 319g - making it a great lightweight option for creators on the go. It has bi-colour mode of 2700K - 6500K, and an impressive RGB mode with a full spectrum to scroll through. And yes, it has some fun RGB modes along with Lighting Effects so you can get fancy schmancy with it.
It’s currently the smallest full colour COB cinematography light on the market - and despite its small size it's more than capable of providing professional level lighting for all kinds of applications - without the struggles of trying to navigate how you’d get a giant ass light to work at an outdoor location like the one I chose for this photoshoot.
Inside it has a ‘DynaVort Cooling System’ which I’m not even going to claim I know what it does - all I know is that it kicks in and cools down the light so it doesn’t overheat - which is really useful if you decide to cram it inside tight spaces. Although I wouldn't recommend laying it down on carpet inside a car like I did with an M20, you might cook it.
The first comment I made about the appearance of the light was how much it looks and feels like you’re holding another camera - it’s actually really cool how small Zhiyun has managed to make such a powerful bit of kit. It’s absolutely gorgeous and really well built. It’s got some kickass accessories to take it to the next level with the use of their ZY Bowens mount accessory - something I feel like will come in handy when I use it in a studio setting.
The second I turned on the X60 at Port Botany though - the entire scene lit up like I had never seen before and everyone was blown away by this little light.
Have you ever been driving through the bush, and flicked on your 4WD’s spotties just to blind yourself as night suddenly becomes day? It was like that - but somehow even brighter… now I know why there’s multiple warnings to not look directly at it (although I did that once… I do not recommend it.)
For this photoshoot with Clem he mentioned he loved the ideas of having a purple toned light, and some warmth thrown in from a bi-colour light. So I settled on a gorgeous purple tone using the HSL dial which we were able to sync up with the F100 RGB light as well if we needed it, and the little M20 RGBs that would be used inside the car later on - super convenient!
At first the X60 was cranked up to 100% brightness until I realized it was maybe a little too bright, and we turned the lights down to 50% and even then it was still super vibrant.
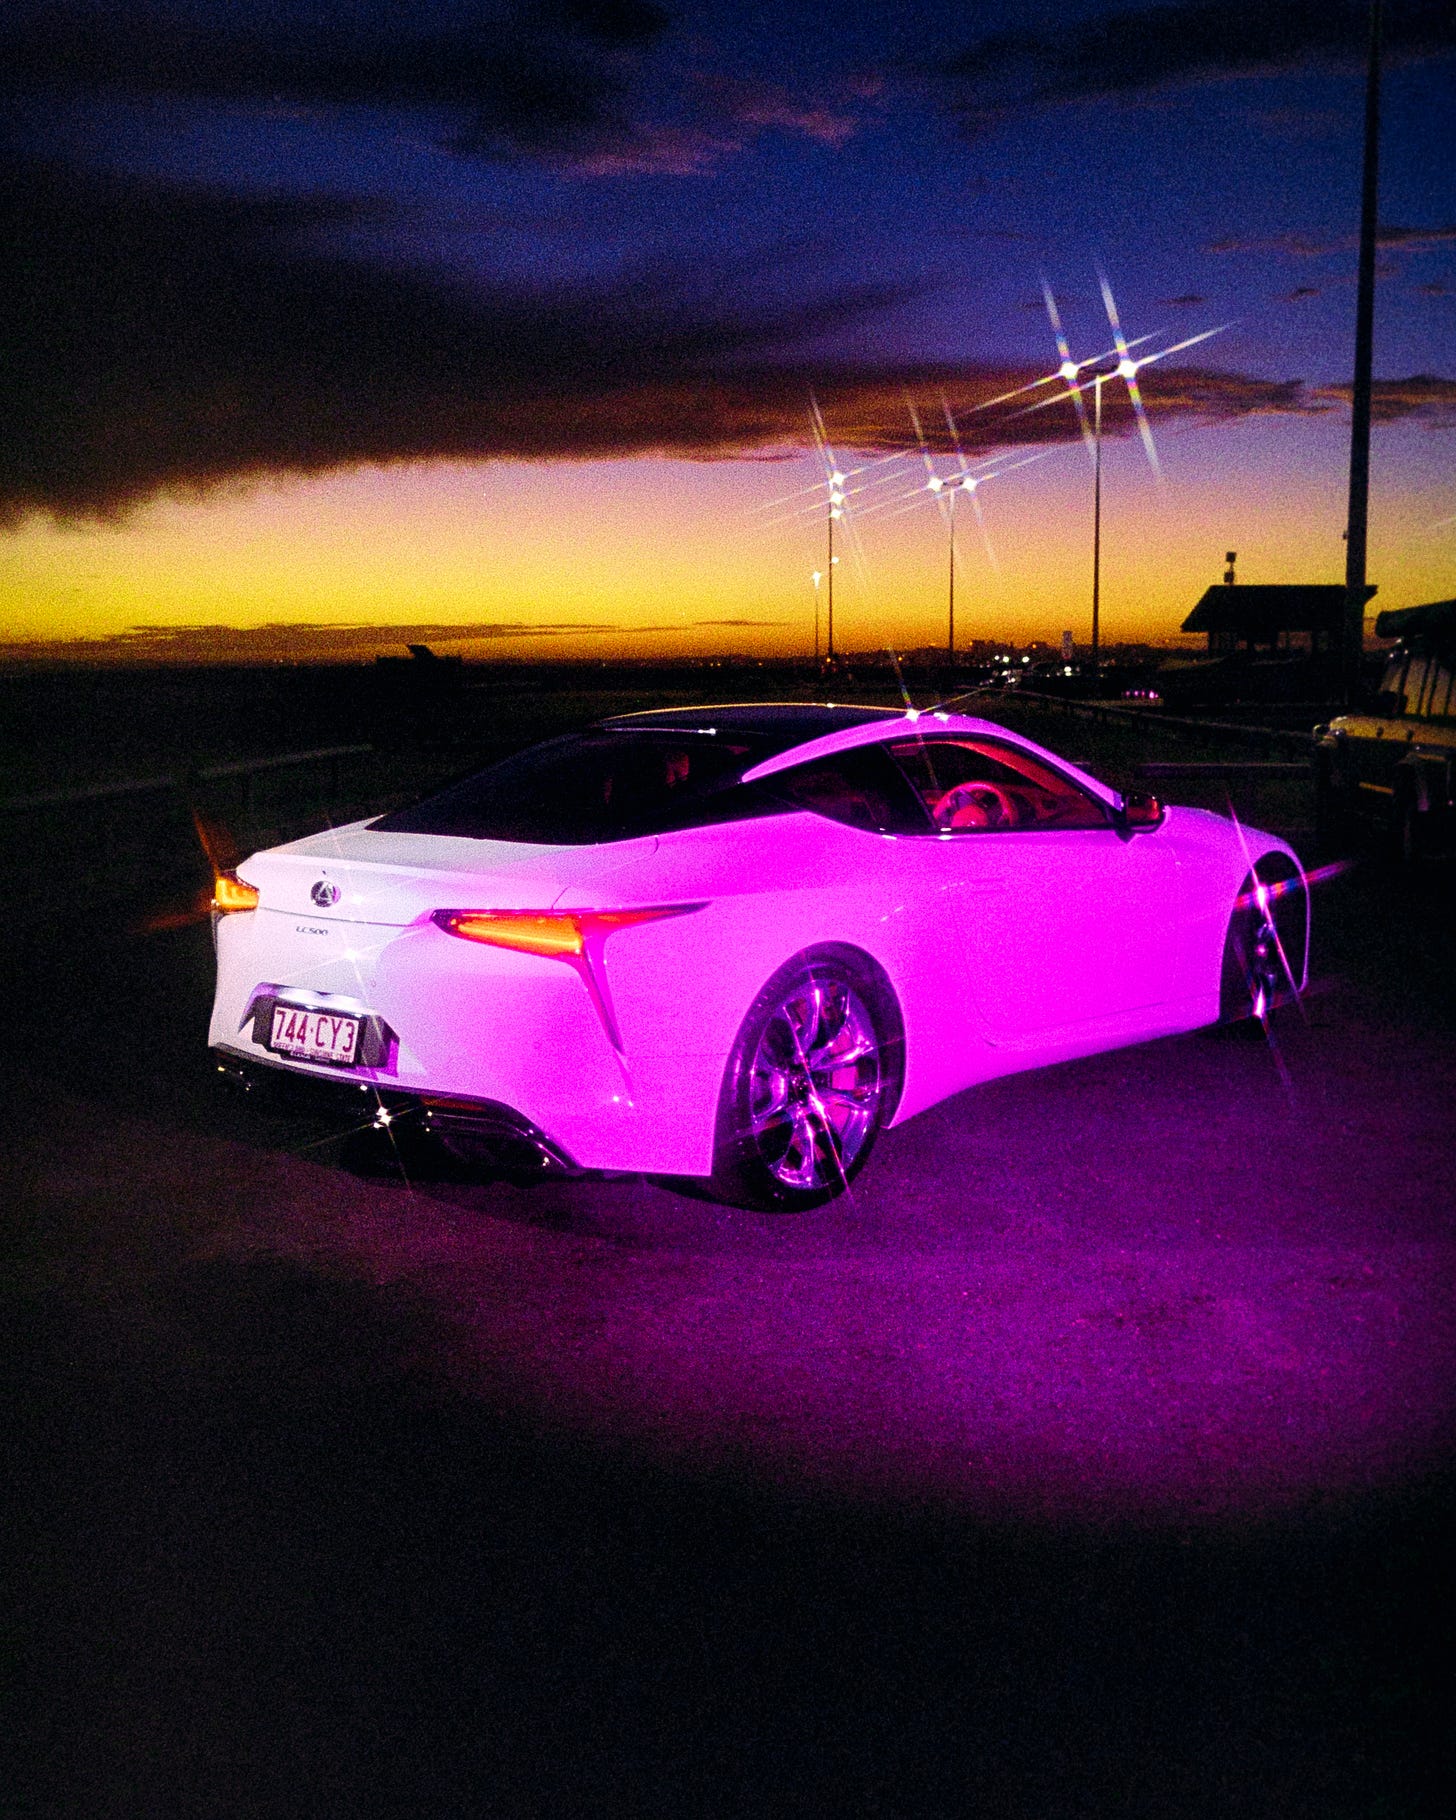
So throughout the images you see here, the light stayed at 50% for the entire shoot and it casted more than enough colour for it to show up flawlessly on 35mm Film!
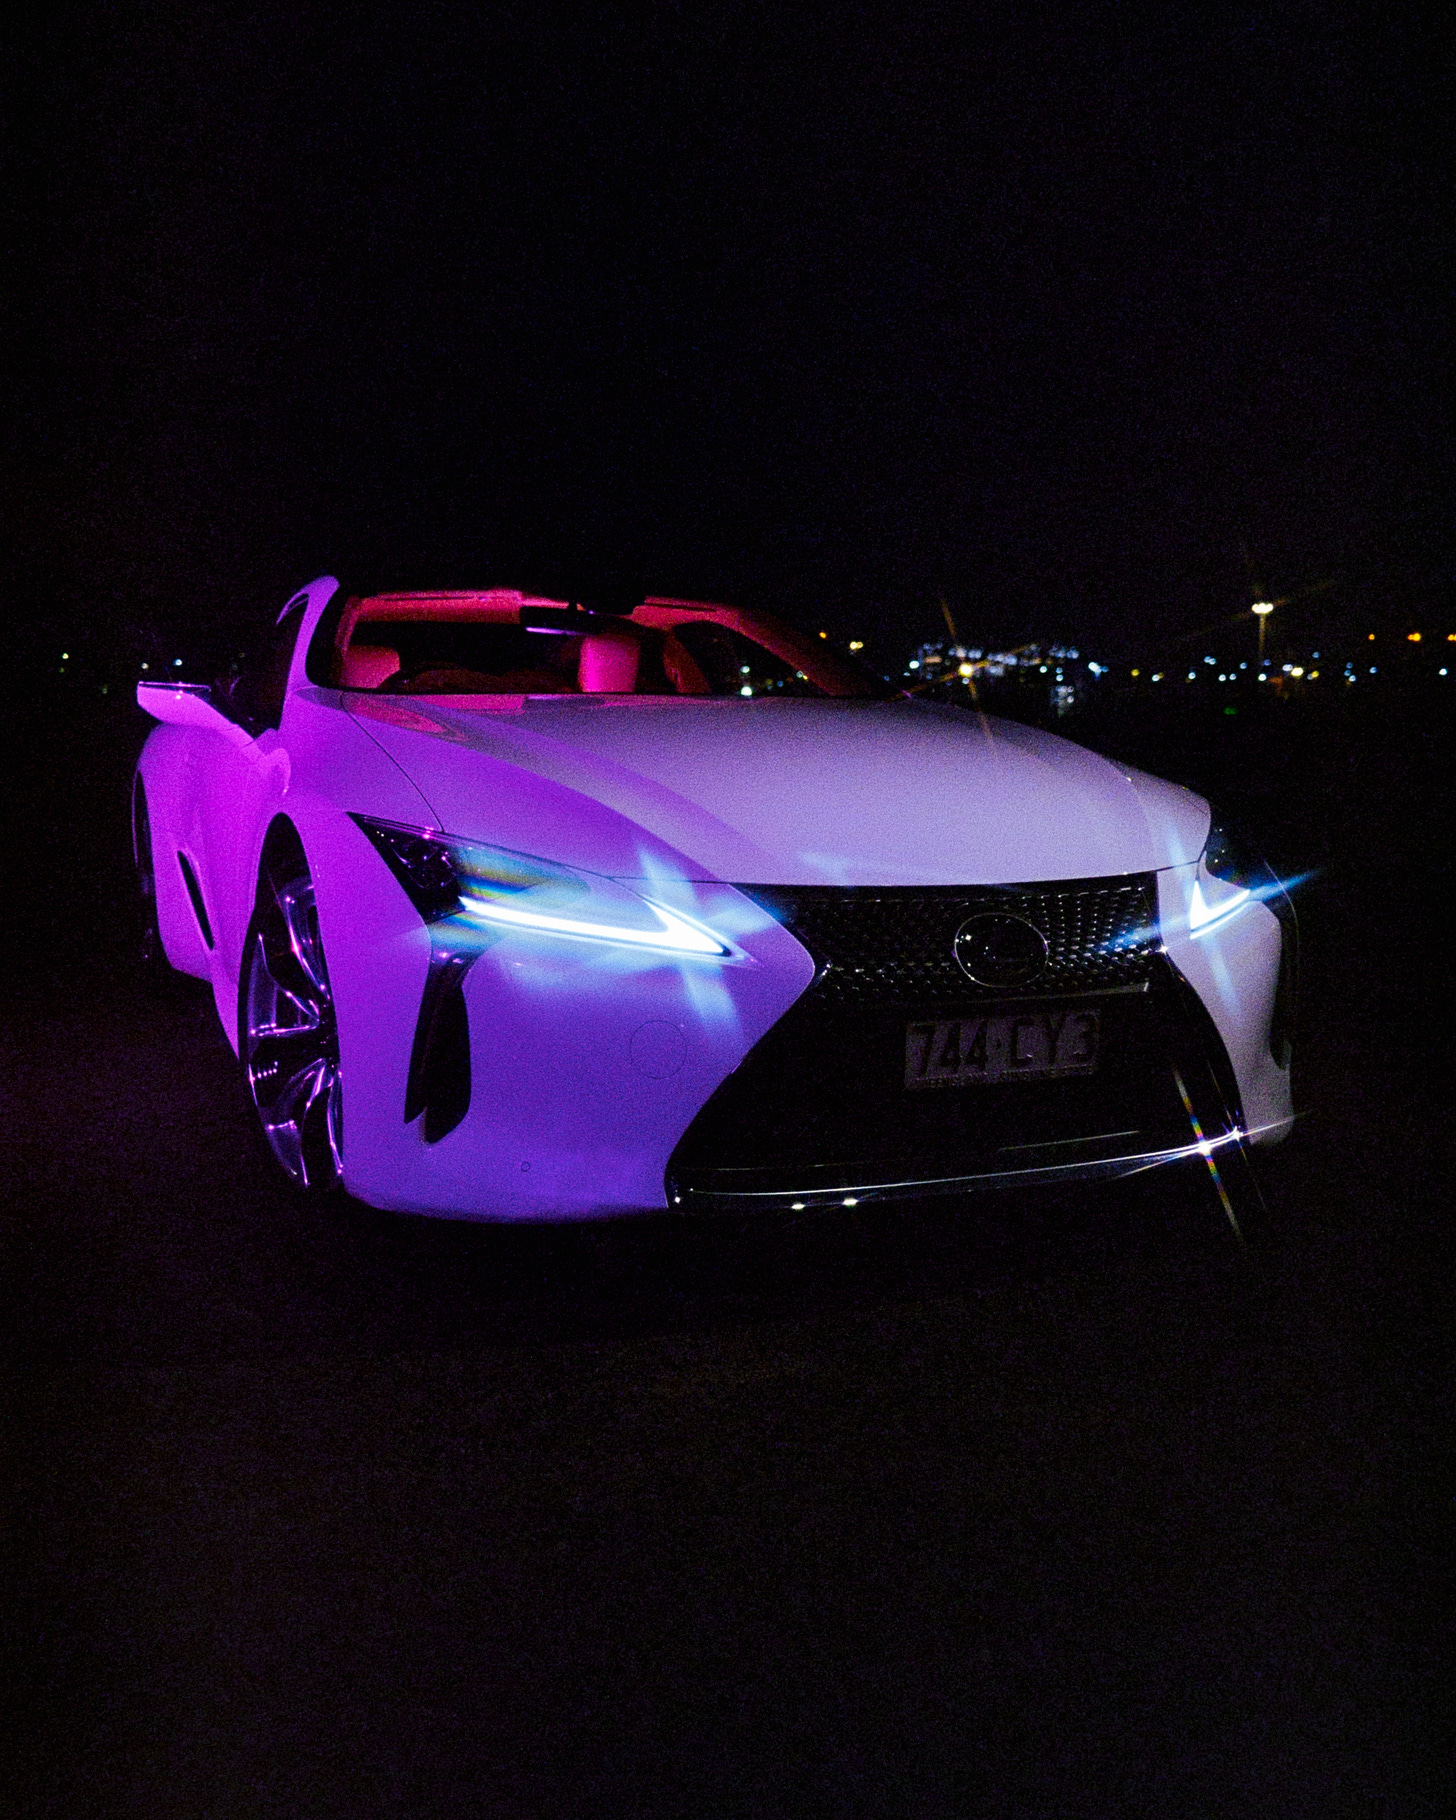
I was beyond impressed. Normally I’d be shooting at 1/15th - 1/60th at f/2 on my cameras with 400 ISO film but I was able to shoot at 1/250th and higher until it got towards total darkness, and even then it only dropped below 1/125th for a handful of shots. This is not something I’ve been able to do previously. I’d be pulling out extra lights, or even supplementing with flash, or straight calling it a night and ending the photoshoot in the past. The Zhiyun lights were an absolute game changer to have on hand.
I also used an additional X60 a key light to help balance the scene - and that’s the biggest tip with 35mm Film with RGBs, you can’t just rely on a single coloured light to do the job, you need additional white light otherwise everything will be a single wash of colour. Adding in an additional X60 dialed in to Daylight white balance at at 45 degree angle on the opposite side allowed enough lighting to flood the scene and ensure that the shots still had enough natural colours and details to really tie together the theme of ‘Miami Vice’ we were going for - all while still being moody enough to show that it was shot at night.
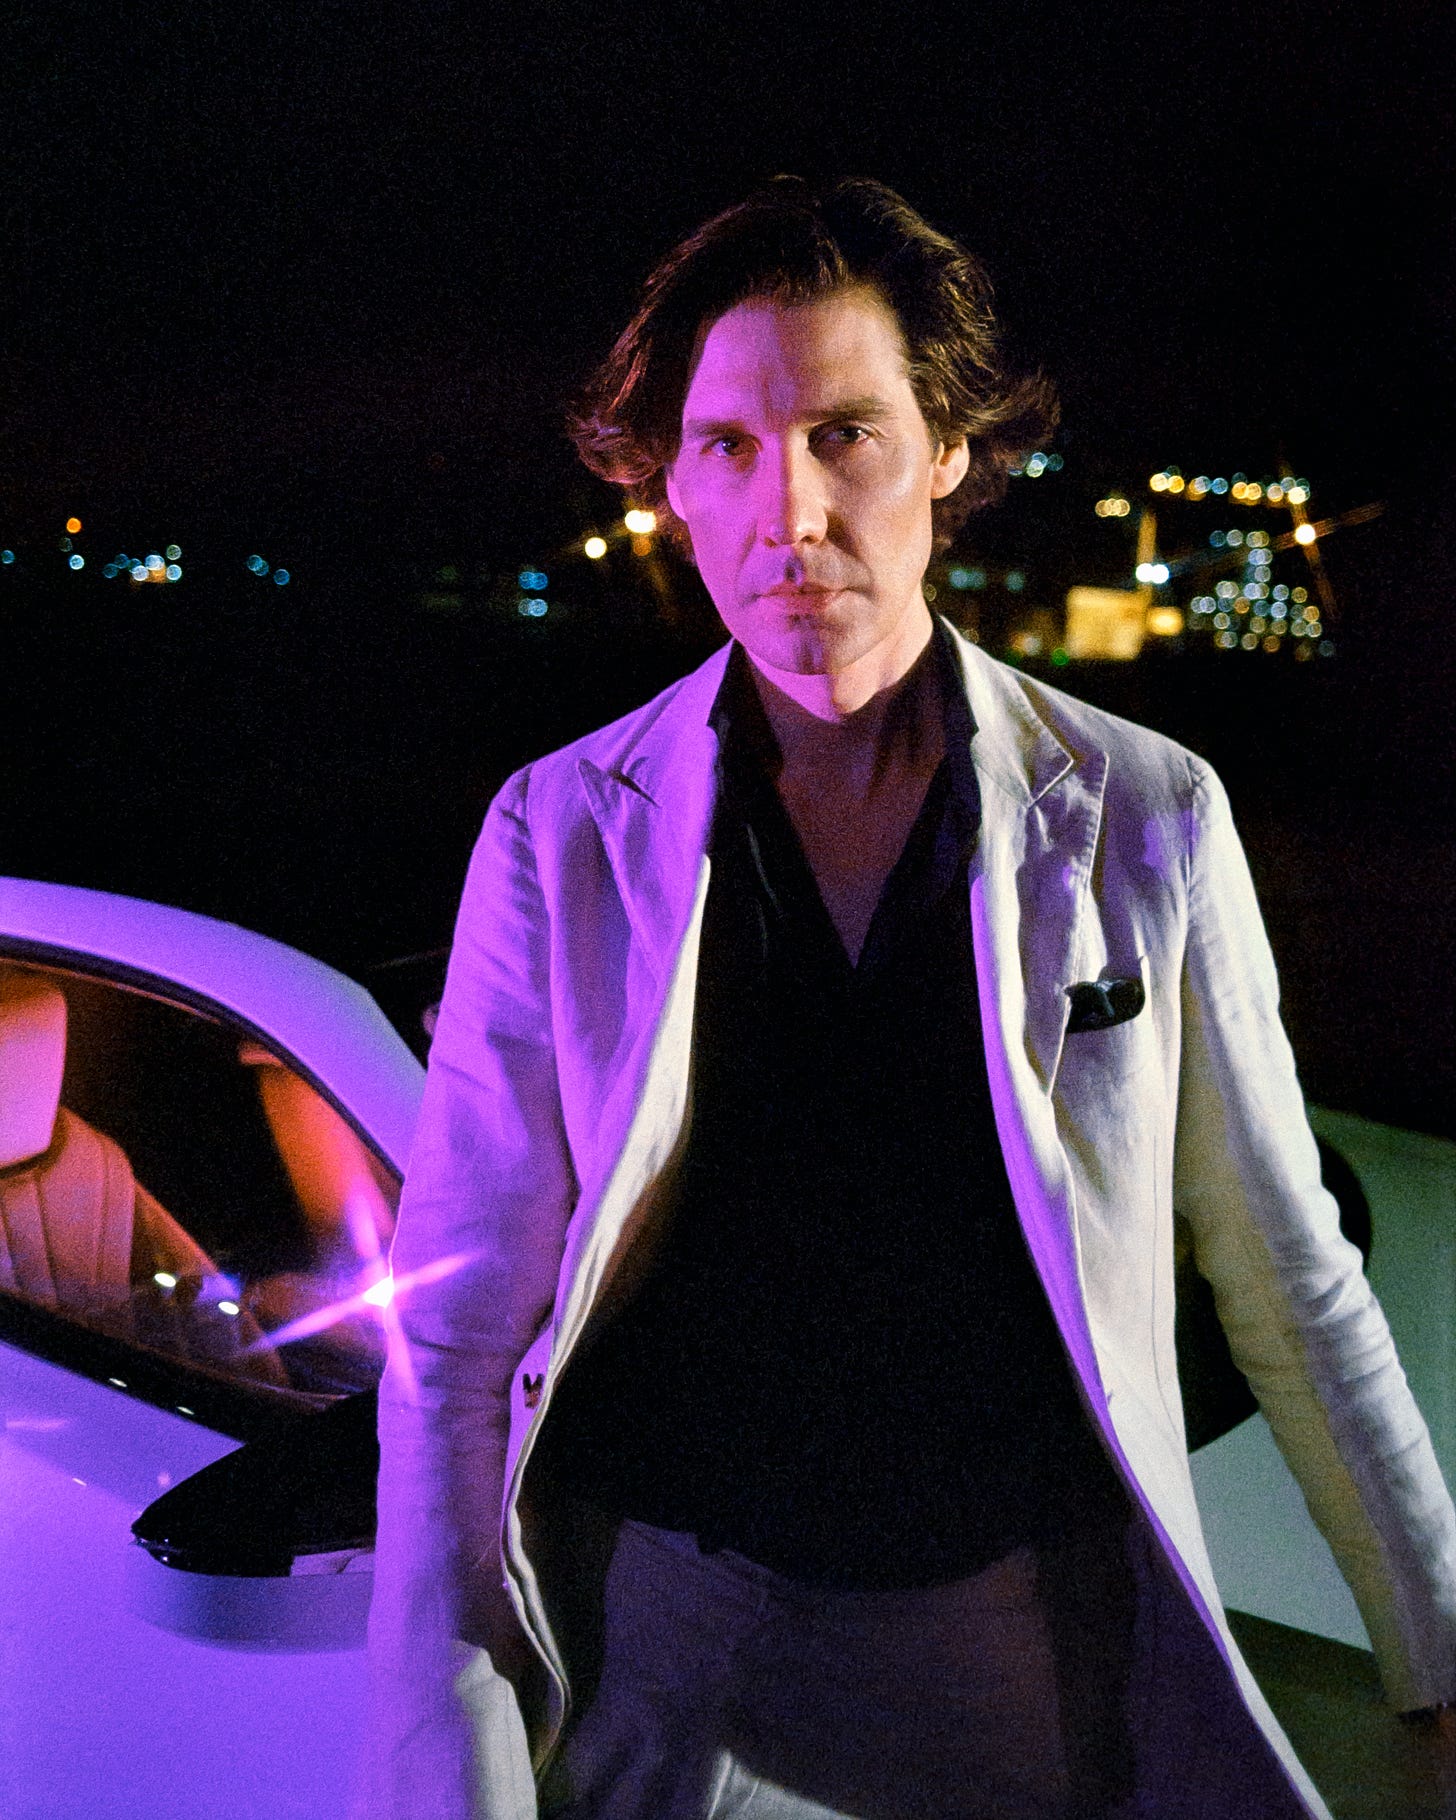
Overall - If you’re looking into trying artificial lighting on 35mm Film, the X60 is a great addition to your kit. Team this with even a smaller unit like an M40 or even an M20 bi-color and you’ll be set for just about any night time shoot where you want to throw some colour light and capture those sweet 80’s vibes!

So Park Your Lexus…
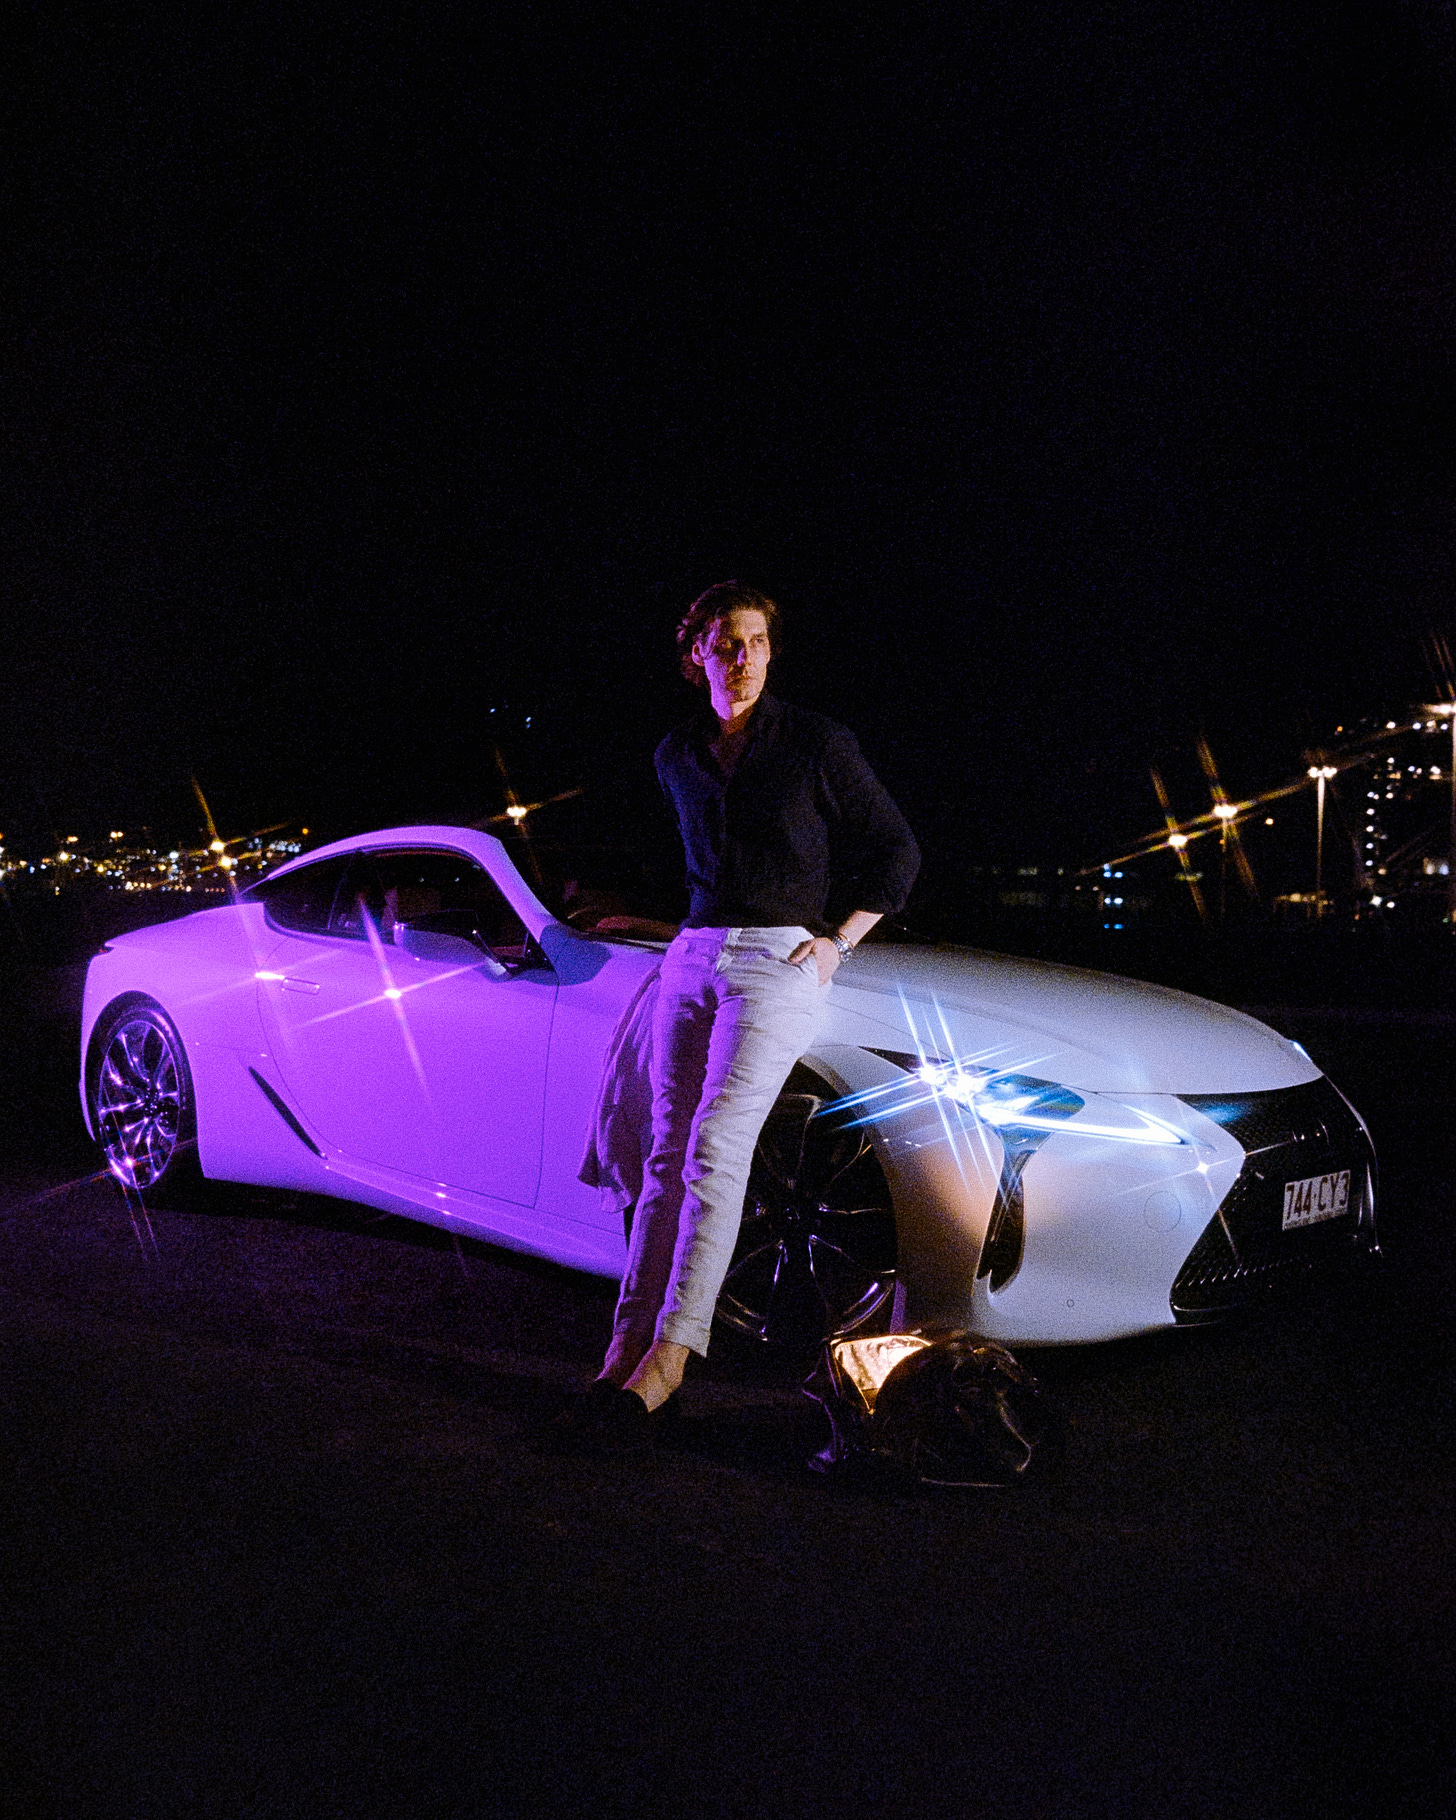
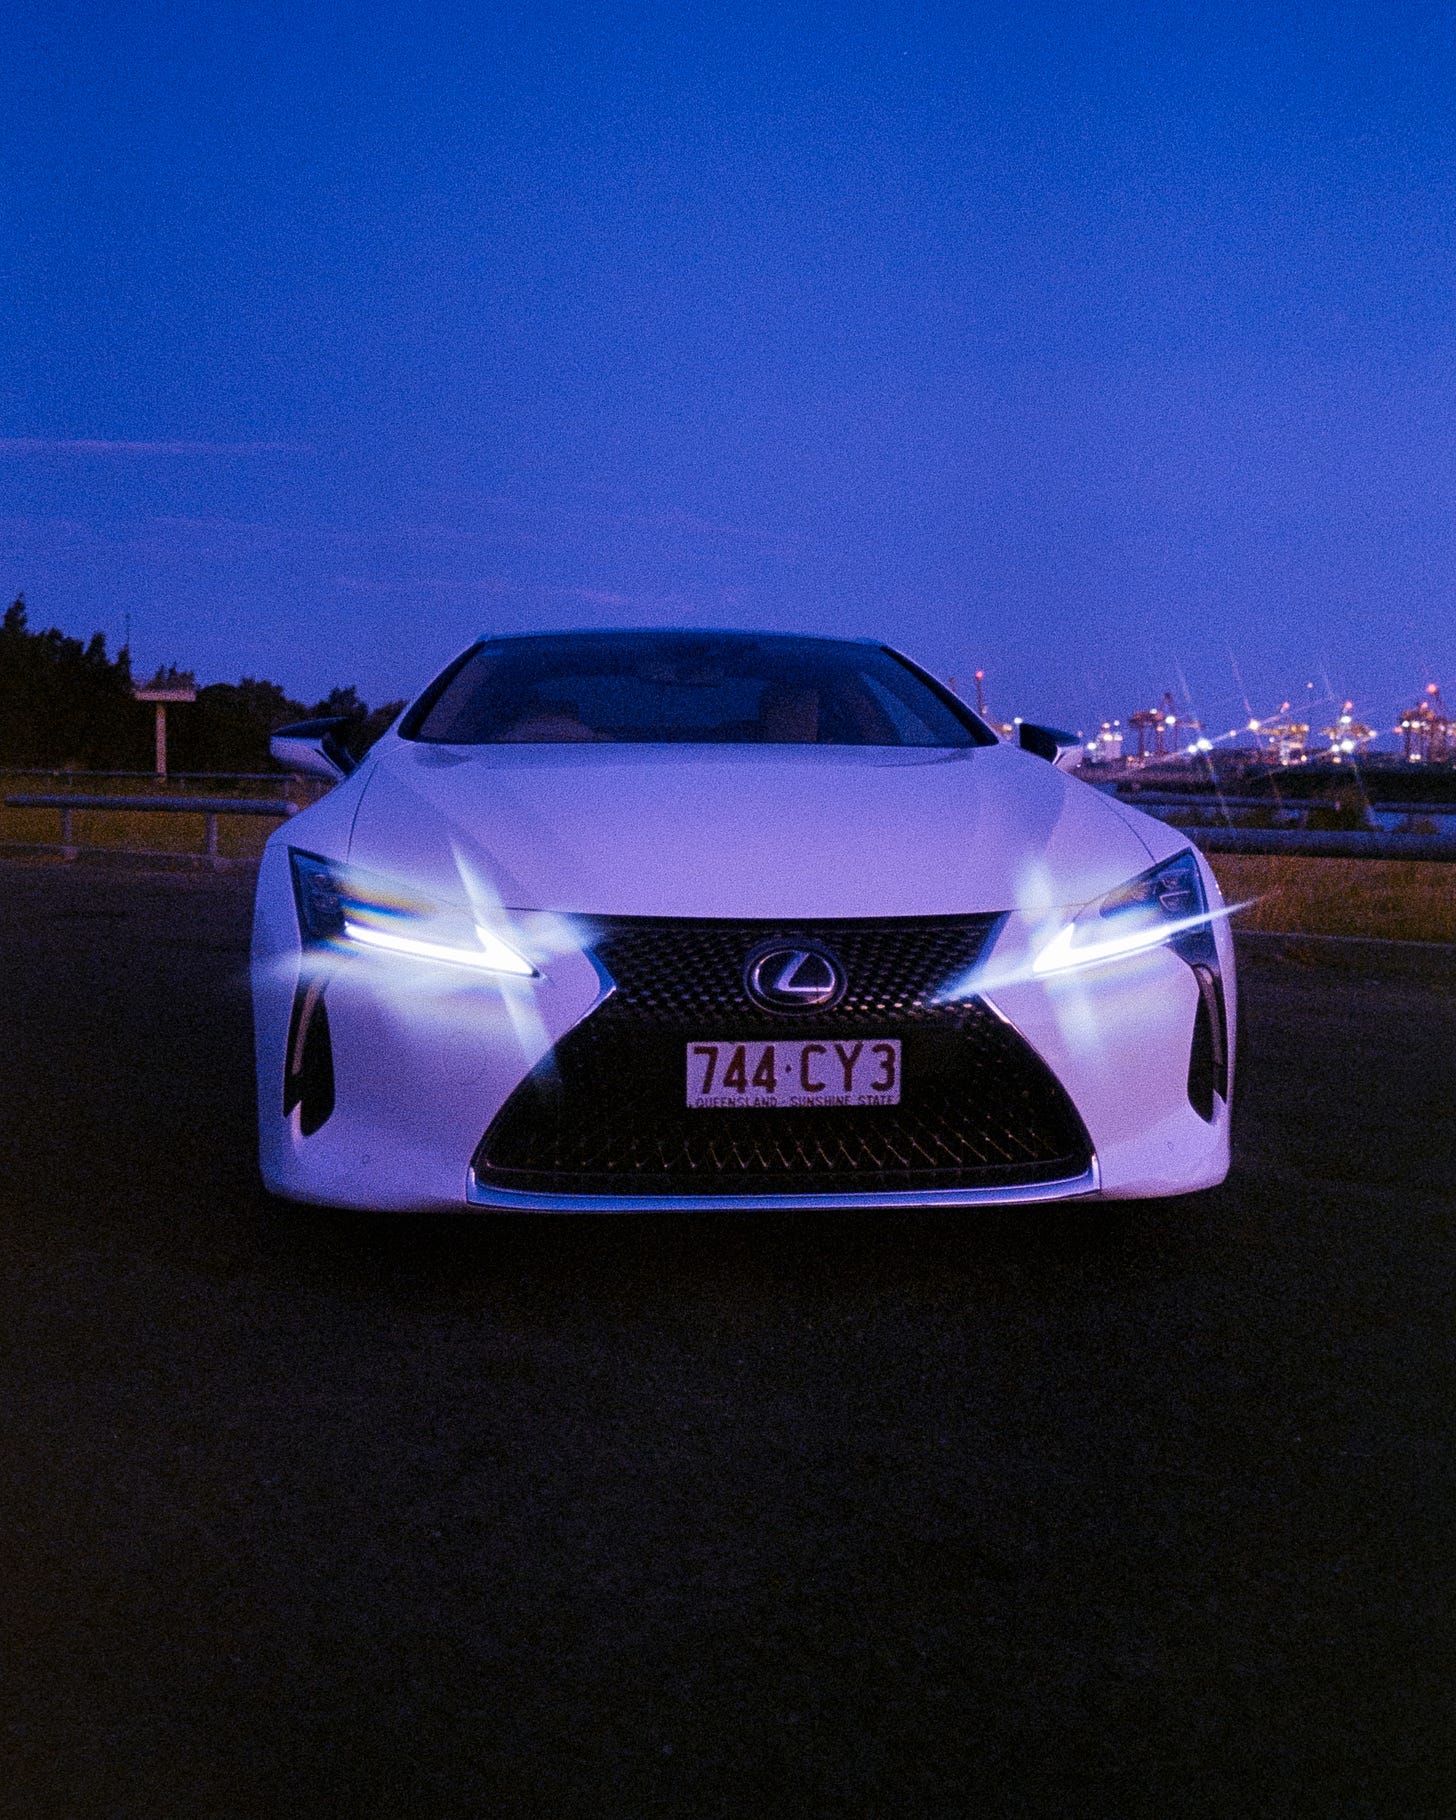
When it comes to automotive photography there’s some key shots you should try to get. First of all, you have to make sure the car is parked in an aesthetic way, wheels always turned away from the camera. I guided Clem into position and promptly let him know I’d snap some photos of his car on its own first before we moved onto the portraits.
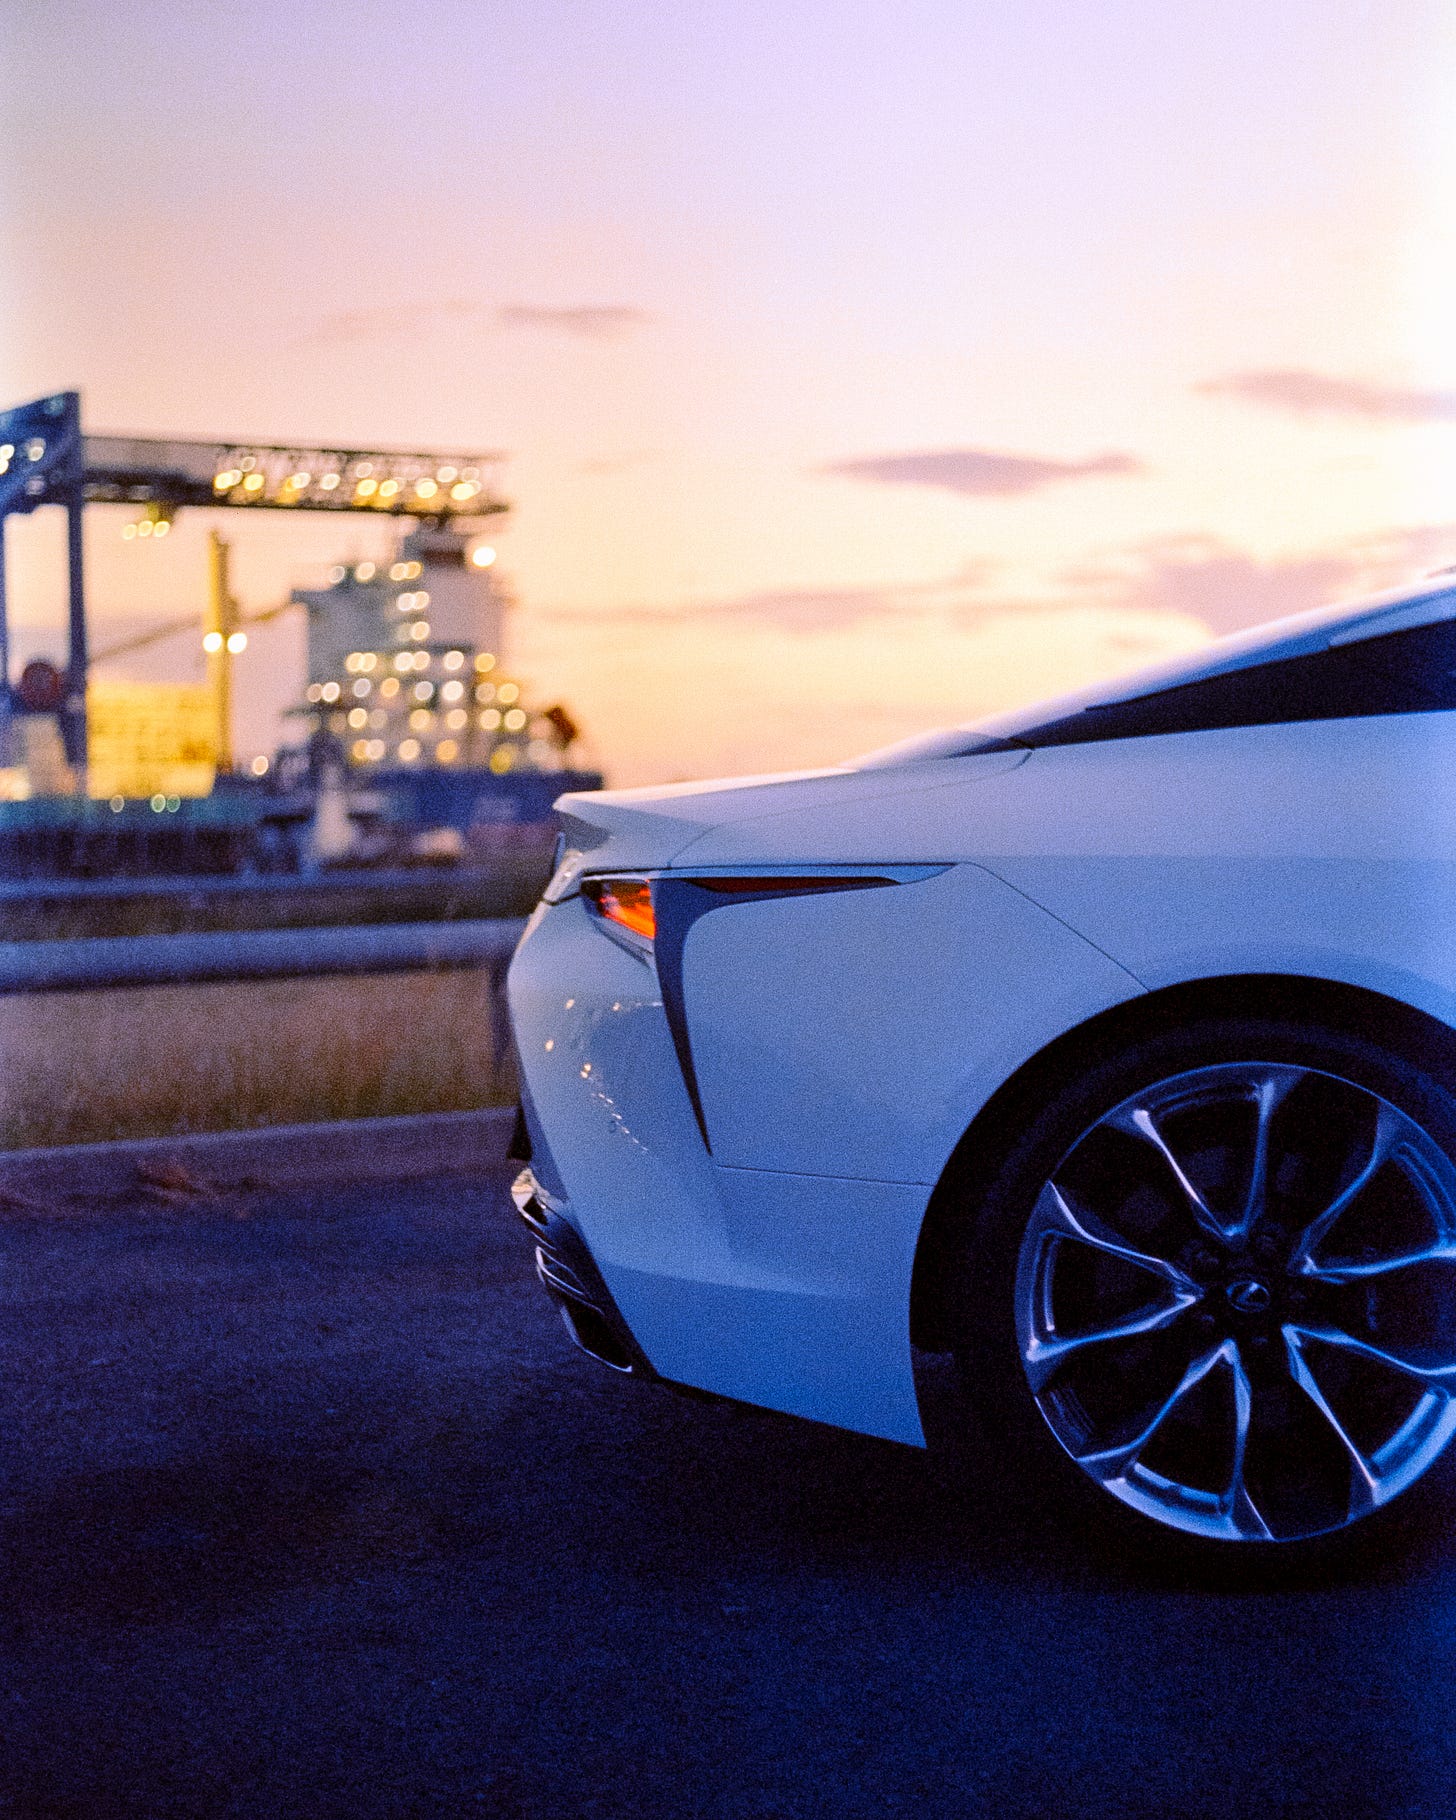
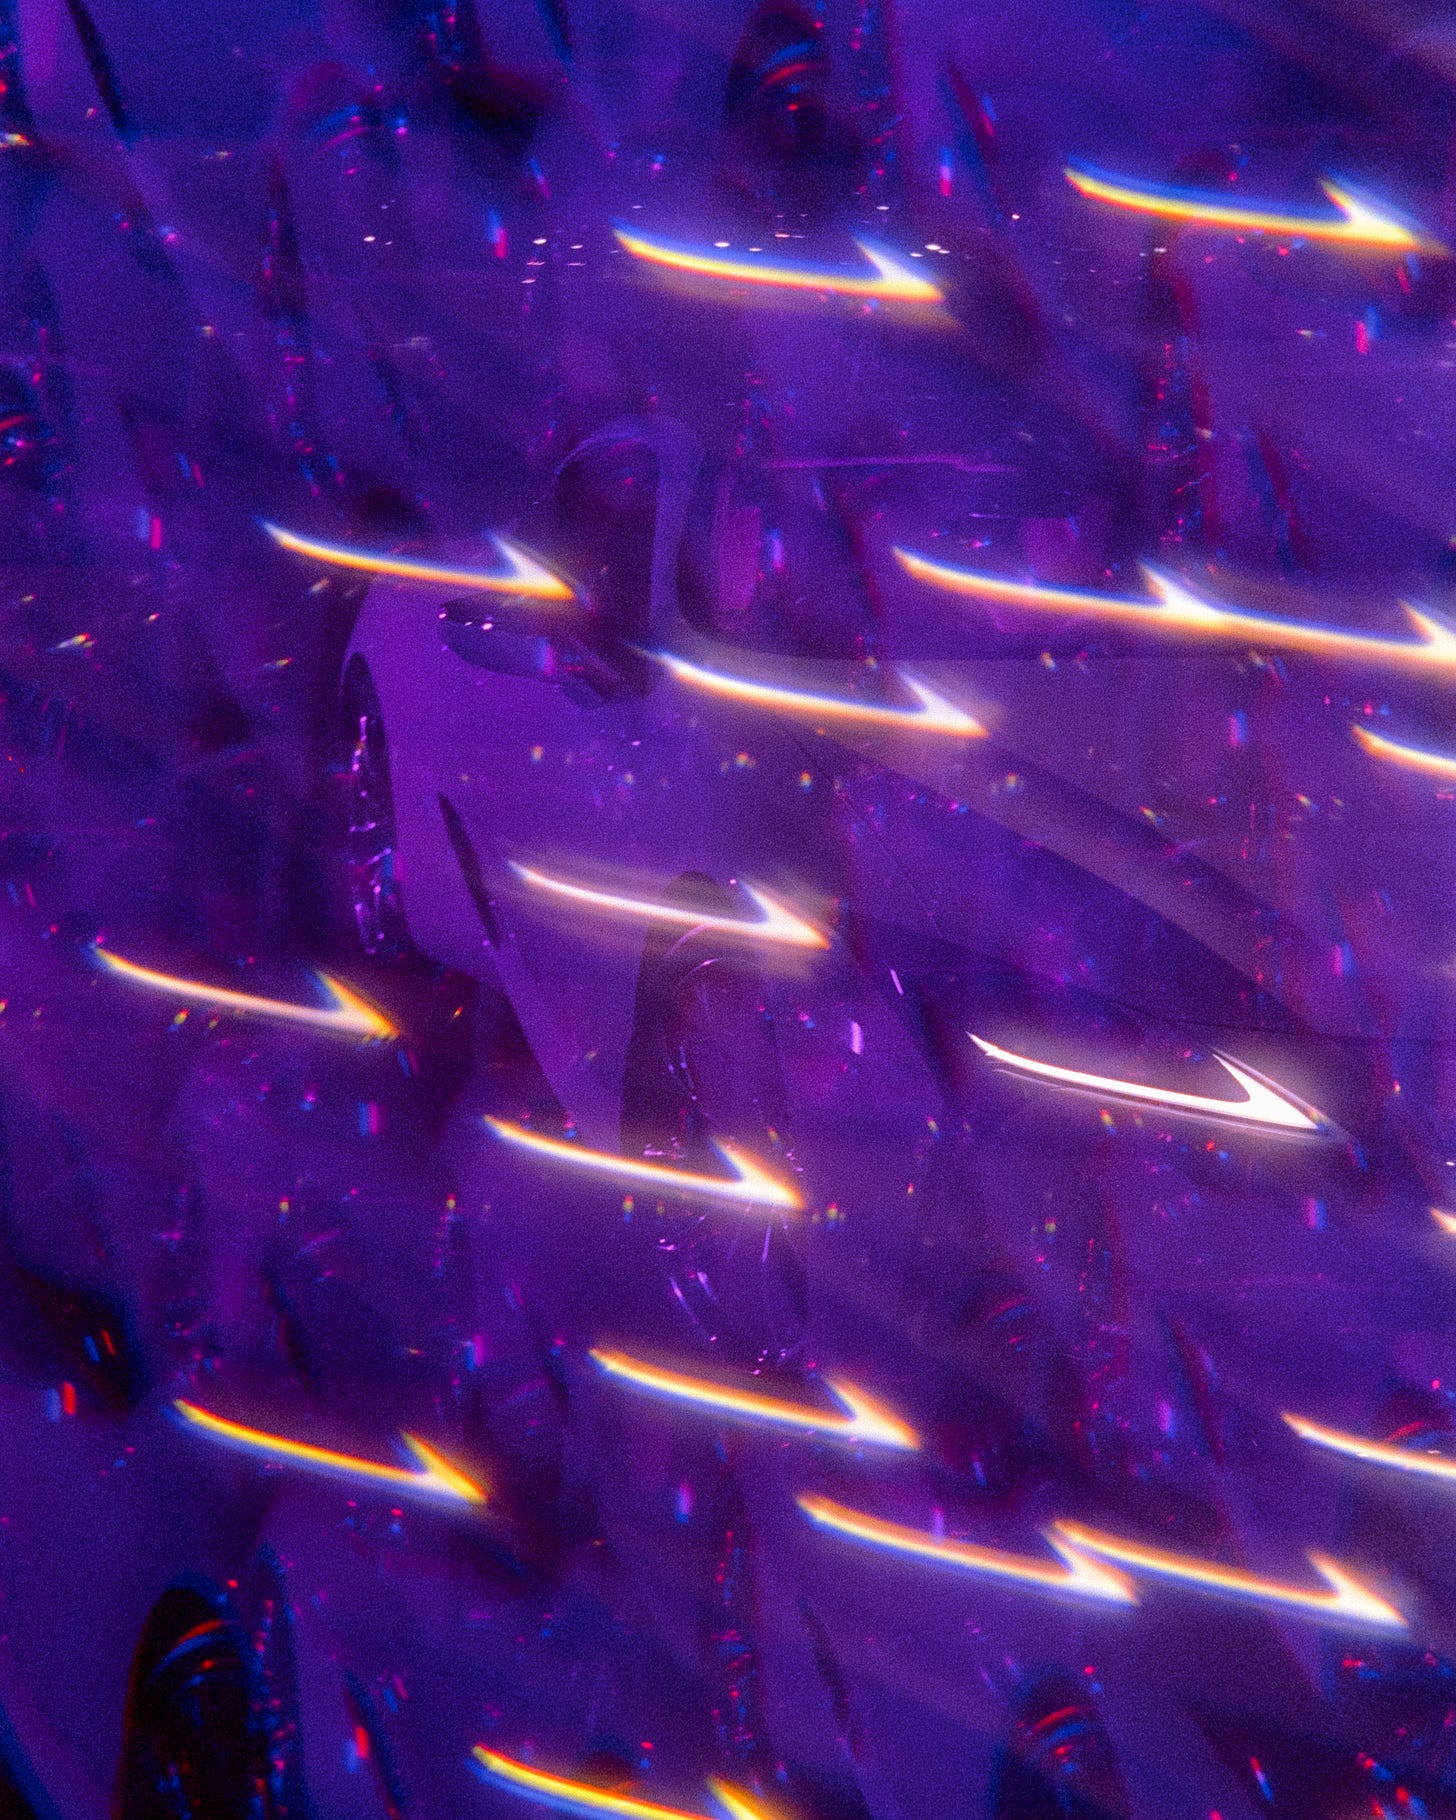
I like to grab dynamic angles, get headlight details, quarter panels, and get the background in as well where possible. Establish the scene a little and try to bring out the personality of the car itself. I also love playing around with vintage multi image filters on top of the cross screen and diffusion filter I use. I think it adds a little bit of flair to the shoot and it’s one of the things that helps my work stand out from others - so I always chuck in a few sneaky shots with it when I can!
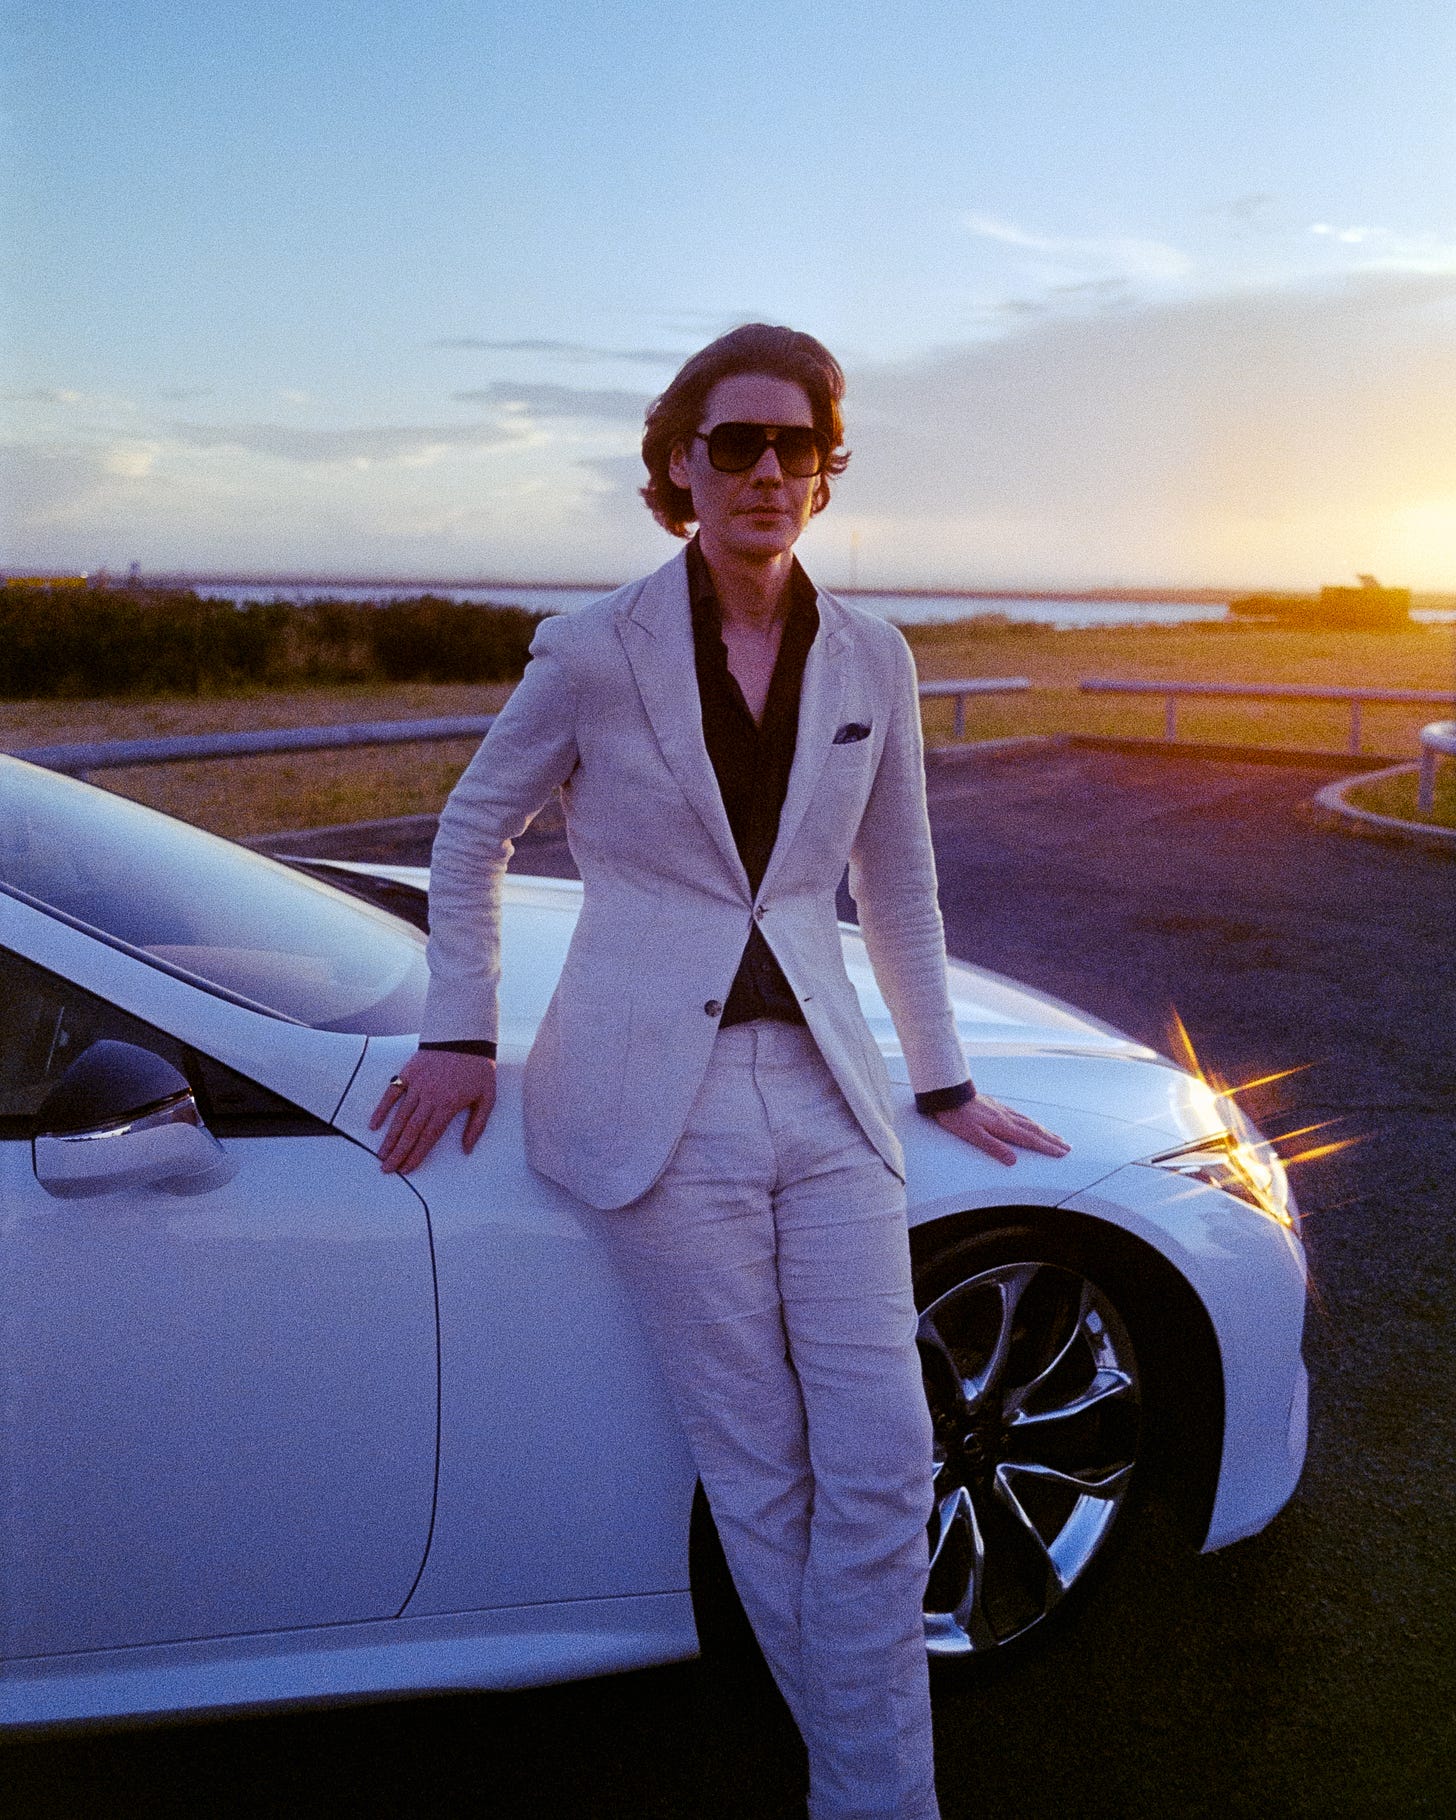
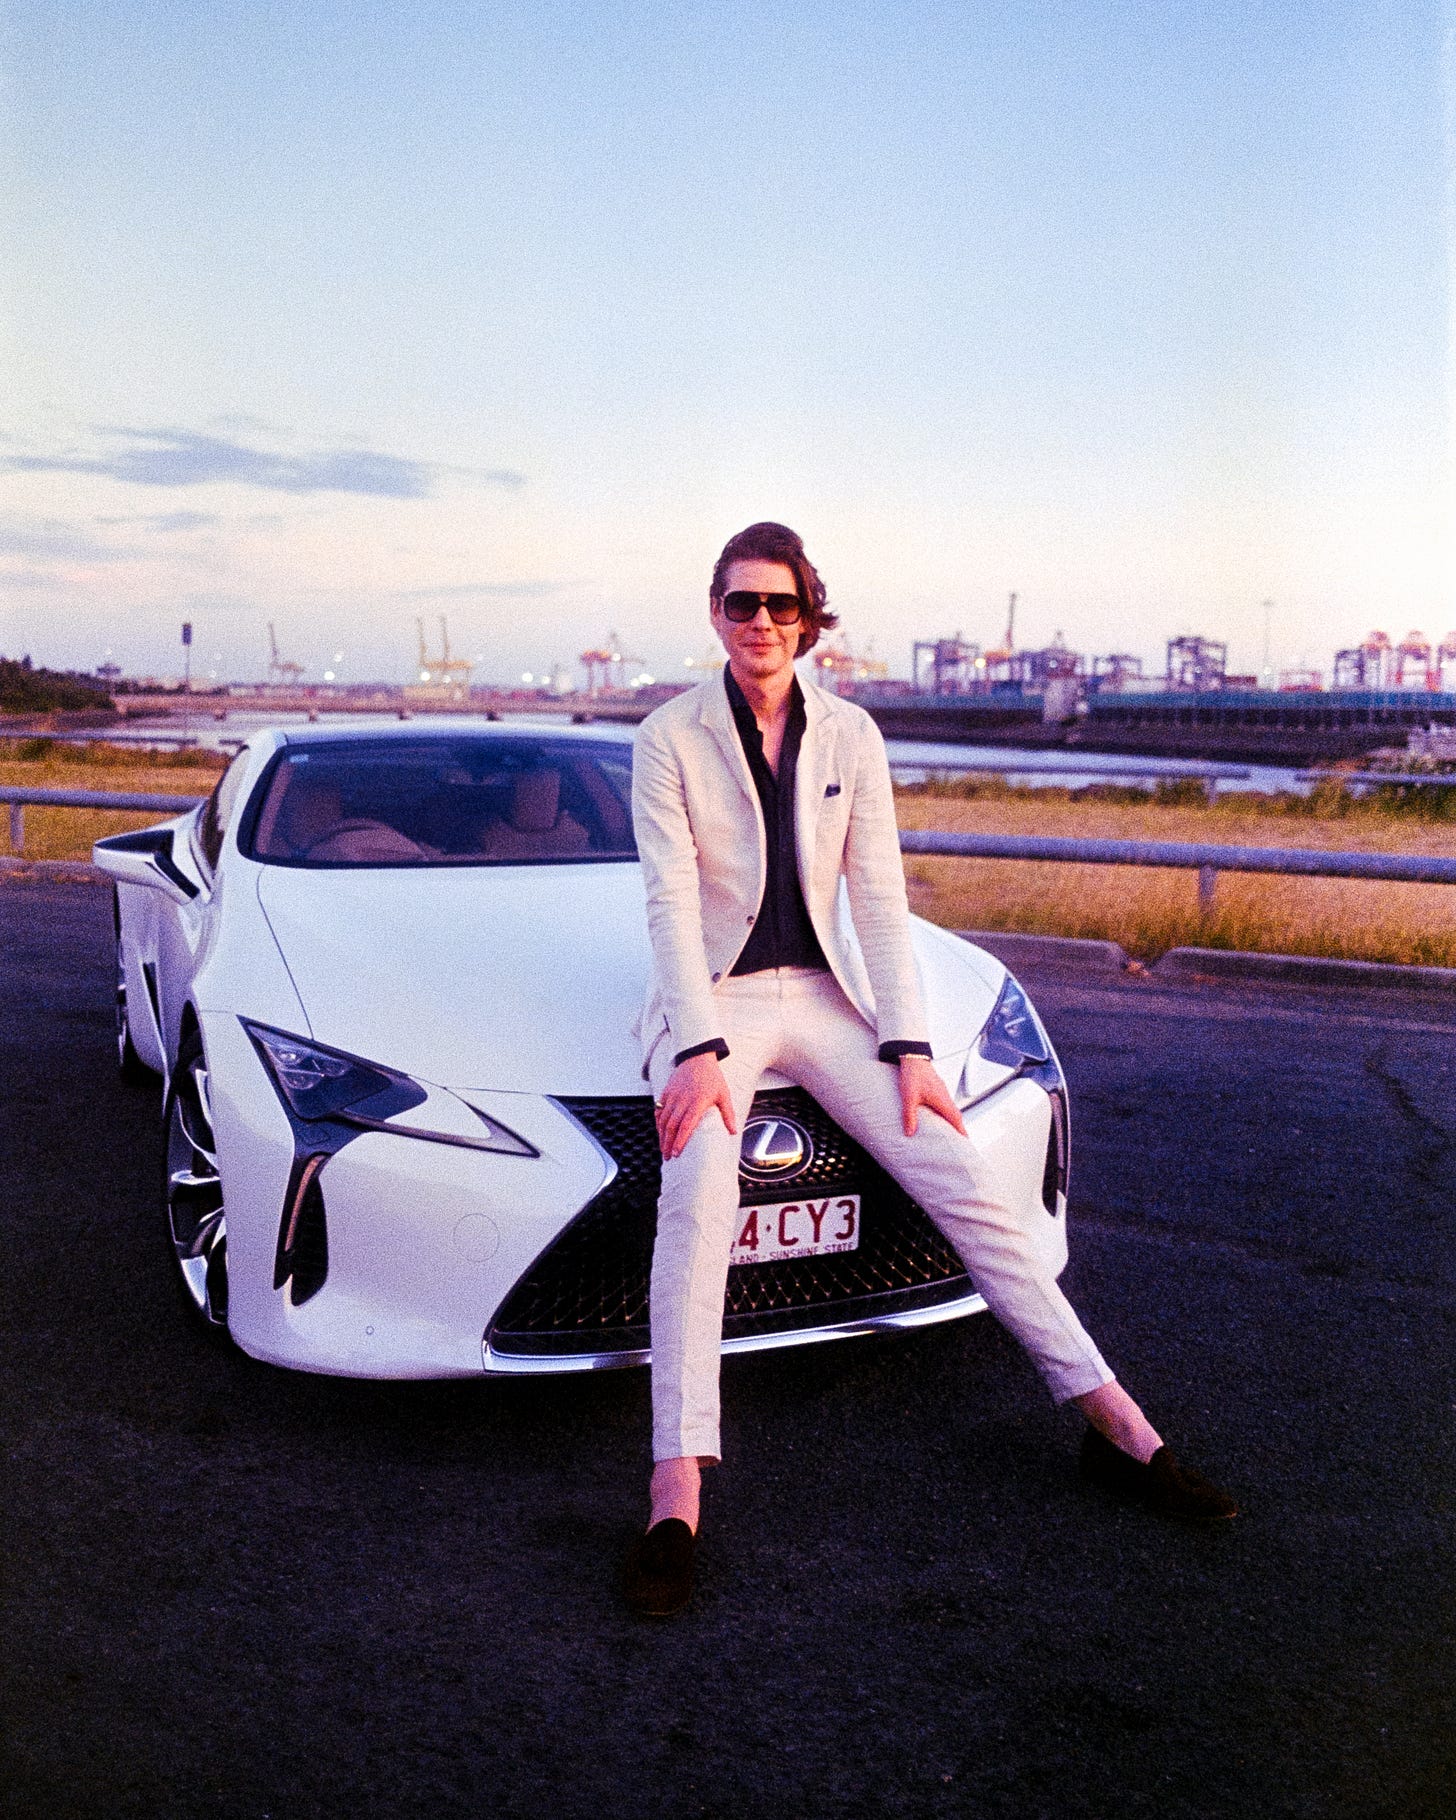
As the sun began to set and the sky lit up with a gorgeous golden tone (we got SO lucky with the weather!) I pulled Clem into the fame and got him working on his poses - giving him a character to play and have a bit of fun with. We were going for those classic 80’s ‘Miami Vice’ vibes, and he did a fantastic job of dressing and acting the part to create some really cool photos.
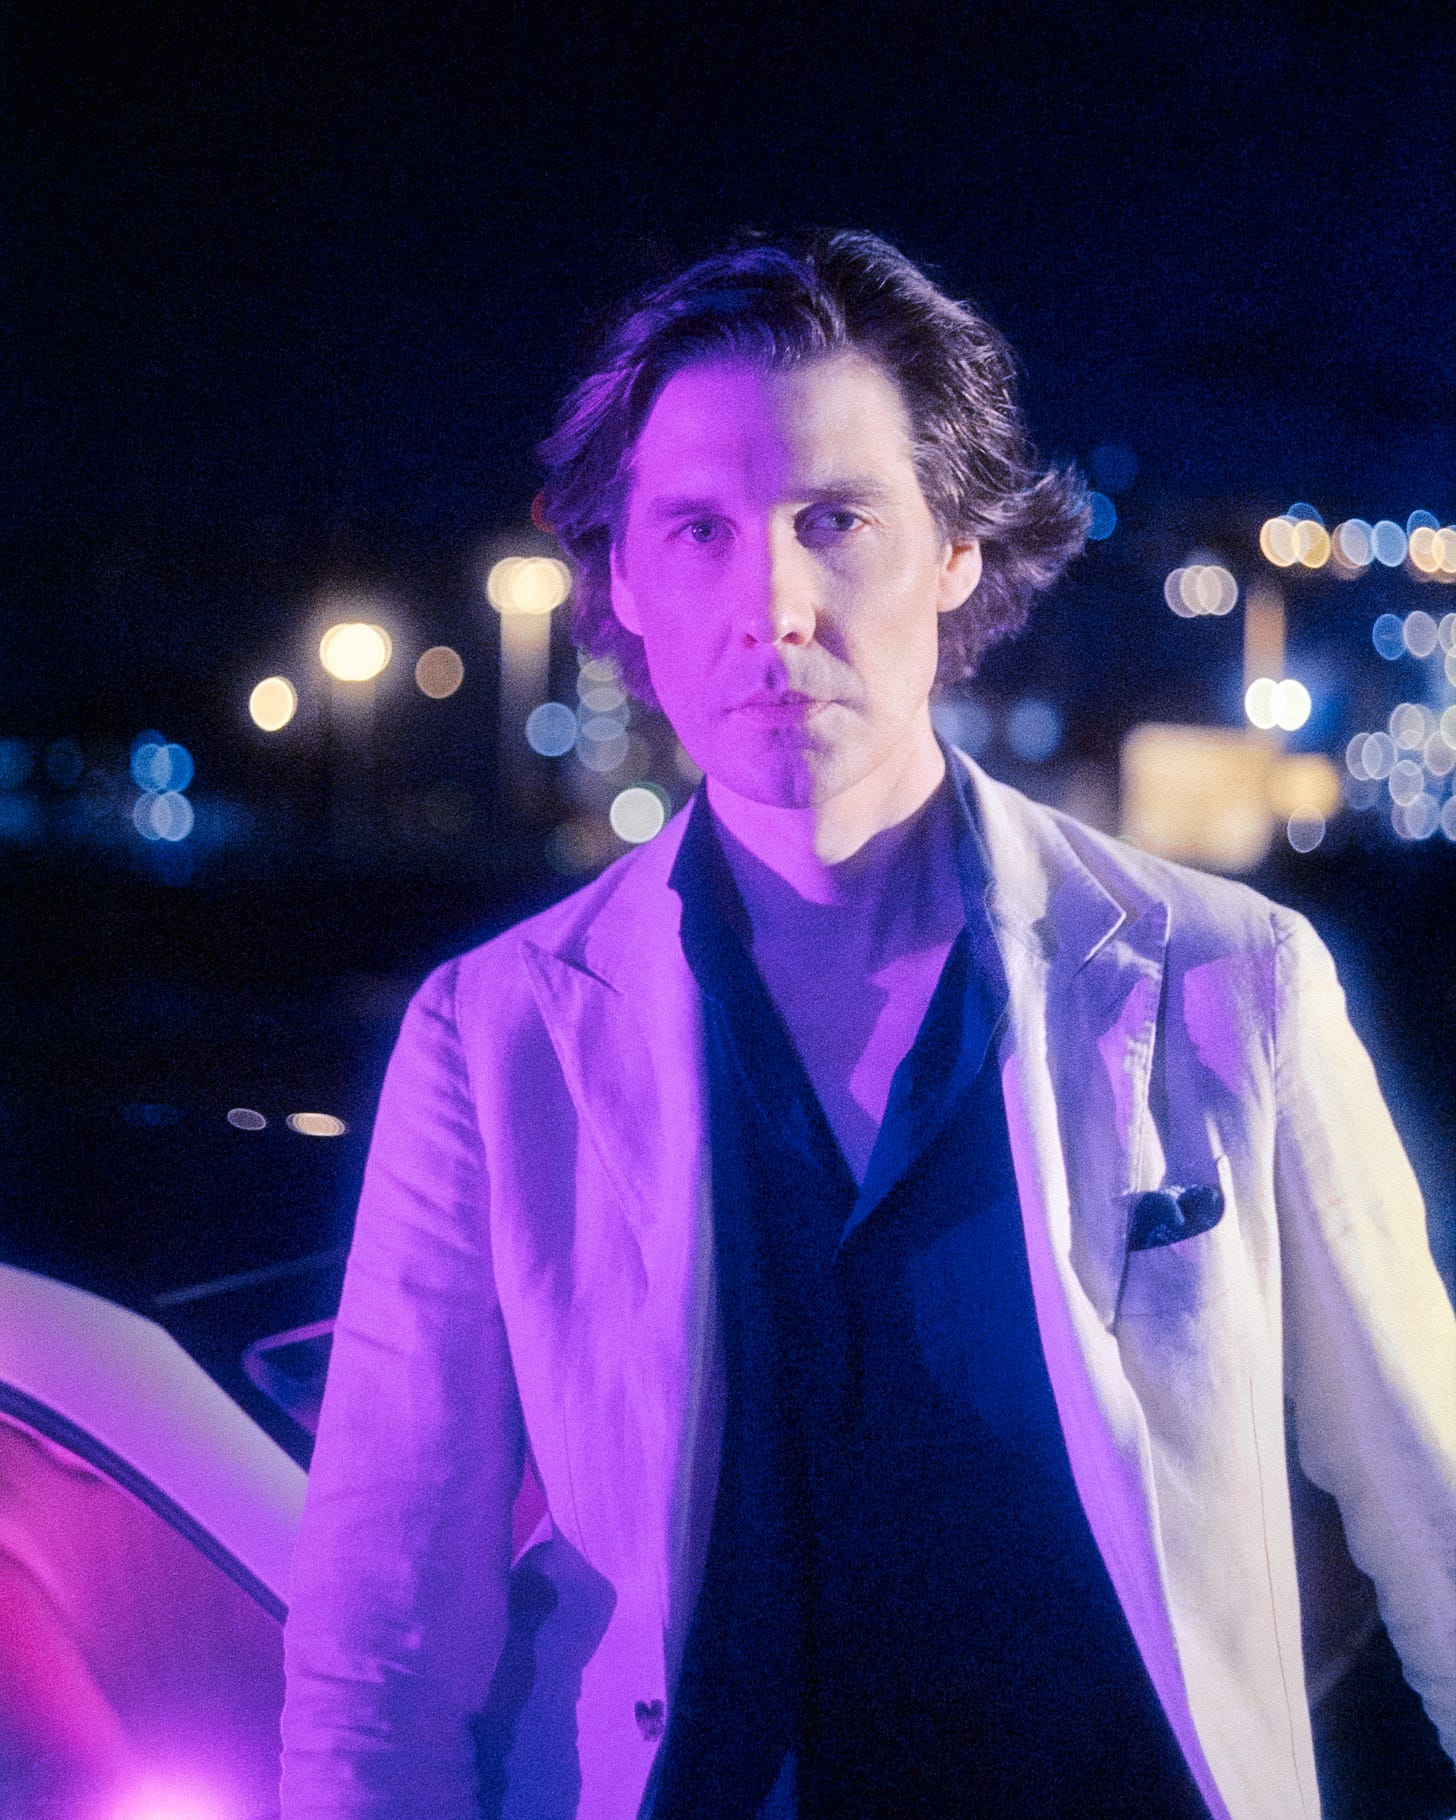
Once the sun started disappearing the Zhiyun lights came out to join the party and again I made sure to get some photos with just the car before we moved deeper into some of the more dramatically lit images.
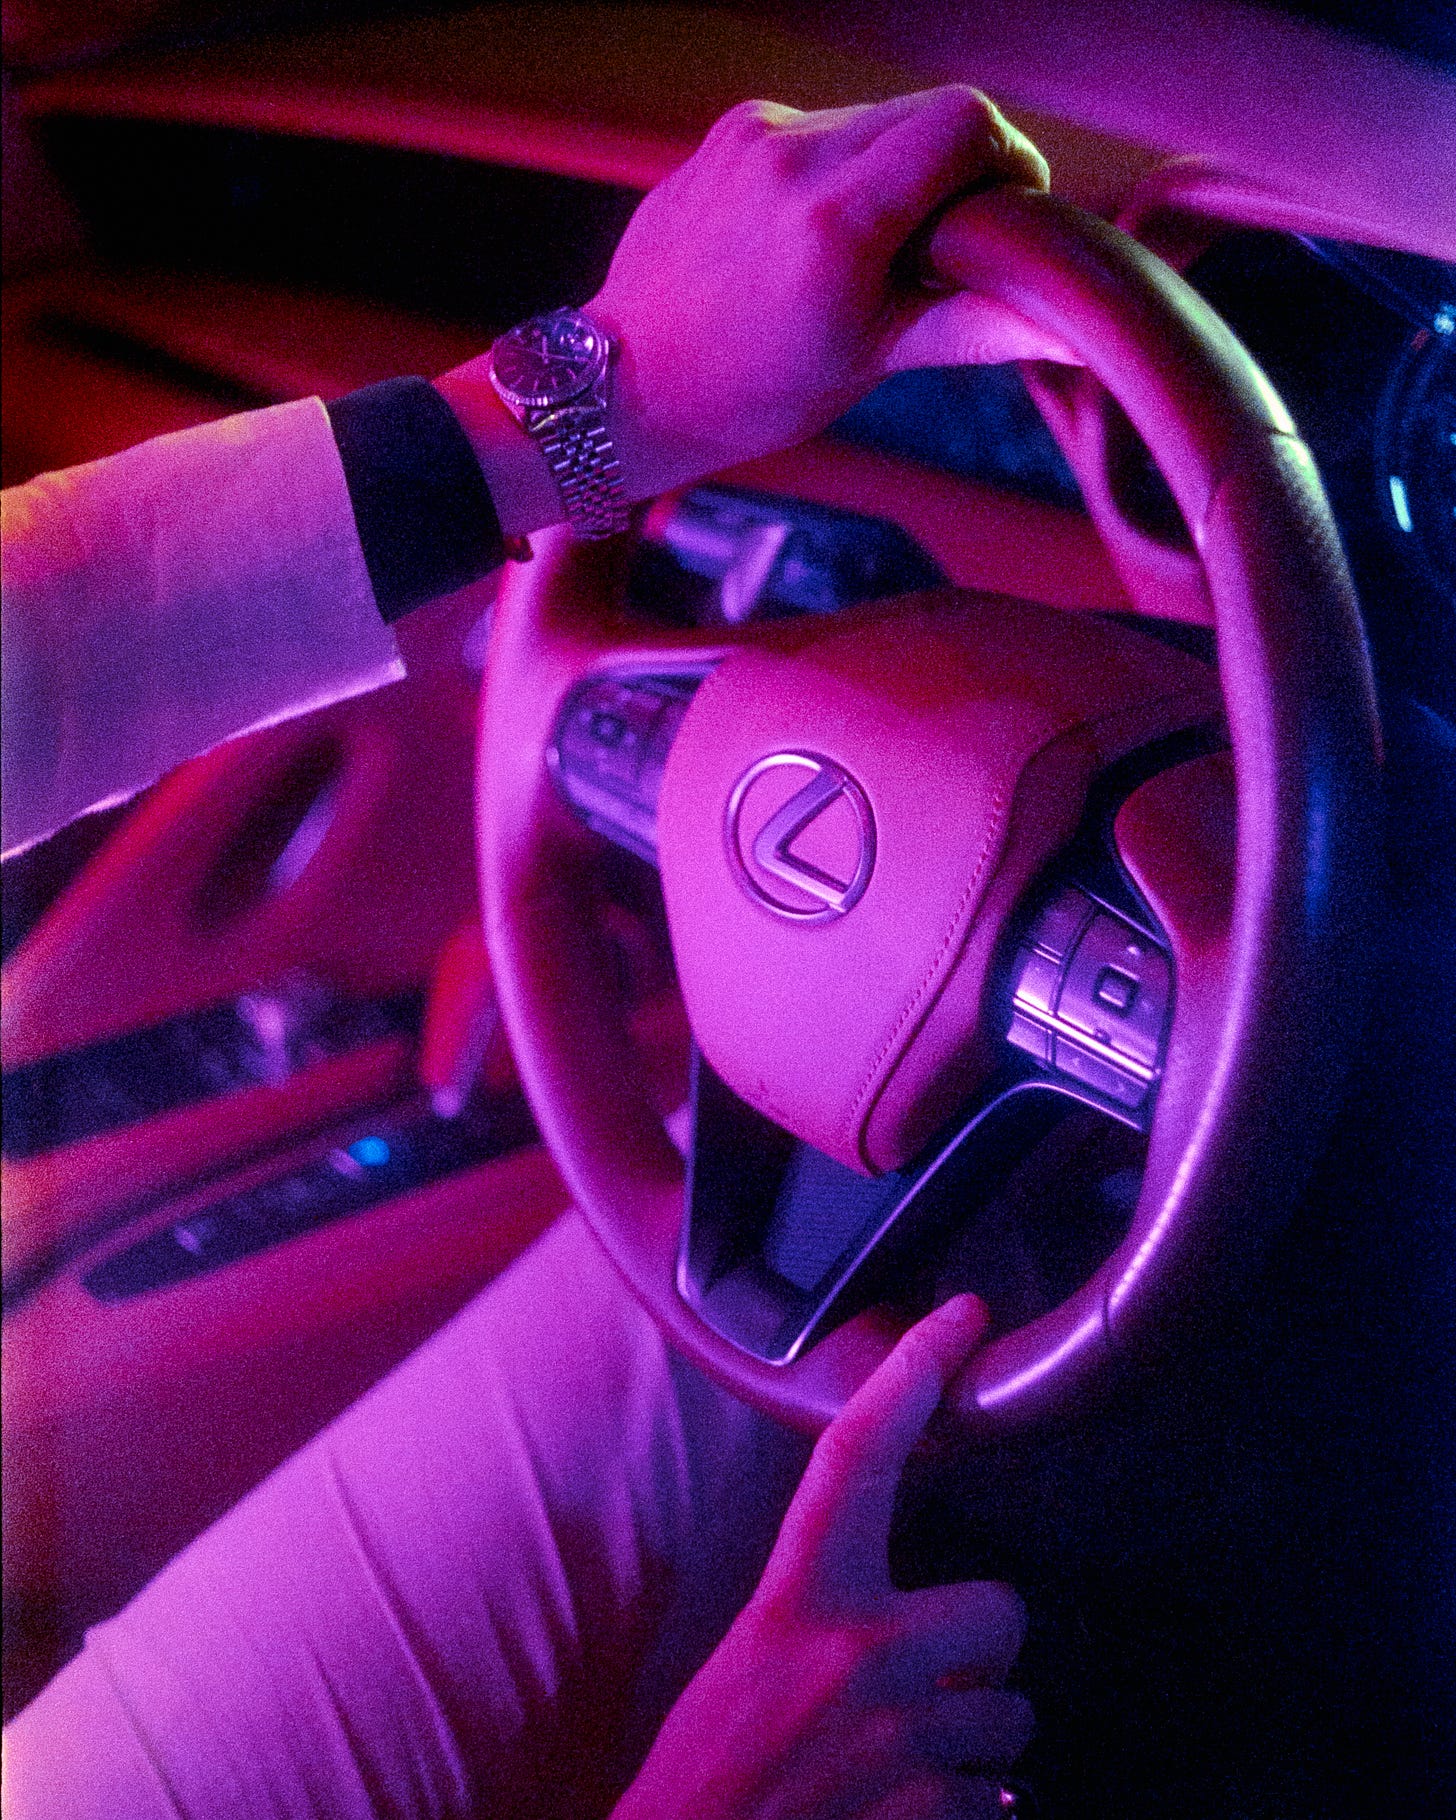
I’m a sucker for getting someone inside their car and in that zone where they’re really interacting with their environment. The M20 RGB light came in handy here, being small and compact but still packing a big punch. We chucked one in the back seat dialed in to match the other lights, while the X60 was maneuvered behind the car to spill extra light in, and the white light positioned in front of the car. This allowed for some really dramatic shadows as well that Clem could play around with, and created some of my absolute favourite shots of the night.
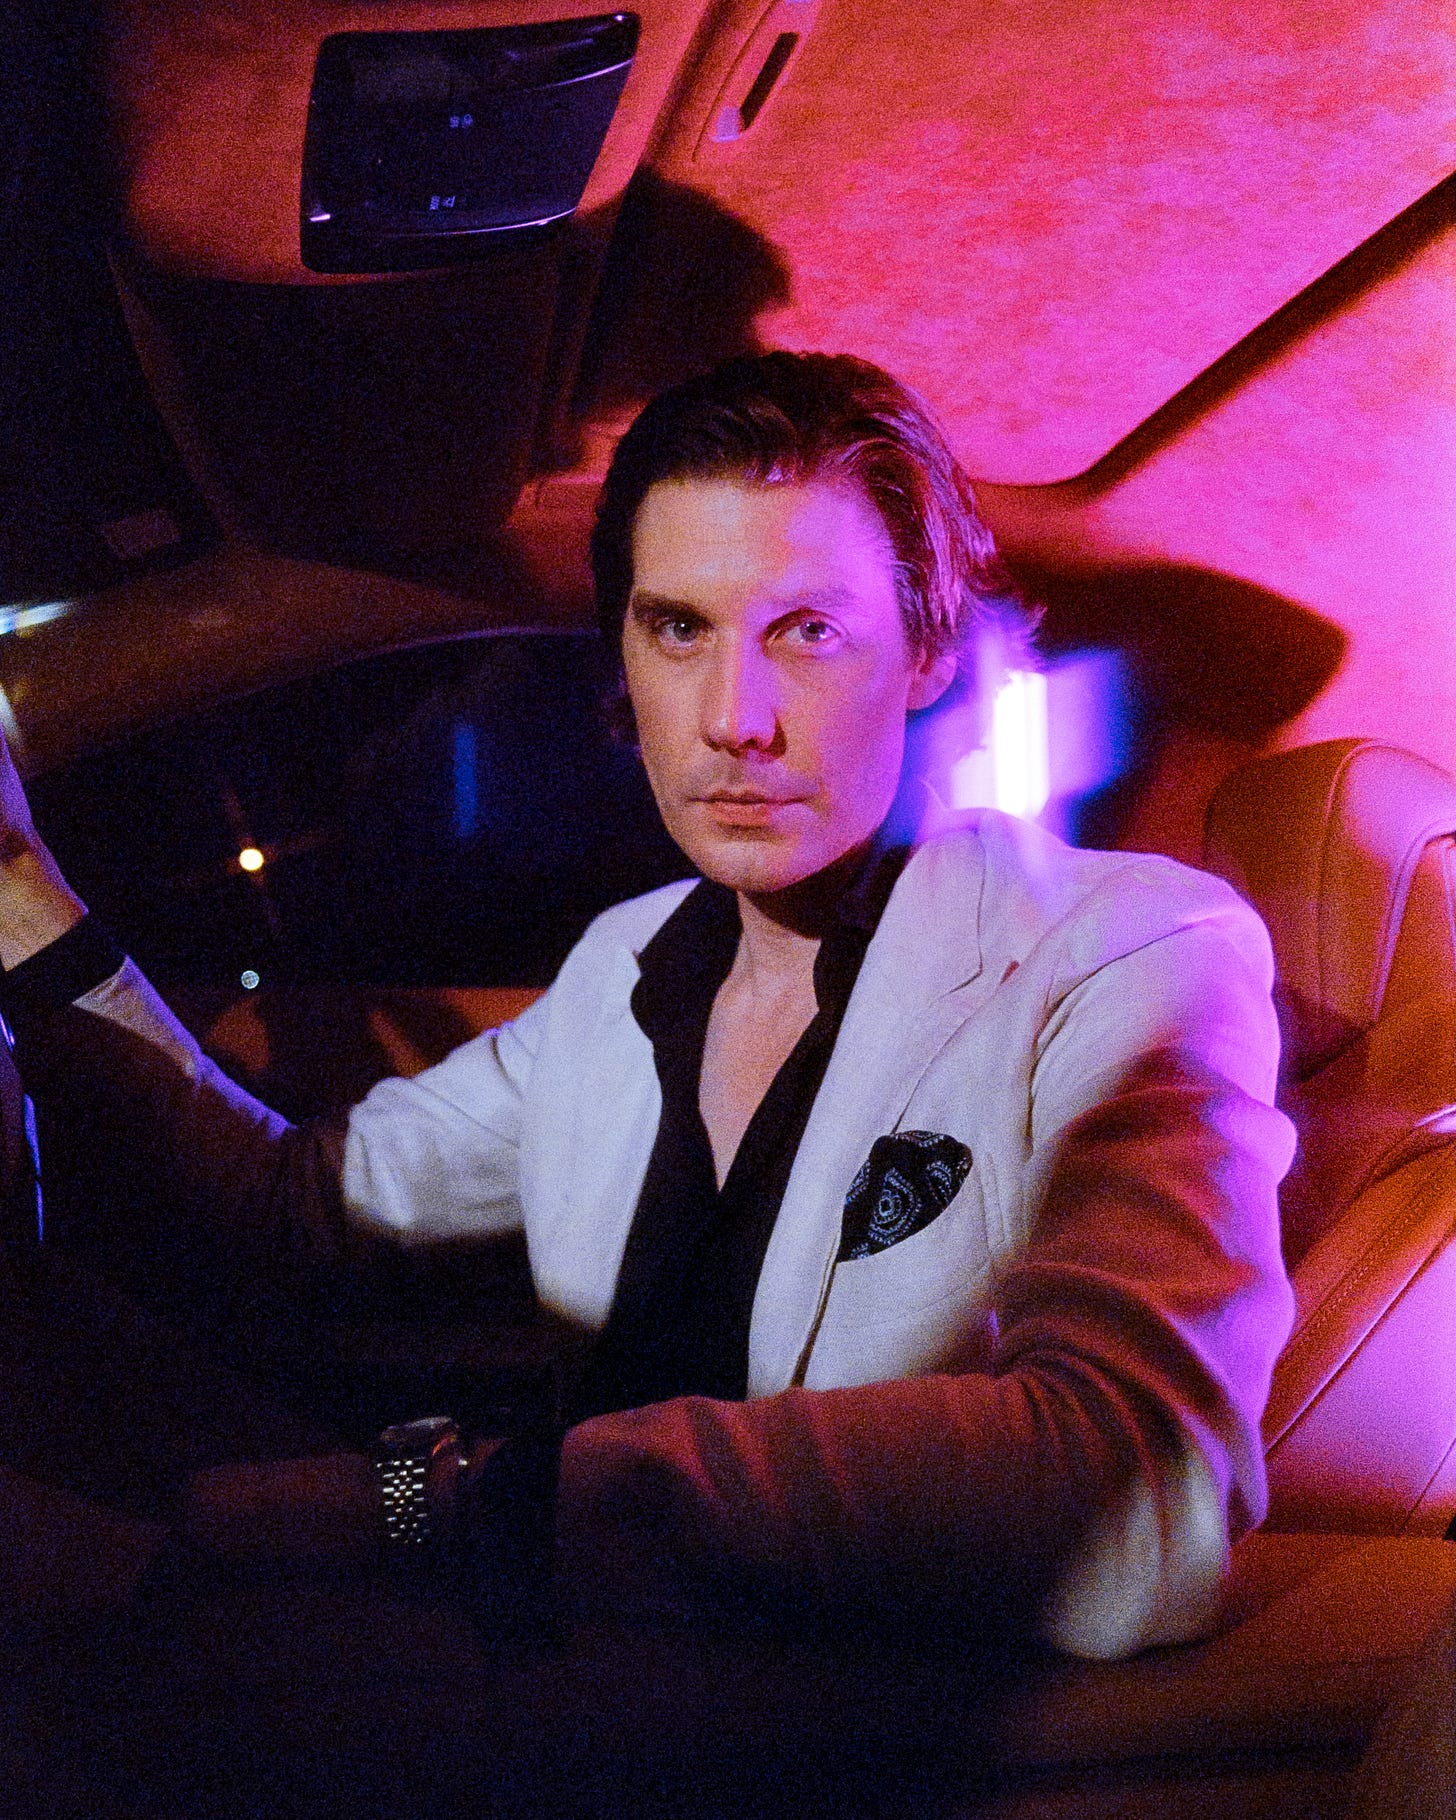
Towards the end the team added some bruising makeup to Clem’s face to kind of play further on that ‘narcotic cop on a bust’ vibe, as if maybe he wrestled with a mark and copped a blow to the face - you know, really getting him into the undercover role. I was thrilled that Clem went along with this and I was so excited to see that it showed up on film as well adding to the moody vibes.
An M20 bi-colour was placed inside a leather duffle bag to throw some extra light from below and to add some interest to the scene - which I thought was a little nod to that moment in Pulp Fiction where they open the suitcase and there’s a glowing golden light - turns out it was just a happy coincidence that the light matched.
I then began capturing some really ‘badass’ kind of moments, instructing him to kind of glare and stare down the camera, but also look unbothered yet still rather dominant.
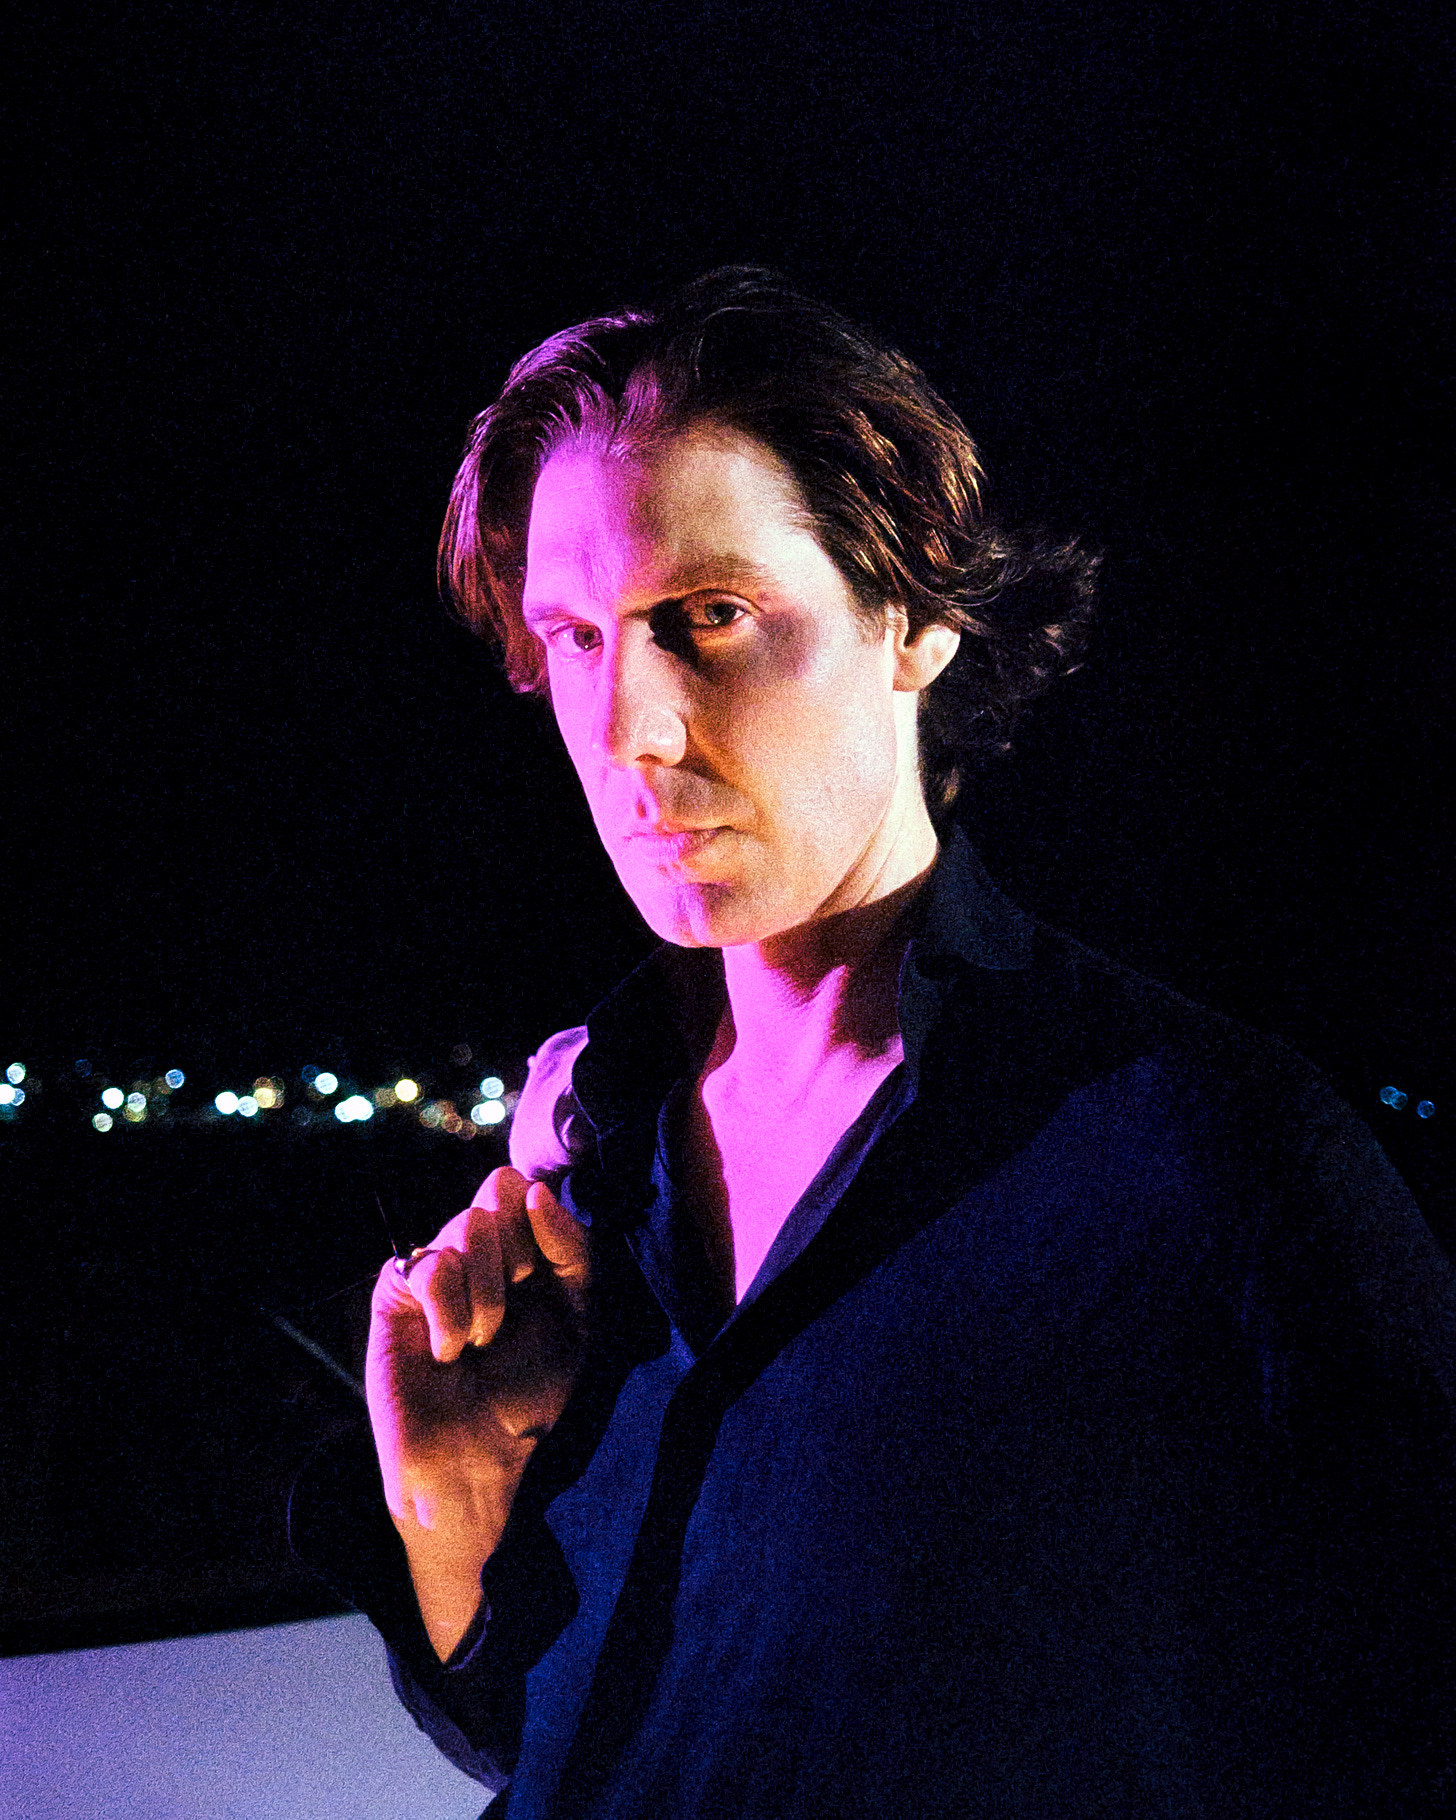
Clem certainly pulled the ‘just punched’ aesthetic off well and I’m super stoked with the end results! What do you think - do you reckon he did a good job?
I also really adore how the Cinefilm shifted the colours more blue toned - as expected with Tungsten film without a colour correction filter - and the black diffusion filter created this otherworldly glow that enhances the portrait shots with the 50mm lens even more.
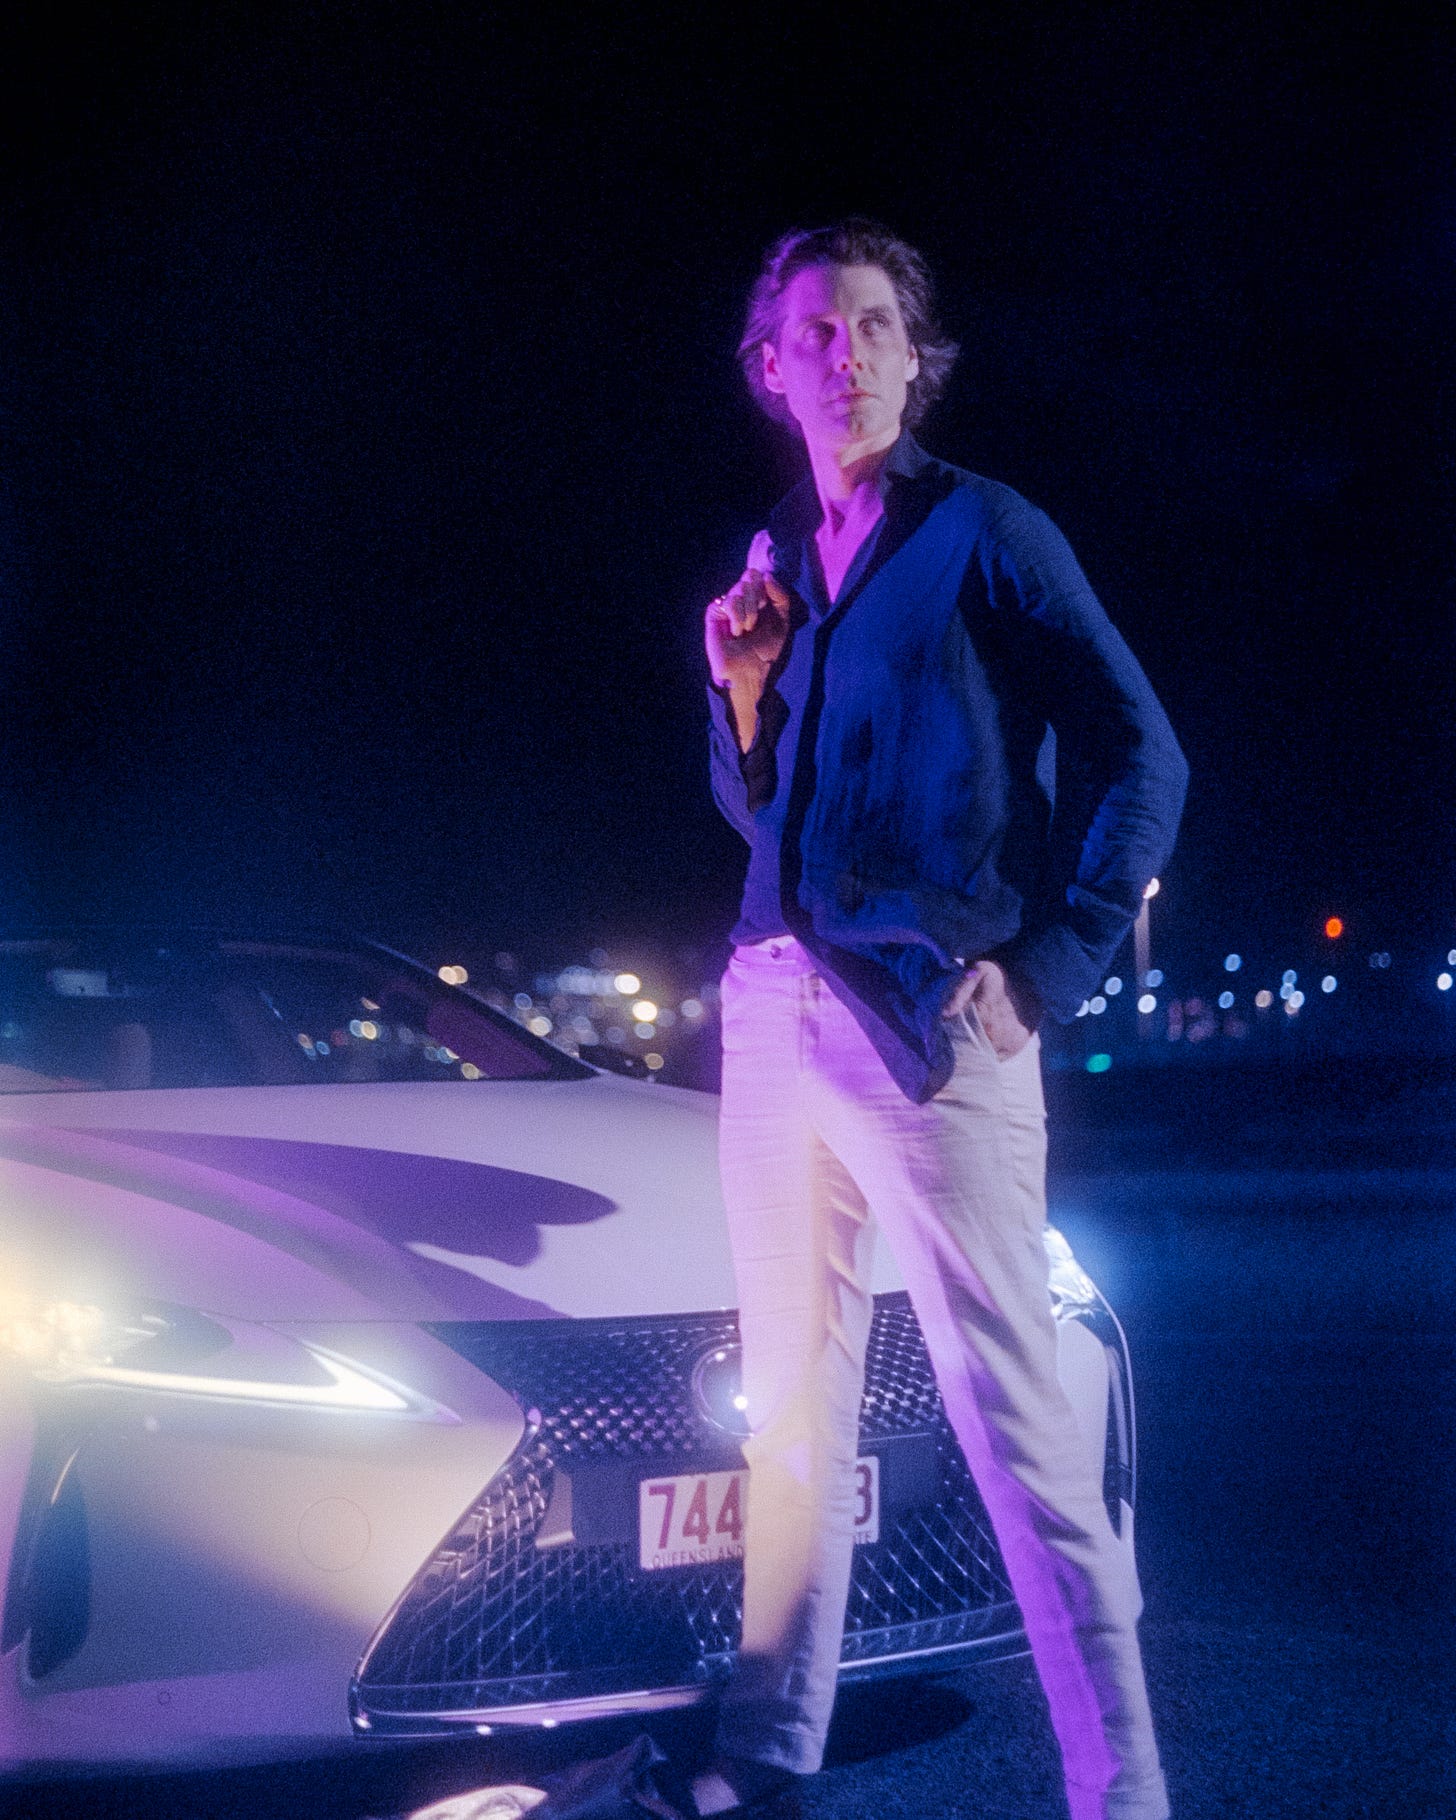
Right at the end the team suggested playing around with a portable smoke machine as well and the timing of everything was just perfect, because after 2 hours of shooting the X60 light had just enough juice in the battery for a few more shots to tie it all up. These shots were lit with the RGB flooding the scene a lot more dramatically, and we chucked the M20 in the boot to make it glow as Clem opened it.
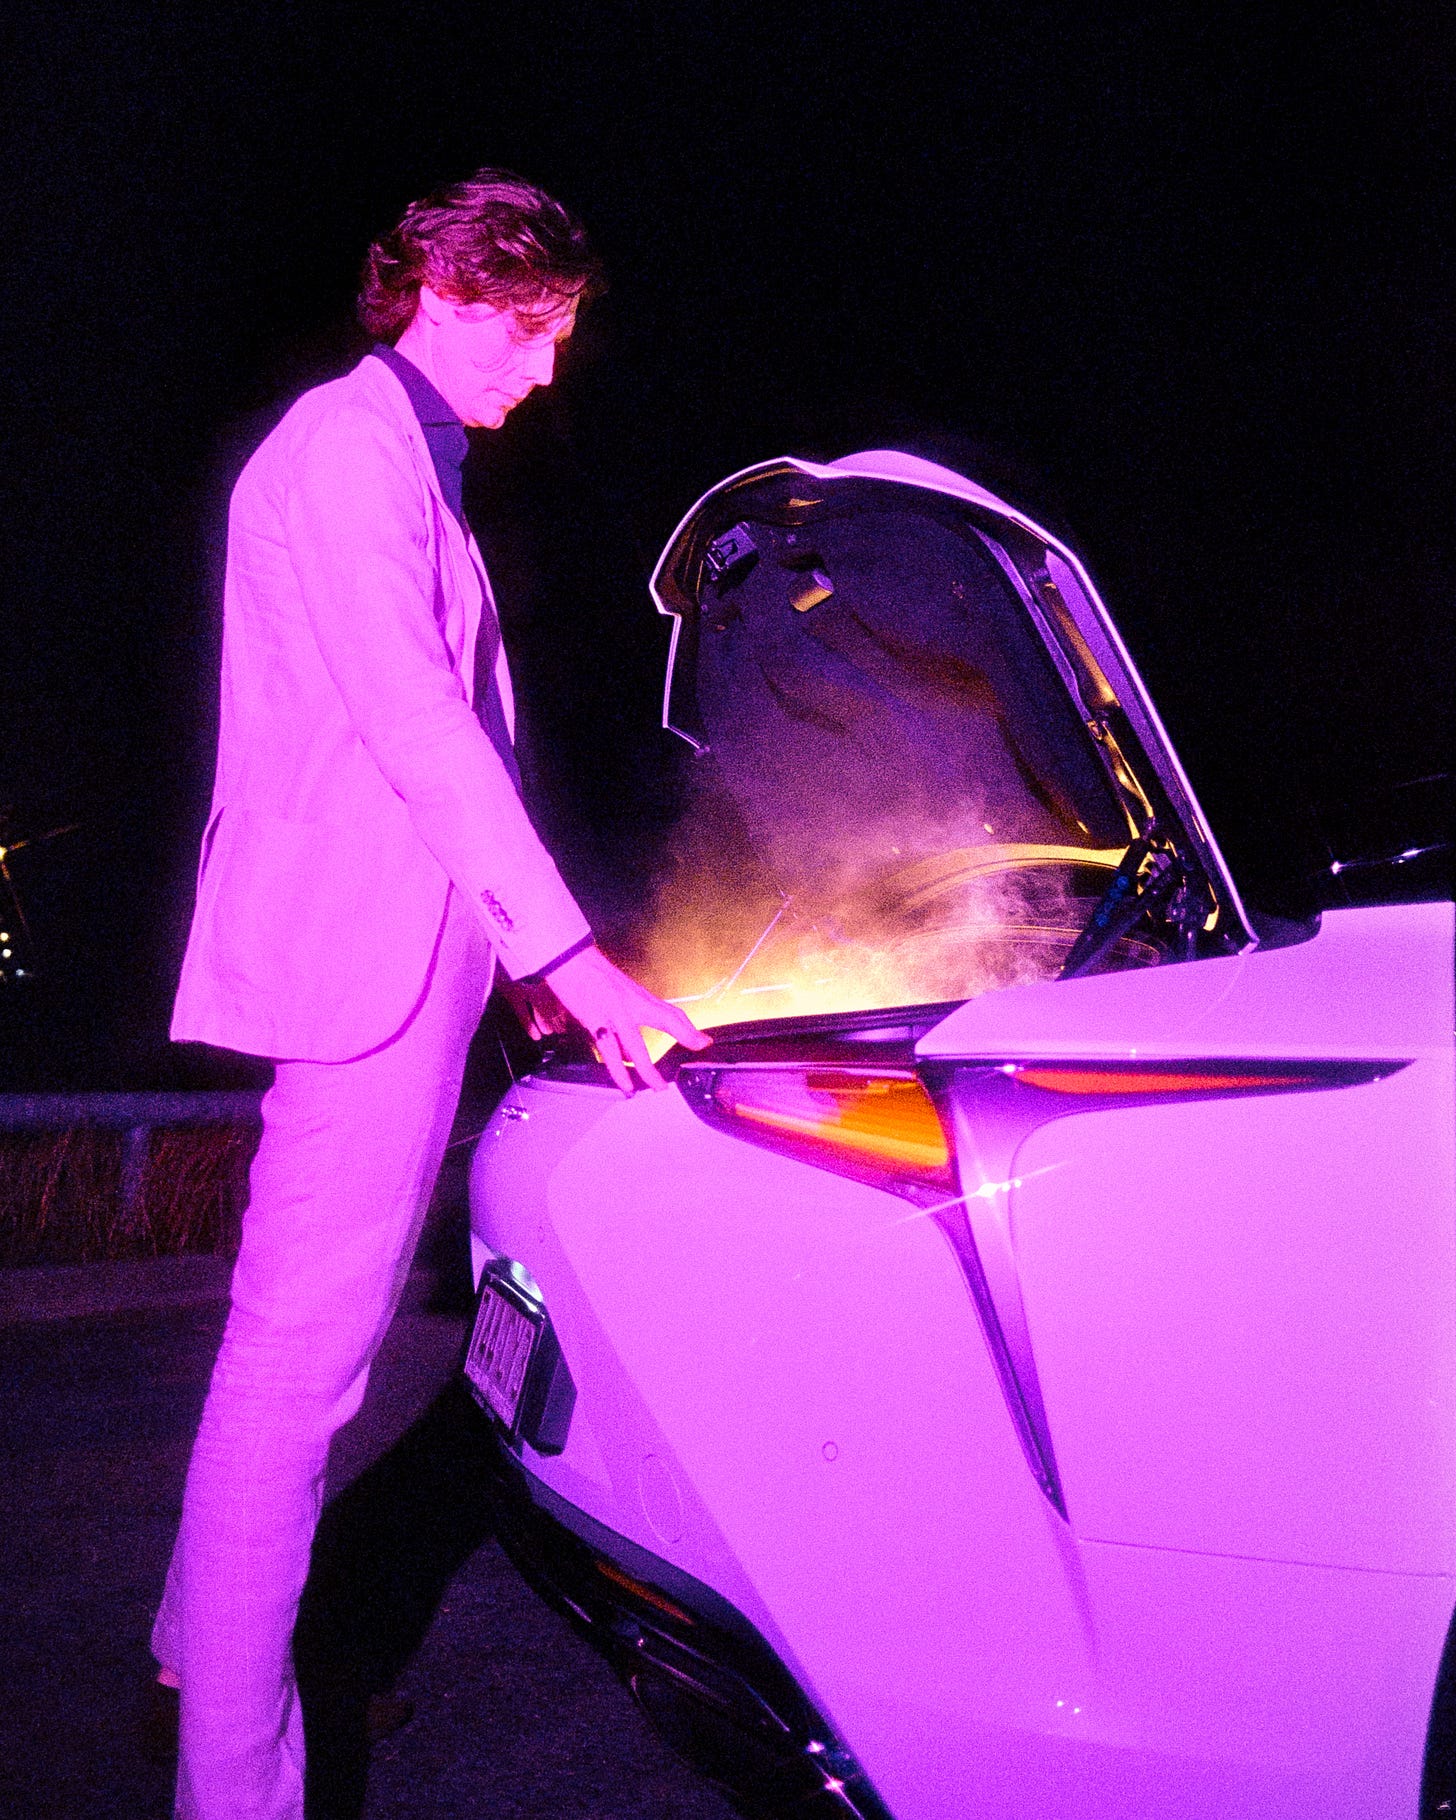
This shot shows you what I mean about needing a white light positioned correctly to ensure that the shot isn’t just one tone - but I still think the shot turned out great, definitely gives off a different look which is always fun to experiment with!
The long drive home.
I have to confess that after the shoot was done and everyone went their separate ways - I was overwhelmed with impostor syndrome. I went from feeling super proud of myself and smiling like a fool - to tearfully stressing about how I was certain I somehow fucked everything up and - ‘oh my god what am I going to do if the film doesn’t turn out? Did I say anything stupid? Fuck! I was mic’d up all night and I was muttering to myself like a dickhead… and shit I swapped shirts, and I forgot the SD card, and maybe I should have moved the light…’ - you get the idea.
I ended up in a bit of a Fibro flare - as expected - and barely slept, and spent a few anxious days freaking out about what I should do if the film somehow wasn’t good. What if Portra 800 screwed me over again? Or what if - god forbid - they turn out fine, but the team absolutely hates the photos? What if Zhiyun regrets choosing me?! Ah the struggles and stresses of being a freelance artist who shoots only 35mm Film - I do it to myself really.
Well, I have some fantastic news - if you’re reading this, that means my dumb ass brain was wrong, the CRK team loved the photos, and Zhiyun doesn’t in fact hate me for doing wild shit with their brand new X60. So all is well and I can rest easy!
The experience overall has been an eye opening one to see how bigger productions are run and how companies interact with individual artists like myself - which everyone has been an absolute sweetheart throughout the entire process. And frankly once I pulled the film out of the tank to see that they turned out perfectly fine and exactly as I envisioned - I was fine and my fears melted away.
I was able to relax and feel proud of the work I’ve done. Once again - I was ‘that Ricoh girl’ who pulled it off and lived up to my reputation.
(And yes, if you know me, I did indeed indulge and you guessed it… I purchased another 90’s Ricoh film camera - direct from Japan - in celebration of achieving a massive goal and landing my dream photography gig - more on that next time! lol)
Post Processing - Film Dev, Scanning, and all that fun stuff… aka, 150 hours of hard work
Here comes all the boring technical mumbo jumbo - so if you want to skip this section by all means, or just flick through to the pretty pictures - I won’t be offended! But for those of you who like to know how it all works… welcome to the nerdy part of shooting 35mm Film.
A few days after the shoot (and some much needed rest) I mixed a fresh batch of C-41 powder with demineralized water which was heated 39-42 degrees as it doesn’t have to be bang on and the powders drop the temperature significantly anyways once you start mixing. I use the Cinestil 1L kits which consist of 1 part for the developer, and an A and B two part mix for the Blix. I’ve made a handy reel on my Instagram for those of you who like to see it visually.
I never use C-41 straight away after this although the instructions say it's perfectly fine to do so. I have always preferred to wait 24 hours for the chemicals to properly dissolve and do their thing before I get started with my batch of film.
I use a sous vide in a big 15L bucket of water, heat it to 40 - 42 degrees - entirely dependent on the weather of course. Hotter days you drop it, colder days and the chemicals have a harder time getting to temperature and need a little more. Internally they should be sitting at around 39 degrees. Now I’m not going to tell you my exact measurements and temperatures and each and every extra step I do to get crystal clear shiny negatives - that's my little trade secret that took hundreds of rolls and countless film dev sessions to achieve - but I do the usual C-41 process in general.
When it comes to Cinefilm - I don’t use remjet removed film like 800T or anything like that. I find that Vision3 500T or 200T is perfectly fine as it is, and with my current Cinefilm setup on the Singlex TLS - I get super glowy results anyways so the remjet layer doesn’t even matter. I use MFS remjet remover which takes just 5 - 10 seconds to get to work.
Pre rinse your film, chuck the remjet remover in, tip it back into the bottle and then rinse your film till it runs clear. I do this a second time, and then you can develop in C-41 like normal. Sure you can ECN-2 process your Cinefilm but the results aren’t that much different and for me it's more cost effective to keep using C-41 chemicals. The post process is a little different - once the film is blixed and rinsed you’ll have to wipe off the leftover remjet. This is inevitable, there's no way around it.
Most people use a soaked cloth in a rinse aid, or they squeeze off the remjet - I personally dunk it into a container and gently rub it off within a rinse aid solution by hand to ensure any and all remjet particles are removed. Yes, you have to toss this afterwards as it’ll turn black - but the rinse aid is just a handful of mls in 1L of water and lasts a lifetime so it's really not that much of a waste.
Here’s a reel of that process and me talking about Cinefilm (and yes, the film I was pulling out of the tank was from this shoot!)
From there - let your film dry for 24-48 hours and then get scanning!
I scan with a DSLR setup that I borrow from Jordan as I don’t have my own full frame camera - maybe that’ll change someday soon though? It’s a Canon 5D Mkii with a 100mm 1:1 macro lens. I use a LED light panel with an industrial strength diffusion sheet, and home made film mask. I scan with borders on just because sometimes I like to export them with that for horizontal shots (and sometimes it’s so I can prove that I did in fact shoot film…)
Once everything is scanned it's then converted with software and then the meticulous editing begins. Each photo can take up to 4 hours - depending on how much dust removal there is along with the editing and adjustments.
Film + RGB - Navigating Conversion Issues
Now, sometimes - depending on the film used such as Portra 800 - weird shit happens with the conversion software. For whatever reason when using RGB lights that entirely flood the scene it can get really bloody confused.
The image converted completely green - which at first glance you may think ‘oh cool my film is fucked’ but in reality it’s fine - NLP just doesn’t know what to do, so you have to tell it.
Adjust your white balance to bring back the magenta side of things, and hey presto it’s already looking good! From there you mess with all the sliders in the mids, highs, and shadows, before accepting the changes and moving onto your regular editing within the converted raw negative - remembering that everything is the opposite if you haven’t exported it as a TIFF file to work on.
Eventually you’ll get something that looks the way it should… and then you can continue on to crop, dust remove, and do any final tweaks before doing it all over again with a handful more photos - yay!
I’m not going to walk you through exactly what I did - again, giving away years of hard work and some little secrets - but if you attend a Film Workshop I hold, or hire me for a Mentorship - maybe I’ll show you a few things ;)
‘Miami Vice’ - Clem’s Reveal
The photos took around 150 hours of work to create and produce, and I’m so incredibly proud of the end results. I have some favourites that I can’t stop obsessing over and I was anxious yet excited to see what the CRK Team, and especially Clem thought of the final images.
I was lucky enough to get invited back to their office afterwards and the verdict was in - Clem loved them which was such a relief to hear!
It was so lovely to get positive feedback and I will admit it always feels really good to hear someone say that I nailed the aesthetic they had hoped for.
I hope you’ve all loved seeing them too - more of the photos will be up on my Instagram, along with some fun behind the scenes footage and some more professional videos where I got to talk a little bit about the process on the night of the photoshoot.
I had such a blast on this project, and being able to play with such high powered portable lights like the X60 to bring this vision to life was a total dream. I’m excited to see what the future holds for Zhiyun as they continue to push boundaries with lighting - and if I’m lucky I’ll get to jump on board some more CRK x Zhiyun projects again soon!
Final Thoughts
If you’re a 35mm Film Photographer, it's well worth investing in a set of good lights - I’m not just saying this because I worked with Zhiyun either - I’ve learned from experience how important it is to have powerful portable lights for night time projects if you expect vibrant colours on film. And it’s especially important to find ones that are easy to use and accessible enough for someone like myself with limited physical strength due to disabilities - I’m sure most people don’t need to think of this aspect but unfortunately I do.
The portability of the X60 RGB and even the little M20 RGB means that if I didn’t have an assistant on a shoot I could easily set lights up and move them around myself which is a game changer and reduces the risk of injury. So that’s a total win for me!
P.S -
I’m holding a 35mm Film Workshop in Late April in the exact same location of this amazing ‘Miami Vice’ photoshoot - and Zhiyun has kindly given me some lights to play with on the night including the X60 RGB - how exciting!
So if you’d love to learn how to shoot 35mm Film like what I’ve shown while using some insanely bright lights - tickets will be limited to 5 people and released at the end of March.
All proceeds go directly to my cost of materials and the time spent teaching you how to master your film camera along with all the goodies involved.
You can register your interest for free HERE and be emailed when the tickets go live to purchase!
See you in the next Newsletter!
Thank you for sticking through to the end of this Newsletter, I appreciate it and I’m so happy and thankful for this amazing opportunity to work with C.R. Kennedy Imaging and Zhiyun.
If you know me, you know how hard I’ve worked for years behind the scenes to get to where I am today - and if nothing else comes of it - this was an opportunity of a lifetime and an experience I’ll forever be beaming over!
Coming soon:
A paid educational newsletter featuring some kickass portraits I shot at Port Kembla and outside of 7/11 with my wonderful friend Mel - I used Ultramax pushed to 800 + some yummy 200T and 250D - In this newsletter I’ll deep dive into all the technical aspects everyone wants to know about shooting film at night with ambient + artificial lighting!
Through My Viewfinder #4 + An overview of my new Ricoh film SLR
AMMO x Stash Launch photos - First Look sneak peek + Full Gallery (paid)
Fortune x Hiraya - First Look sneak peek + Full Gallery (paid)
A closer look at my Self Portrait created with Zhiyun X60 & M20 lights using my usual KR-10 Super setup + my official Film Photography Workshop announcement + all the details for April - yay!
It’s super important to me that I keep providing an inclusive and accessible space - even as I try to pivot towards being compensated for my hard work and unique skill set as a 35mm Film Specialist.
If you love what I do, you can upgrade to be a paid subscriber, or if you’d just love to chuck a few $$ my way to help support my ongoing art (and help me restock on film and chemicals!) - you can donate directly HERE.
And as always, there’s no obligation to do so if you’re just hanging out for the free goodies and First Looks I’m still glad to have you here either way!
So in saying that - if you’re in the Blue Mountains, South Coast, or wider Sydney area and want to get in contact with me, whether to book a shoot, book a mentorship, or get more info for my creative workshops and events - you can catch me on my Instagram or email me directly at josieonfilm@gmail.com
Until the next roll, take care!
xoxo, Josie


